CHAPTER 3
CHAPTER 3: Basics of Node Modules and Npm
Some Node functionality is present globally, which means you don’t have to do anything to include it. However, most Node functionality is incorporated us-ing the module system.
How Node Finds and Loads a Module
When you want to include access to a Node module, whether a core module or one you’ve installed outside of the Node application, use the require state-ment:
var http = require('http');
You can also access one specific property of an exported object. For in-stance, people frequently access only the parse() function when using the URL module:
var name = require('url').parse(req.url, true).query.name; Or you can access a specific module object to use throughout your applica-
tion:
var spawn = require('child_process').spawn;
When your application requests a module, several things happen. First, Node checks to see if the module has been cached . Rather than re-load the module each time, Node caches the module the first time it’s accessed. This eliminates the drag associated with the system having to perform a system lookup for the file.
O N E - T O - O N E C O R R E S P O N D E N C E : F I L E T O M O D U L E
Node only supports one module per file.
If the module isn’t cached, Node then checks to see if it’s a native module. Native modules are those that are pre-compiled binaries, such as the C++ add-ons discussed in Chapter 1. If the module is a native module, a function is used specifically for native modules that returns the exported functionality.
If the module isn’t cached or isn’t a native module, a new Module object is created for it, and the module’s exports property is returned. Later in the sec-tion on Creating Your Own Module, we’ll cover the module exports in more de-tail, but this basically returns public-facing functionality to the application.
The module is also cached. If, for some reason, you want to delete the mod-ule from cache, you can:
An Overview of the Node Module System
delete require('./circle.js');
The module is reloaded then the next time the application requires it. As part of loading the module, Node has to resolve the location for it. It goes
through a hierarchy of checks when looking for the module file.
First, core modules have priority. You can name your module http if you wish, but when you go to load http , Node is going to grab the version from core. The only way you can use http as module name is if you also provide a path, to diferentiate it from the core module:
var http = require ('/home/mylogin/public/modules/http.js'); As this example demonstrates, if you provide an absolute or relative path
with the file name, Node uses the path. The following looks for the module in the local subdirectory:
var someModule = require('./somemodule.js');
I give the module extension, but it’s not necessary. When you give a module name without the extension, Node first of all looks for the module in the current subdirectory with a .js extension. If found, the module is loaded. If not found, Node looks for a file with a .json extension. If a file with the proper name is found with a .json extension, the module contents are loaded as JSON. Finally, Node looks for a module with a .node extension. It assumes this module is a pre-compiled Node add-on, and handles it accordingly.
JSON files don’t require an explicit exports statement. They only need to be proper JSON.
You can also use a more complex relative path:
var someModule = require('./somedir/someotherdir/somemodule.js'); Or you can use an absolute path, if you’re sure the application will never be
moved. This path is file system specific, not a URL:
var someModule = require('/home/myname/public/modules/somemodule.js'); If the module is installed using npm, you don’t need to provide a path. You
just list the module name:
var async = require('async');
CHAPTER 3: Basics of Node Modules and Npm
Node looks for the module in a node_modules subdirectory, using a search hierarchy that includes searches in:
- a node_modules subdirectory local to the application (/home/myname/ projects/node_modules)
- a node_modules subdirectory in the parent subdirectory to the current application (/home/myname/node_modules)
- continuing up the parent subdirectories, looking for a node_modules, un-til top-level (root) is reached (/node_modules)
- Finally, looking for the module among those installed globally (discussed next)
The reason Node uses this hierarchy is so that localized versions of a module are accessed before more global versions. So if you’re testing a new version of a module, and you’ve installed in locally, relative to your application:
npm install somemodule
It will be loaded first, rather than the globally installed module:
npm install -g somemodule
You can see which module is loaded using the require.resolve() func-tion:
console.log(require.resolve('async'));
The resolved location of the module is returned.
If you provide a folder name as a module, Node looks for a package.json file that contains a main property flagging the module file to load:
{ "name" : "somemodule",
"main" : "./lib/somemodule.js" }
If Node can’t find a package.json file, it looks for an index.js or index.node file to load.
If all these searches fail, you’ll get an error.
C A C H I N G I S F I L E N A M E S P E C I F I C
Be aware that caching is based on the file name and path used to load the module. If you’ve cached a global version of a module, and then load a lo-cal version, the local version also gets cached.
An Overview of the Node Module System
Since the Module object is JavaScript-based, we can take peek into the Node source code, and get a closer look at what happens behind the scenes with all of this.
Each module wrapped with the Module object has a require function, and the global require we use invokes the Module-specific function. The Mod-ule.require() function, in turn, calls another internal function, Mod-ule._load() , which performs all of the functionality I just covered. The only exception is if the request for REPL, covered in the next chapter, which has its own unique handling.
If the module is the main module, the one that’s actually invoked at the command line (that I refer to as application), it’s actually assigned to a proper-ty, require.main of the global require object. Type the following into a file named “test.js” and run it with Node:
console.log(require);
You’ll see the main object, which is the Module object wrapping the applica-tion code, and you can see the file name is the file name and path for the appli-cation. You can also see the paths Node uses to look for modules, as well as the application cache, containing only the application in this instance.
L O C A T I N G T H E N O D E S O U R C E
You can look at all of Node’s functionality if you download the source. You don’t have to use the source to build Node on your system, just use it as a learning exercise. The JavaScript functionality is located in the /lib subdirectory, and the actual C++ code for Node can be found in /src.
This leads me to re-visit the concept of Node’s global object once more. In Chapter 2, I cover the Node global object, and describe how it difers from the browser global object. I noted that unlike the browser, top-level variables are constrained to their immediate context, which means that variables declared in a module are not going to conflict with variables declared in the application or any other module included in the application. That’s because Node wraps all scripts in the following:
function (module, exports, __filename, ...) {}
In other words, Node wraps the modules (main or otherwise) in anonymous functions, only exposing that, which the module developer wants to expose. And since these module properties are prefaced by the module name when you use the module, they can’t conflict with your locally declared variables.
Speaking of context, I’ll get more into that in the next section.
CHAPTER 3: Basics of Node Modules and Npm
Sandboxing and the VM Module
One of the first things you learn as a JavaScript developer is avoid eval() at all costs. The reason why is that eval() executes your JavaScript in the same con-text as the rest of your application. You’re taking an unknown or arbitrary block of JavaScript and executing it with the same level of trust as the code you’ve carefully written. It’s the same as taking text from an input field and tacking it into a SQL request, without ensuring something nasty hasn’t been inserted.
If, for some reason, you do need to execute an arbitrary chunk of JavaScript in your Node application, you can do so using the VM module to sandbox the script. As the Node developers note, however, it isn’t a completely trustworthy approach. The only safe way to execute an arbitrary chunk of JavaScript is in a separate process. However, if you’re comfortable with the source of the Java-Script, but are interested in avoiding unintended and accidental consequences, then you can isolate that script from your local environment with VM.
Scripts can be pre-compiled first, using the vm.Script object, or passed in as part of a function called directly on vm . There are also three types of func-tions. The first, either script.runInNewContext() or vm.runInNewCon-text() , runs the script in the new context, and the script doesn’t have access to either local variables or the global object. Instead, a new contextified sand-box is passed in the function. The following code demonstrates this content. The sandbox contains two global values, the same names as two Node global objects, but redefined:
var vm = require('vm');
var sandbox = {
process: 'this baby',
require: 'that'
};
vm.runInNewContext('console.log(process);console.log(require)',sandbox); An error results, because the console object isn’t part of the runtime con-
text for the script. You can make it so:
var vm = require('vm');
var sandbox = {
process: 'this baby',
require: 'that',
console: console
};
An Overview of the Node Module System
vm.runInNewContext('console.log(process);console.log(require)',sandbox); But that defeats the purpose of creating an entirely new context for the
script. If you want the script to have access to the global console (or other) ob-ject, use runInThisContext() instead. In the following code, I’m using the Script object to demonstrate how the context includes the global object, but not the local objects:
var vm = require('vm');
global.count1 = 100;
var count2 = 100;
var txt = 'if (count1 === undefined) var count1 = 0; count1++;' + 'if (count2 === undefined) var count2 = 0; count2++;' +
'console.log(count1); console.log(count2);';
var script = new vm.Script(txt);
script.runInThisContext({filename: 'count.vm'});
console.log(count1);
console.log(count2);
The result of running this application is:
101
1
101
100
The variable count1 is declared on the global object, and is available in the context in which the script is run. The variable count2 is a local variable, and must be defined within the context. Changes to the local variable in the sand-boxed script do not impact the local variable of the same name in the contain-ing application.
If I didn’t declare count2 in the script that’s running in a separate context, I would get an error. The error displays because one of the sandbox content func-tion’s options is displayErrors , set to true by default. The other options for runInThisContext() are filename , shown in the example, and timeout , which is the number of milliseconds the script is allowed to run before being terminated (and throwing an error). The filename option is used to specify a file name that shows up in stack traces when the script is run. If you want to specify a file name for the Script object, though, you need to pass it in when you create the Script object, not in the context function call:
CHAPTER 3: Basics of Node Modules and Npm
var vm = require('vm');
global.count1 = 100;
var count2 = 100;
var txt = 'count1++;' +
'count2++;' +
'console.log(count1); console.log(count2);';
var script = new vm.Script(txt, {filename: 'count.vm'}); try {
script.runInThisContext();
} catch(err) {
console.log(err.stack);
}
Other than the filename diference, Script supports the other two global options in the context function calls: displayErrors and timeout .
Running the code results in a displayed error because the sandboxed script does not have access to the local variable ( count2 ) in the application, though it does have access to the global count1 . And when the error is printed out, the stack trace is printed, which then displays the file name passed as an option.
Instead of writing the code out directly in the application, we can load it from a file. Given the following script to run:
if (count1 === undefined) var count1 = 0; count1++;
if (count2 === undefined) var count2 = 0; count2++;
console.log(count1); console.log(count2);
We can pre-compile it and run it in a sandbox with the following: var vm = require('vm');
var fs = require('fs');
global.count1 = 100;
var count2 = 100;
var script = new vm.Script(fs.readFileSync('script.js','utf8')); script.runInThisContext({filename: 'count.vm'});
console.log(count1);
console.log(count2);
What’s to stop us from using the File System module directly in the script? It’s assigned to a local variable, and not accessible. Why can’t we just import it
An Overview of the Node Module System
into the script? Because require is not available. None of the global objects or functions, such as require , are accessible in the script.
The last sandbox function is runInContext() . It also takes a sandbox, but the sandbox must be contextualized (context explicitly created) before the func-tion call. We’ll call it on the VM object, directly, in the following code. Note that we’re adding a new variable to the contextualized sandbox in the code, which then shows in the application:
var vm = require('vm');
var util = require('util');
var sandbox = {
count1 : 1
};
vm.createContext(sandbox);
if (vm.isContext(sandbox)) console.log('contextualized'); vm.runInContext('count1++; counter=true;',sandbox,
{filename: 'context.vm'});
console.log(util.inspect(sandbox));
The result from this application is:
contextualized
{ count1: 2, counter: true }
The runInContext() function supports the three options that runInThis-Context() and runInNewContext() supports. Again, the diference between running the functions in Script and directly in VM is the Script object pre-compiles the code, and you pass the filename in when you create the object, rather than as one of the options to the function calls.
R U N N I N G S C R I P T I N A S E P A R A T E P R O C E S S
If you’re interested in further isolating the script by running it in a sepa-rate process, check out the third-party sandboxing modules that provide this additional protection. The next section describes how to search for these.
CHAPTER 3: Basics of Node Modules and Npm
An In-Depth Exploration of NPM
Much of the rich functionality associated with Node comes in via third-party modules. There are router modules, modules for working with relational or document database systems, template modules, testing modules, and even modules for payment gateways.
Though not a requirement, developers are encouraged to upload their mod-ules to GitHub.
To use a module, you can download the source from GitHub (or wherever the source is located), and then install it manually into your application envi-ronment. Most modules provide basic installation instructions, or, at a mini-mum, you can deduce the installation requirements by examining the files and directories included in the module. However, there is a far easier way to install a Node module: using npm
The npm site is at http://npmjs.org/ . Documentation is available at the npm Documentation site .
Node comes with npm installed, but it doesn’t always come with the most recent version of npm. If you want to use a diferent version of npm, use the following to update the version you have (using sudo if appropriate to your en-vironment):
npm install npm -g
Be careful with updating npm, though. If you’re using a diferent version of your teammates, you can have very unexpected results.
To get a detailed overview of npm commands, use the following: $ npm help npm
Modules can be installed globally or locally. The local installation is the best approach if you’re working on an isolated project and everyone sharing the same system doesn’t need access to the module. A local installation, which is the default, installs the module in the current location in the *node_modules di-*rectory.
$ npm install modulename
As an example, to install Request, use the following:
$ npm install request
An In-Depth Exploration of NPM
npm not only installs Request, it also discovers its module dependencies and installs them, too. And the more sophisticated the module, the more de-pendencies are installed. Figure 3-1 shows a partial listing from installing Re-quest in my Windows machine.
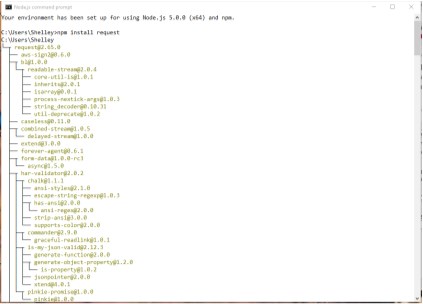
FIGURE 3-1
A partial listing of
loaded dependencies
for Request
figure3-1.png
Once the module is installed, you can find the module in your local directo-ry’s node_modules directory. Any dependencies are also installed in that mod-ule’s node_modules directory. A glance shows you get a lot of bang for your buck when you install a module like Request.
If you want to install the package globally, use the -g or --global option: $ npm install request -g
If you’re working in Linux, don’t forget to use sudo if you want to install a module globally:
$ sudo npm install request -g
Some modules, including command-line applications, may require global in-stallation. These examples install packages that are registered at the npm site.
CHAPTER 3: Basics of Node Modules and Npm
You can also install a module that’s in a folder on the filesystem, or a tarball that’s either local or fetched via a URL:
npm install http:// somecompany .com/ somemodule .tgz
If the package has versions, you can install a specific version:
npm install modulename @0.1
You can even install an old friend, jQuery:
npm install jquery
If you’re no longer using a module, you can uninstall it:
npm uninstall modulename
The following command tells npm to check for new modules, and perform an update if any are found:
npm update
Or you can update a single module:
npm update modulename
To update npm, itself, use:
npm install npm -g
If you just want to check to see if any packages are outdated, use the follow-ing:
npm outdated
Again, you can run this command against a single module.
List installed packages and dependencies with list , ls , la , or ll : npm ls
The la and ll options provide extended descriptions. For instance, one of the dependencies for Request is tunnel-agent@0.4.1 (version 0.4.1 of tunnel-agent). So what the heck is tunnel-agent? Running npm la request at the command line lists out the dependencies, including tunnel-agent, but with ad-ditional detail:
An In-Depth Exploration of NPM
tunnel-agent@0.4.1
HTTP proxy tunneling agent. Formerly part of mikeal/request, now a standalone module
git+https://github.com/mikeal/tunnel-agent.git
https://github.com/mikeal/tunnel-agent#readme
Sometimes the output will display a warning, such as an unmet dependen-cy, or a requirements for an older module. To correct, install the module, or the necessary version of the module:
npm install jsdom@0.2.0
You can also directly install all dependencies with the -d flag. For instance, in the directory for the module, type the following:
npm install -d
If you want to install a version of the module that hasn’t yet been uploaded to the npm registry, you can install directly from the Git repository:
npm install https://github.com/visionmedia/express/tarball/master Use caution, though, as I’ve found that when you install a not-yet-released
version of a module, and you do an npm update, the npm registry version can overwrite the version you’re using.
U S I N G N P M I N L I N U X V I A P U T T Y
If you’re working with Node/npm in Linux using the PuTTY application in Windows, you may notice that you don’t get a clean print out when using the npm commands. Instead of nicely defined lines showing dependen-cies, you get strange characters.
To fix this problem, you need to instruct PuTTY to translate characters using UTF-8 encoding. In PuTTY, click the Window->Translation option, and select UTF-8 from the dropdown window.
To see which modules are installed globally, use:
npm ls -g
You can learn more about your npm installation using the config com-mand. The following lists the npm configuration settings:
npm config list
CHAPTER 3: Basics of Node Modules and Npm
You can get a more in-depth look at all configuration settings with: npm config ls -l
You can modify or remove configuration settings either by using a command line:
npm config delete keyname
npm config set keyname value
or by directly editing the configuration file:
$ npm config edit
I would strongly recommend you leave your npm configuration settings alone, unless you’re very sure of a change’s effect.
You can also search for a module using whatever terms you think might re-turn the best selection:
npm search html5 parser
The first time you do a search, npm builds an index, which can take a few minutes. When it’s finished, though, you’ll get a list of possible modules that match the term or terms you provided.
G E T T I N G “ R E G I S T R Y E R R O R P A R S I N G J S O N ” R E S U L T S
If you’re using npm and get a “registry error parsing json” error, you can use one of the npm mirrors to complete your task. For instance, to use the European mirror, use the following:
npm --registry http://registry.npmjs.eu/ search html5 parser
The npm website provides a registry of modules you can browse through, and an up-to-date listing of modules most depended on—that is, modules most used by other modules or by Node applications. In the next section, I’ll cover a sampling of these modules.
I’ll cover other npm commands later in this chapter, in the section ??? . One last note on npm before we move on. When you first start playing
around with npm, you might notice a set of warning messages at the end of the output. The first line makes a note about not being able to find a pack-
An In-Depth Exploration of NPM
age.json file, and all the rest of the warnings are associated with the missing package.json file.
The npm documentation recommends you create a package.json file to maintain your local dependencies. It’s not a bothersome request, though the warnings are a bit of an irritant.
To create a default package.json file in the project directory, run the fol-lowing command:
npm init --yes
This creates a default package.json in the directory, asking you a set of ba-sic project questions such as your name and the project name, each of which has a default value. From this point on, when you install a module, you’ll no longer get most of the annoying messages. To eliminate the rest, you’ll need to update the JSON in the file to include a description and a repository . In addition, if you want to update the file to reflect the newly installed module, use the following syntax:
npm install request --save-dev
This saves the module name and version to the devDependencies field in the package.json file. You can also save the module to production dependen-cies, but I’ll get into more detail on the package.json file in the next section, where you can create a Node module of your own.
To automatically save the dependencies, you can add and/or edit a npmrc file. You can add it per user ( ~/.npmrc ), per project ( /path/project/.npmrc ), globally ( $PREFIX/etc/npmrc ), and using the built-in configuration file ( / path/to/npm/npmrc ). Use the following to edit your personal settings to auto-matically save the dependencies:
npm config set save=true
npm config set save-exact=true
This automatically adds a --save flag (to save package in dependencies) and a -- save-exact flag (saved with exact version, not npm’s semver range de-fault) when you install new packages.
There are also many diferent configuration settings you can adjust. A good place to start exploring these is in the npm documentation .
CHAPTER 3: Basics of Node Modules and Npm
Creating and Publishing Your Own Node Module Just as you do for your client-side JavaScript, you’ll want to split of reusable JavaScript into its own libraries. The only diference is that you need to take a couple of extra steps to convert your JavaScript library into a module for use with Node.
Creating a Module
Let’s say you have a JavaScript library function, concatArray , that takes a string and an array of strings, and concatenates the first string to each string in the array, returning a new array:
function concatArray(str, array) {
return array.map(function(element) {
return str + ' ' + element;
});
}
You want to use this function, as well as others, in your Node applications. To convert your JavaScript library for use in Node, you’ll need to export all of
your exposed functions using the exports object, as shown in the following code:
exports.concatArray = function(str, array) {
return array.map(function(element) {
return str + ' ' + element;
});
};
To use concatArray in a Node application, import the library. The exported function can now be used in your application:
var newArray = require ('./arrayfunctions.js');
console.log(newArray.concatArray('hello', ['test1','test2'])); You can also create a module consisting of an object constructor or function,
and export it using module.exports.
As an example, the heavily-depended on Mime module creates a function, Mime():
function Mime() { ... }
Creating and Publishing Your Own Node Module
Adds functionality using the prototype property:
Mime.prototype.define = function(map) {...}
Creates a default instance:
var mime = new Mime();
Assigns the Mime function to its own same-named property:
mime.Mime = Mime;
And then exports the instance:
module.exports=mime;
You can then use all of the various mime functions in your application: var mime = require('mime');
console.log(mime.lookup('phoenix5a.png')); // image/png
Packaging an Entire Directory
You can split your module into separate JavaScript files, all located within a di-rectory. Node can load the directory contents, as long as you organize the con-tents in one of two ways.
The first way is to provide a package.json file with information about the directory. The structure contains other information, but the two entries rele-vant to packaging the module are name and main :
{ "name" : "mylibrary",
"main" : "./mymodule/mylibrary.js"
}
The first property, name , is the name of the module. The second, main , indi-cates the entry point for the module.
The second way to load directory contents is to include either an index.js or index.node file in the directory to serve as the main module entry point.
Why would you provide a directory rather than just a single module? The most likely reason is that you’re making use of existing JavaScript libraries, and just providing a “wrapper” file that wraps the exposed functions with exports statements. Another reason is that your library is so large that you want to break it down to make it easier to modify.
CHAPTER 3: Basics of Node Modules and Npm
Regardless of the reason, be aware that all of the exported objects must be in the one main file that Node loads.
Preparing Your Module for Publication
If you want to make your package available to others, you can promote it on your website, but you’ll be missing out on a significant audience. When you’re ready to publish a module, you’re going to want to publish it to the npm regis-try.
Earlier I mentioned the package.json file. The npm JSON is documented at https://docs.npmjs.com/files/package.json . It’s actually based on the Com-monJS module system recommendations, which you can find at http:// wiki.commonjs.org/wiki/Packages/1.0#Package_Descriptor_File .
Among the recommended fields to include in the package.json file are: name
The name of the package- required
description
The package description
version
The current version conforming to semantic version requirements - required keywords
An array of search terms
maintainers
An array of package maintainers (includes name, email, and website) contributors
An array of package contributors (includes name, email, and website) bugs
The URL where bugs can be submitted
licenses
An array of licenses
repository
The package respository
dependencies
Prerequisite packages and their version numbers
Creating and Publishing Your Own Node Module
Only the name and version fields are required, though all of these fields are recommended. Thankfully, npm makes it easier to create this file. If you type the following at the command line:
npm init
the tool will run through the required/recommended fields, prompting you for each. When it’s done, it generates a package.json file.
In Chapter 2, in Example 2-7 , I started an object called InputChecker that checks incoming data for commands and then processes the command. The ex-ample demonstrated how to incorporate EventEmitter . Now we’re going to modify this simple object to make it usable by other applications and modules.
First, we’ll create a subdirectory in node_modules and name it inputcheck , and then move the existing InputChecker code file to it. We need to rename the file to index.js . Next, we need to modify the code to pull out the part that implements the new object. We’ll save it for a future test file. The last modifica-tion we’ll do is add the exports object, resulting in the code shown in Example 3-1 .
EXAMPLE 3-1. Application from Example 2-7 modifed to be a module object var util = require('util');
var eventEmitter = require('events').EventEmitter;
var fs = require('fs');
exports.InputChecker = InputChecker;
function InputChecker(name, file) {
this.name = name;
this.writeStream = fs.createWriteStream('./' + file + '.txt', {'flags' : 'a',
'encoding' : 'utf8',
'mode' : 0666});
};
util.inherits(InputChecker,eventEmitter);
InputChecker.prototype.check = function (input) {
var command = input.toString().trim().substr(0,3);
if (command == 'wr:') {
this.emit('write',input.substr(3,input.length));
} else if (command == 'en:') {
this.emit('end');
} else {
this.emit('echo',input);
}
};
CHAPTER 3: Basics of Node Modules and Npm
We can’t export the object function directly, because util.inherits ex-pects an object to exist in the file named InputChecker . We’re also modifying the InputChecker object’s prototype later in the file. We could have changed these code references to use exports.InputChecker , but that’s kludgy . It’s just as easy to assign the object in a separate statement.
To create the package.json file, I ran npm init and answered each of the prompts. The resulting file is shown in Example 3-2 .
EXAMPLE 3-2. Generated package.json for inputChecker module
{
"name": "inputcheck",
"version": "1.0.0",
"description": "Looks for and implements commands from input", "main": "index.js",
"scripts": {
"test": "echo \"Error: no test specified\" && exit 1" },
"keywords": [
"command",
"check"
],
"author": "Shelley Powers",
"license": "ISC"
}
The npm init command doesn’t prompt for dependencies, so we need to add them directly to the file. A better approach to use, however, is use npm in-stall --save when installing the modules, which will automatically add the dependencies for us. However, the InputChecker module isn’t dependent on any external modules, so we can leave these fields blank.
At this point, we can test the new module to make sure it actually works as a module. Example 3-3 is the portion of the previously existing InputChecker application that tested the new object, now pulled out into a separate test ap-plication.
EXAMPLE 3-3. InputChecker test application
var inputChecker = require('inputcheck').InputChecker;
// testing new object and event handling
var ic = new inputChecker('Shelley','output');
ic.on('write', function(data) {
this.writeStream.write(data, 'utf8');
});
Creating and Publishing Your Own Node Module
ic.addListener('echo', function( data) {
console.log(this.name + ' wrote ' + data);
});
ic.on('end', function() {
process.exit();
});
process.stdin.resume();
process.stdin.setEncoding('utf8');
process.stdin.on('data', function(input) {
ic.check(input);
});
We can now move the test application into a new test subdirectory within the module directory to be packaged with the module as an example. Good practice demands that we also provide a test directory with one or more testing applications, as well as a doc directory with documentation. For a module this small, a README file should be suficient.
Since we now have a test application, we’ll need to modify the pack-age.json file to include a reference to it:
"scripts": {
"test": "node test/test.js"
},
The test is rather primitive, and isn’t using one of the robust Node testing environments, but it does demonstrate how testing can work. To run the test application type the following at the command line:
npm test
Lastly, we create a gzipped tarball of the module. You can skip this step, though, when you publish the module, discussed in the next section.
W H A T I S T H I S T A R B A L L T H I N G ?
I’ve made use of the term tarball in this and previous chapters. If you’ve not worked in Unix, you may not be familiar with the term. A tarball is one or more files archived together into one using a tar command.
Once we’ve provided all we need to provide, we can publish the module. P R O V I D I N G M O R E
You can, minimally, get by with a simplified module like inputcheck, but you’ll want to provide a lot more before going online with a module. You’ll need to provide a repository for your module, a URL for reporting bugs, home page for the modules, and so on. Still, start simple, and work up.
Publishing the Module
The folks who brought us npm also provide a guide detailing what’s needed to publish a Node module: the Developer Guide .
The documentation specifies some additional requirements for the pack-age.json file. In addition to the fields already created, we also need to add in a directories field with a hash of folders, such as the previously mentioned test and doc :
"directories" : {
"doc" : ".",
"test" : "test",
"example" : "examples"
}
Before publishing, the Guide recommends we test that the module can cleanly install. To test for this, type the following in the root directory for the module:
npm install . -g
At this point, we’ve tested the inputChecker module, modified the pack-age.json package to add directories, and confirmed that the package success-fully installs.
Next, we need to add ourselves as npm users if we haven’t done so already. We do this by typing:
npm adduser
and following the prompts to add a username, a password, and an email ad-dress.
There’s one last thing to do:
npm publish
Discovering Node Modules and Three Must-Have Modules
We can provide the path to the tarball or the directory. As the Guide warns us, everything in the directory is exposed unless we use a .npmignore with the file(s) listed in the package.json file to ignore material. It’s better, though, just to remove anything that’s not needed before publishing the module.
Once published—and once the source is also uploaded to GitHub (if that’s the repository you’re using)—the module is now oficially ready for others to use. Promote the module on Twitter, Google+, Facebook, your website, and wherever else you think people would want to know about the module. This type of promotion isn’t bragging—it’s sharing .
Discovering Node Modules and Three Must-Have Modules
It’s not dificult to find Node modules. Most that you’ll discover will be ones friends and co-workers recommend. Others you might discover by searching for specific functionality using a search engine and they show up at the top in the search results.
At one time, there were few enough modules that the best of the diferent types were manually listed on a single page. Well, those days are long gone. Nowadays, if you’re looking for modules, you’ll most likely do so at the npm web site . Not only can you find documentation for npm at the site, but it also provides a searchable directory of Node modules.
If you’re looking for modules to support the OAuth protocol, enter this as search phrase in the search bar at the top of the page. The top of the results is named simply Oauth, and is the most popular OAuth module in use today. You can tell by the statistics displayed for the module.
You will want to check out the module statistics. The biggest challenge when searching for Node modules at npm, is that many of the modules are no longer supported, or aren’t considered best in breed. The only way you can tell which modules are actively supported and most widely used are the statistics listed in the right side of the page. Figure 3-2 is an example, for the OAuth module.
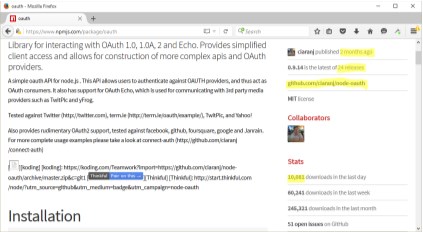
FIGURE 3-2
NPM statistics for
OAuth module
Note the highlighted text. The module currently available was published in the last couple of months, which demonstrates at least recent updates. It’s the last of 24 releases, which shows an active involvement. The kicker, though, is the number of downloads: over 10,000 in just a single day. That’s a very actively used module, indicating it is viable and likely maintained.
In addition, you can access the GitHub page and check out the issues to see how involved the developer(s) is with those reporting concerns. Or whether there are issues that make the module not a good choice (such as a security is-sue).
There’s no question that the OAuth module is most likely both the most ac-tively supported and best of breed module. That’s not to say there aren’t other good options, but until you’re more familiar with Node, you’ll probably want to stay with commonly-used Node modules.
Speaking of commonly used modules, the npm web site also lists, on the very first page, the most popular Node modules in use today. The site also con-tains a list of the most-starred modules , as well as the modules most depended-upon . The latter set of modules are those that are installed as de-pendencies for other modules. In the following five sections, I’m covering three modules you’ll find on both lists: Async, Commander, and Underscore. These are in addition to other modules I use throughout the book.
Better Callback Management with async
The application in Chapter 2, Example 2-11 is an example of an asynchronous pattern, where each function is called in turn and passes its results to the next
Discovering Node Modules and Three Must-Have Modules
function, and the entire chain stops only if an error occurs. There are several such patterns, though some are variations of others, and not everyone uses the exact same terminology.
The example also demonstrated a major problem with the use of callbacks: the temple of doom efect, as the nested callbacks progressively push out to the right.
One of the most commonly used modules to work around this efect is the Async module. It replaces the typical callback pattern with ones more linear and manageable. Among the asynchronous patterns Async supports are: waterfall
Functions are called in turn, and results of all are passed as an array to the last callback (also called series and+sequence+ by others).
series
Functions are called in turn and, optionally, results are passed as an array to the last callback.
parallel
Functions are run in parallel and when completed, results are passed to the last callback (though the result array isn’t part of the pattern in some inter-pretations of the parallel pattern).
whilst
Repeatedly calls one function, invoking the last callback only if a preliminary test returns false or an error occurs.
queue
Calls functions in parallel up to a given limit of concurrency, and new func-tions are queued until one of the functions finishes.
until
Repeatedly calls one function, invoking the last callback only if a post-process test returns false or an error occurs.
auto
Functions are called based on requirements, each function receiving the re-sults of previous callbacks.
iterator
Each function calls the next, with the ability to individually access the next iterator.
CHAPTER 3: Basics of Node Modules and Npm
apply
A continuation function with arguments already applied combined with oth-er control flow functions.
nextTick
Calls the callback in the next loop of an event loop—based on pro-cess.nextTick in Node.
The Async module also provides functionality for managing collections, such as its own variation of forEach , map , and filter as well as other utility func-tions, including ones for memoization . However, what we’re interested in here are its facilities for handling control flow.
Async’s GitHub repository is https://github.com/caolan/async .
Install Async using npm. If you want to install it globally, use the -g flag. If you want to update your dependencies, use --save or --save-dev:
npm install async
As mentioned earlier, Async provides control flow capability for a variety of asynchronous patterns, including serial , parallel , and waterfall . As an example, the pattern of the example in Chapter 2 matches with Async’s water-fall , so we’ll be using the async.waterfall method. In Example 3-4 , I used async.waterfall to open and read a data file using fs.readFile , perform the synchronous string substitution, and then write the string back to the file using fs.writeFile . Pay particular attention to the callback function used with each step in the application.
EXAMPLE 3-4. Using async.waterfall to read, modify, and write a fle’s contents asynchronously
var fs = require('fs'),
async = require('async');
async.waterfall([
function readData(callback) {
fs.readFile('./data/data1.txt', 'utf8', function(err, data){ callback(err,data);
});
},
function modify(text, callback) {
var adjdata=text.replace(/somecompany.com/g,'burningbird.net'); callback(null, adjdata);
},
Discovering Node Modules and Three Must-Have Modules
function writeData(text, callback) {
fs.writeFile('./data/data1.txt', text, function(err) {
callback(err,text);
});
}
], function (err, result) {
if (err) {
console.error(err.message);
} else {
console.log(result);
}
});
The async.waterfall takes two parameters: an array of tasks and an op-tional final callback function. Each asynchronous task function is an element of the async.waterfall array, and each function requires a callback as the last of its parameters. It is this callback function that allows us to chain the asyn-chronous callback results without having to physically nest the functions. How-ever, as you can see in the code, each function’s callback is handled as we would normally handle it if we were using nested callbacks—other than the fact that we don’t have to test the errors in each function. Async looks for an error object as first parameter in each callback. If we pass an error object in the call-back, the process is ended at this point, and the final callback routine is called. The final callback is when we can process the error or the final result.
Example 3-4 uses named functions, while the Async documentation shows anonymous functions. However, named functions can simplify debugging and error handling. Both work equally well.
The processing is very similar to what we had in Chapter 2, but without the nesting (and having to test for an error in each function). It may seem more complicated and I wouldn’t recommend its use for such simple nesting, but look what it can do with a more complex nested callback. Example 3-5 dupli-cates the exact functionality from Chapter 2, but without the callback nesting and excessive indenting.
EXAMPLE 3-5. Get objects from directory, test to look for fles, read fle test, modify, and write back out log results
var fs = require('fs'),
async = require('async'),
_dir = './data/';
var writeStream = fs.createWriteStream('./log.txt',
{'flags' : 'a',
'encoding' : 'utf8',
CHAPTER 3: Basics of Node Modules and Npm
'mode' : 0666});
async.waterfall([
function readDir(callback) {
fs.readdir(_dir, function(err, files) {
callback(err,files);
});
},
function loopFiles(files, callback) {
files.forEach(function (name) {
callback (null, name);
});
},
function checkFile(file, callback) {
fs.stat(_dir + file, function(err, stats) {
callback(err, stats, file);
});
},
function readData(stats, file, callback) {
if (stats.isFile())
fs.readFile(_dir + file, 'utf8', function(err, data){
callback(err,file,data);
});
},
function modify(file, text, callback) {
var adjdata=text.replace(/somecompany.com/g,'burningbird.net'); callback(null, file, adjdata);
},
function writeData(file, text, callback) {
fs.writeFile(_dir + file, text, function(err) {
callback(err,file);
});
},
function logChange(file, callback) {
writeStream.write('changed ' + file + '\n', 'utf8',
function(err) {
callback(err);
});
}
], function (err) {
if (err) {
console.error(err.message);
} else {
console.log('modified files');
}
});
Discovering Node Modules and Three Must-Have Modules
Every last bit of functionality is present from the Chapter 2 example. The fs.readdir method is used to get an array of directory objects. The Node forEach method (not the Async forEach ) is used to access each specific ob-ject. The fs.stats method is used to get the stats for each object. stats is used to check for files, and when a file is found, it’s opened and its data ac-cessed. The data is then modified, and passed on to be written back to the file via fs.writeFile . The operation is logged in the logfile and a successful com-pletion is echoed to the console.
Note that there is more data passed in some of the callbacks. Most of the functions need the file name as well as the text, so this is passed in the last sev-eral methods. Any amount of data can be passed in the methods, as long as the first parameter is the error object (or null , if no error object) and the last pa-rameter in each function is the callback function. We don’t have to check for an error in each asynchronous task function, because Async tests the error object in each callback, and stops processing and calls the final callback function if an error is found.
The other Async control flow methods, such as async.parallel and async.serial perform in a like manner, with an array of tasks as the first method parameter, and a final optional callback as the second. How they pro-cess the asynchronous tasks difers, though, as you would expect.
The async.parallel method calls all of the asynchronous functions at once, and when they are all finished, calls the optional final callback. Example 3-6 uses async.parallel to read in the contents of three files in par-allel. However, rather than an array of functions, this example uses an alterna-tive approach that Async supports: passing in an object with each asynchro-nous task listed as a property of the object. The results are then printed out to the console when all three tasks have finished.
EXAMPLE 3-6. Opening three fles in parallel and reading in their contents var fs = require('fs'),
async = require('async');
async.parallel({
data1 : function (callback) {
fs.readFile('./data/fruit1.txt', 'utf8', function(err, data){ callback(err,data);
});
},
data2 : function (callback) {
fs.readFile('./data/fruit2.txt', 'utf8', function(err, data){ callback(err,data);
});
},
CHAPTER 3: Basics of Node Modules and Npm
data3 : function readData3(callback) {
fs.readFile('./data/fruit3.txt', 'utf8', function(err, data){ callback(err,data);
});
},
}, function (err, result) {
if (err) {
console.log(err.message);
} else {
console.log(result);
}
});
The results are returned as an array of objects, with each result tied to each of the properties. If the three data files in the example had the following con-tent:
- fruit1.txt : apples
- fruit2.txt : oranges
- fruit3.txt : peaches
the result of running Example 3-6 is:
{ data1: 'apples\n', data2: 'oranges\n', data3: 'peaches\n' } I’ll leave the testing of the other Async control flow methods as a reader ex-
ercise. Just remember that when you’re working with the Async control flow methods, all you need is to pass a callback to each asynchronous task and to call this callback when you’re finished, passing in an error object (or null ) and whatever data you need.
Command-Line Magic with Commander
Commander provides support for command-line options. These are the flags we provide when running an application, such as the ubiquitous -h or --help for how to use a utility or application.
Install it via npm:
npm install commander
And include it using require:
Discovering Node Modules and Three Must-Have Modules
var program = require('commander');
To use it, chain option calls listing out all of the various options supported for the application. In the following code, the application supports two default options—-V or --version for version and -h or --help for help—as well as two cus-tom option: -s or --source for source web site, and -f or --file for a file name:
var program = require('commander');
program
.version ('0.0.1')
.option ('-s, --source [web site]', 'Source web site') .option ('-f, --file [file name]', 'File name')
.parse(process.argv);
console.log(program.source);
console.log(program.file);
We provide the custom options, while Commander provides the default ver-sion and help. If you run the application using:
node options -h
Commander prints out the available options:
Usage: options [options]
Options:
- h, --help output usage information
- V, --version output the version number
- s, --source [web site] Source web site
- f, --file [file name] File name
Short options can be concatenated, such as -sf , and Commander can han-dle it. It also takes a multi-work option, such as --file-name , and uses Camel casing with the result: program.fileName .
Commander also supports coercion (type casting):
.option('-i, --integer
.option('-d --drink [drink]', 'Drink', /^(coke|pepsi|izze)$/i) CHAPTER 3: Basics of Node Modules and Npm
As well as a variadic argument in the last option, which means it will take any number of arguments. Perhaps your application can support multiple key-words, of unknown number. You can create a Command option for this using:
var program = require('commander');
program
.version('0.0.1')
.command('keyword
.action(function (keyword, otherKeywords) {
console.log('keyword %s', keyword);
if (otherKeywords) {
otherKeywords.forEach(function (oKey) {
console.log('keyword %s', oKey);
});
}
});
program.parse(process.argv);
The following command line:
node options2 keyword one two three
Results in the following print-out:
keyword one
keyword two
keyword three
D O W N L O A D C O M M A N D E R
If you want to download Commander directly you can do so at its GitHub repository . Commander is especially useful for command-line applica-tions, as demonstrated in Chapter 6.
The Ubiquitous Underscore
Install the Underscore module with:
npm install underscore
According to the developers, Underscore is a utility-belt library for Node. It provides a lot of extended JavaScript functionality we’re used to with third-party libraries, such as jQuery or Prototype.js.
Discovering Node Modules and Three Must-Have Modules
Underscore is so named because, traditionally, its functionality is accessed with an underscore ( _ ), similar to jQuery’s $ . Here’s an example:
var _ = require('underscore');
_.each(['apple','cherry'], function (fruit) { console.log(fruit); }); Of course, the problem with the underscore is that this character has a spe-
cific meaning in REPL, as you’ll see in the next chapter. No worries, though—we can just use another variable, us :
var us = require('underscore');
us.each(['apple','cherry'], function(fruit) { console.log(fruit); }); Underscore provides expanded functionality for arrays, collections, func-
tions, objects, chaining, and general utility. Fortunately, there’s also excellent documentation for all of its functionality, available at its website , so I’ll forgo detailing any of it here.
However, I do want to mention one nice capability: a controlled way to ex-tend Underscore with your own utility functions, via the mixin function. We can quickly try this method, and the others, in a REPL session:
var us = require('underscore');
us.mixin({
... betterWithNode: function(str) {
..... return str + ' is better with Node';
..... }
... });
console.log(us.betterWithNode('chocolate'));
chocolate is better with Node
You’ll see the term mixin used in several Node modules. It’s based on a pattern where properties of one object are added (“mixed in”) to anoth-er.
Underscore isn’t the only top-rated utility module. Another is lodash. Unless you’ve worked with one or the other, I’d check both out. The lodash website contains complete documentation for this useful module.
Interactive Node with REPL 4 and More on the Console
While you’re exploring the use of Node and figuring out the code for your cus-tom module or Node application, you don’t have to type JavaScript into a file and run it with Node to test your code. Node also comes with an interactive component known as REPL , or read-eval-print loop.
REPL (pronounced “repple”) supports a simplified line editing and a small set of basic commands. Whatever you type into REPL is, for the most part, pro-cessed no diferently than if you had typed the JavaScript into a file and run the file using Node. You can actually use REPL to code your entire application—lit-erally testing the application on the fly.
In this chapter, I’ll cover how to use REPL, as well as cover some interesting REPL quirks of REPL and how to work with the quirks. These workarounds in-clude replacing the underlying mechanism that persists commands, as well as using some command-line editing. And if the built-in REPL doesn’t provide ex-actly what you need for an interactive environment, there’s also an API to cre-ate your own custom REPL.
REPL is an essential Node development tool, and so is the console. We’re us-ing the console in most applications in the book, but there’s more to this help-ful object than just logging messages.
REPL: First Looks and Undefined Expressions To begin REPL, simply type node without providing any Node application file, like so:
$ node
REPL then provides a command-line prompt—an angle bracket (>)—by de-fault. Anything you type from this point on is processed by the underlying V8 JavaScript engine.