Frameworks such as Express provide a great deal of useful functionality, but one thing they don’t provide is a way of separating the data from the presentation. You can use JavaScript to generate HTML to process the result of a query or update, but the effort can quickly become tedious—especially if you have to generate every part of the page, including sidebars, headers, and footers. Sure, you can use functions, but the work can still verge on overwhelming.
Luckily for us, as framework systems have developed, so have template systems, and the same holds true for Node and Express. In Chapter 7, we briefly used Jade, the template system installed by default with Express, to generate an index page. Express also supports other compatible template systems, including another popular choice, EJS (embedded JavaScript). Jade and EJS take a completely different approach, but both deliver the expected results.
In addition, though you can manually create CSS files for your website or application, you can also use a CSS engine that can simplify this aspect of your web design and development. Rather than having to remember to add in all of the curly braces and semicolons, you use a simplified structure that can be cleaner to maintain. One such CSS engine that works quite nicely with Express and other Node applications is Stylus.
In this chapter I’ll primarily focus on Jade, since it is installed by default with Express. However, I’m going to briefly cover EJS, so you can see two different types of template systems and how they work. I’ll also introduce the use of Stylus to manage the CSS to ensure that the pages display nicely.
Embedded JavaScript is a good name for EJS, because it best describes how it works: JavaScript embedded into HTML markup handles the melding of data and document structure. It’s a very simple template system based on Ruby’s ERB (embedded Ruby).
If you’ve worked with most content management systems (CMS), you’ll quickly grasp the fundamentals of EJS. The following is an example of an EJS template:
<% if (names.length) { %>
<% names.forEach(function(name){ %>
<%= name %>
<% }) %>
<% } %>
In the code, the EJS is embedded directly into HTML, in this example providing the data for the individual list items for an unordered list. The angle brackets and percentage sign pairs (<%, %>) are used to delimit EJS instructions: a conditional test ensures that an array has been provided, and then the JavaScript processes the array, outputting the individual array values.
EJS is based on the Ruby ERB templating system, which is why you’ll frequently see “erb-like” used to describe its format.
The values themselves are output with the equals sign (=), which is a shortcut for “print this value here”:
<%= name %>
The value is escaped when it’s printed out. To print out an unescaped value, use a dash (-), like so:
<%- name %>
If for some reason you don’t want to use the standard open and closing EJS tags (<%, %>), you can define custom ones using the EJS object’s open and close methods:
ejs.open('<<');
ejs.close('>>');
You can then use these custom tags instead of the default ones:
<<=title >>
Unless you have a solid reason for doing so, though, I’d stick with the default.
Though blended with HTML, EJS is JavaScript, so you have to provide the open and closing curly braces, as well as the proper format when using the array object’s forEach method.
For the finished product, the HTML is then rendered via an EJS function call, either returning a JavaScript function that generates a result, or generating the finished result. I’ll demonstrate this once we get EJS for Node installed. Let’s do that now.
The module that’s installed is a version of EJS capable of being used with Node. It’s not the same thing you’ll get if you go to the EJS site and directly download EJS. EJS for Node can be used with client-side JavaScript, but I’m going to focus on its use with Node applications.
Install the template system using npm:
npm install ejs
Once EJS is installed, you can use it directly in a simple Node application—you don’t have to use it with a framework like Express. As a demonstration, render HTML from a given template file as follows:
<%= title %>
<% if (names.length) { %>
<% names.forEach(function(name){ %>
<%= name %>
<% }) %>
<% } %>
Call the EJS object’s renderFile method directly. Doing so opens the template and uses the data provided as an option to generate the HTML.
Example 8-1 uses the standard HTTP server that comes with Node to listen for a request on port 8124. When a request is received, the application calls the EJS renderFile method, passing in the path for the template file, as well as a names array and a document title. The last parameter is a callback function that either provides an error (and a fairly readable error, at that) or the resulting generated HTML. In the example, the result is sent back via the response object if there’s no error. If there *is* an error, an error message is sent in the result, and the error object is output to the console.
Example 8-1. Generating HTML from data and an EJS template
var http = require('http')
, ejs = require('ejs')
;
// create http server
http.createServer(function (req, res) {
res.writeHead(200, {'content-type': 'text/html'});
// data to render
var names = ['Joe', 'Mary', 'Sue', 'Mark'];
var title = 'Testing EJS';
// render or error
ejs.renderFile(__dirname + '/views/test.ejs',
{title : 'testing', names : names},
function(err, result) {
if (!err) {
res.end(result);
} else {
res.end('An error occurred accessing page');
console.log(err);
}
});
}).listen(8124);
console.log('Server running on 8124/');
One variation of the rendering method is render, which takes the EJS template as a string and then returns the formatted HTML:
var str = fs.readFileSync(__dirname + '/views/test.ejs', 'utf8');
var html = ejs.render(str, {names : names, title: title });
res.end(html);
A third rendering method, which I won’t demonstrate, is compile, which takes an EJS template string and returns a JavaScript function that can be invoked to render HTML each time it’s called. You can also use this method to enable EJS for Node in client-side applications.
### Note
The use of compile is demonstrated in Chapter 9, in the section Building a Game Leaderboard.
## Using the EJS for Node Filters
In addition to support for rendering EJS templates, EJS for Node also provides a set of predefined filters, which can further simplify the HTML generation. One filter, first, extracts out the first value in a supplied array of values. Another filter, downcase, takes the result of the first filter and lowercases the text:
var names = ['Joe Brown', 'Mary Smith', 'Tom Thumb', 'Cinder Ella'];
var str = '
<%=: users | first | downcase %>
';
var html = ejs.render(str, {users : names });
The result is the following:
joe brown
The filters can be chained together, with the result of one being piped to the next. The use of the filter is triggered by the colon (:) following the equals sign (=), which is then followed by the data object. The following example of the use of filters takes a set of people objects, maps a new object consisting solely of their names, sorts the names, and then prints out a concatenated string of the names:
var people = [
{name : 'Joe Brown', age : 32},
{name : 'Mary Smith', age : 54},
{name : 'Tom Thumb', age : 21},
{name : 'Cinder Ella', age : 16}];
var str = "
<%=: people | map:'name' | sort | join %>
";
var html = ejs.render(str, {people : people });
Here is the result of that filter combination:
Cinder Ella, Joe Brown, Mary Smith, Tom Thumb
The filters aren’t documented in the EJS for Node documentation, and you have to be careful using them interchangeably because some of the filters want a string, not an array of objects. Table 8-1 contains a list of the filters, and a brief description of what type of data they work with and what they do.
Table 8-1. EJS for Node filters
| Filter | Type of data | Purpose |
| --- | --- | --- |
| first | Accepts and returns array | Returns first element of array |
| last | Accepts and returns array | Returns last element of array |
| capitalize | Accepts and returns string | Capitalizes first character in string |
| downcase | Accepts and returns string | Lowercases all characters in string |
| upcase | Accepts and returns string | Capitalizes all characters in string |
| sort | Accepts and returns array | Applies Array.sort to array |
| sort_by:'prop' | Accepts array and property name; returns array | Creates custom sort function to sort array of objects by property |
| size | Accepts array; returns numeric | Returns Array.length |
| plus:n | Accepts two numbers or strings; returns number | Returns a + b |
| minus:n | Accepts two numbers or strings; returns number | Returns b − a |
| times:n | Accepts two numbers or strings; returns number | Returns a * b |
| divided_by:n | Accepts two numbers or strings; returns number | Returns a / b |
| join:'val' | Accepts array; returns string | Applies Array.join with given value, or , by default |
| truncate:n | Accepts string and length; returns string | Applies String.substr |
| truncate_words:n | Accepts string and word length; returns string | Applies String.split and then String.splice |
| replace:pattern, substitution | Accepts string, pattern, and substitution; returns string | Applies String.replace |
| prepend:value | Accepts string and string value; returns string | Prepends value to string |
| append:value | Accepts string and string value; returns string | Appends value to string |
| map:'prop' | Accepts array and property; returns array | Creates new array consisting of given object properties using Array.map |
| reverse | Accepts array or string | If array, applies Array.reverse; if string, splits words, reverses, rejoins |
| get | Accepts object and property | Returns property of given object |
| json | Accepts object | Converts to JSON string |
# Using a Template System (EJS) with Express
The template system provides the missing piece we need to complete the *views* portion of the MVC (Model-View-Controller) application architecture introduced in Chapter 7.
### Note
The *model* portion of the MVC architecture is added in Chapter 10.
In Chapter 7, I provided a quick introduction for using a template system in Example 7-1. The example used Jade, but we can easily convert it to use EJS. How easily? Example 8-2 is an exact duplicate of the application in Example 7-1, except now using EJS rather than Jade. Exactly one line is changed, shown in bold.
Example 8-2. Using EJS as a template system for an application
var express = require('express')
, routes = require('./routes')
, http = require('http');
var app = express();
app.configure(function(){
app.set('views', __dirname + '/views');
**app.set('view engine', 'ejs');**
app.use(express.favicon());
app.use(express.logger('dev'));
app.use(express.static(__dirname + '/public'));
app.use(express.bodyParser());
app.use(express.methodOverride());
app.use(app.router);
});
app.configure('development', function(){
app.use(express.errorHandler());
});
app.get('/', routes.index);
http.createServer(app).listen(3000);
console.log("Express server listening on port 3000");
The index.js route doesn’t require any change at all, because it’s not using anything that’s specific to any template system; it’s using the Express resource object’s render method, which works regardless of template system (as long as the system is compatible with Express):
exports.index = function(req, res){
res.render('index', { title: 'Express' }, function(err, stuff) {
if (!err) {
console.log(stuff);
res.write(stuff);
res.end();
}
});
};
In the *views* directory, the *index.ejs* file (note the extension) uses EJS for Node annotation rather than the Jade we saw in Chapter 7:
<%= title %>
<%= title %>
Welcome to <%= title %>
This demonstrates the beauty of working with an application that separates the model from the controller from the view: you can swap technology in and out, such as using a different template system, without impacting the application logic or data access.
To recap what’s happening with this application:
1. The main Express application uses app.get to associate a request listener function (routes.index) with an HTTP GET request.
2. The routes.index function calls res.render to render the response to the GET request.
3. The res.render function invokes the application object’s render function.
4. The application render function renders the specified view, with whatever options—in this case, the title.
5. The rendered content is then written to the response object, and back to the user’s browser.
In Chapter 7, we focused on the routing aspects of the application, and now we’ll focus on the view. We’ll take the application we created at the end of Chapter 7, in Example 7-6 through Example 7-8, and add in the views capability. First, though, we need to do a little restructuring of the environment to ensure that the application can grow as needed.
## Restructuring for a Multiple Object Environment
Though the application is the Widget Factory, widgets aren’t going to be the only objects the system maintains. We need to restructure the environment so that we can add objects as needed.
Currently, the environment is as follows:
/application directory
/routes - home directory controller
/controllers - object controllers
/public - static files
/views - template files
The *routes* and the *controllers* directories can stay as they are, but the *views* and the *public* directory need to be modified to allow for different objects. Instead of placing all widget views directly in *views*, we add them to a new subdirectory of *views* named, appropriately enough, *widgets*:
/application directory
/ views
/widgets
Instead of placing all widget static files directly in the *public* directory, we also place them in a *widgets* subdirectory:
/application directory
/public
/widgets
Now, we can add new objects by adding new directories, and we’ll be able to use filenames of *new.html* and *edit.ejs* for each, without worrying about overwriting existing files.
Note that this structure assumes we may have static files for our application. The next step is to figure out how to integrate the static files into the newly dynamic environment.
## Routing to Static Files
The first component of the application to refine is adding a new widget. This consists of two parts: displaying a form to get the new widget’s information, and storing the new widget into the existing widget data store.
We can create an EJS template for the form, though it won’t have any dynamic components—or at least, it won’t at this time with the way the page is designed. However, it makes no sense to serve something through the template system that doesn’t need the system’s capability.
We could also just change how the form is accessed—instead of accessing the form using */widgets/new*, we’d access it as */widgets/new.html*. However, this introduces an inconsistency into the application routing. In addition, if we add dynamic components later to the form page, then we’ll have to change the references to the new form.
A better approach is to handle the routing request and serve the static page as if it were dynamic, but without using the template system.
The Express resource object has a redirect method we could use to redirect the request to the *new.html* file, but *new.html* is what’s going to show up in the address bar on the browser when finished. It also returns a 302 status code, which we don’t want. Instead, we’ll use the resource object’s sendfile method. This method takes as parameters a file path, possible options, and an optional callback function with an error as its only parameter. The widget controller is using only the first parameter.
The filepath is:
__dirname + "/../public/widgets/widget.html"
We used the relative indicator .. since the public directory is located off the *controllers* directory’s parent. However, we can’t use this path in sendfile as is, because it generates a 403 forbidden error. Instead, we use the path module’s normalize method to convert the path’s use of relative indicators into the equivalent absolute path:
// display new widget form
exports.new = function(req, res) {
var filePath = require('path').normalize(__dirname +
"/../public/widgets/new.html");
res.sendfile(filePath);
};
The HTML page with the form is nothing to get excited about—just a simple form, as shown in Example 8-3. However, we did add the description field back in to make the data a little more interesting.
Example 8-3. HTML new widget form
Widgets
Add Widget:
The form is POSTed, of course.
Now that the application can display the new widget form, we need to modify the widget controller to process the form posting.
### Note
There’s also an Express extension module, express-rewrite, that provides URL rewrite capability. Install it with npm like so:
npm install express-rewrite
## Processing a New Object Post
Prior to adding in the new template support, we need to make changes to the main application file to incorporate the use of the EJS template system. I won’t repeat the *app.js* file completely from Example 7-8 in Chapter 7, because the only change is to the configure method call to include the EJS template engine and *views* directory:
app.configure(function(){
**app.set('views', __dirname + '/views');app.set('view engine', 'ejs');**
app.use(express.favicon());
app.use(express.logger('dev'));
app.use(express.staticCache({maxObjects: 100, maxLength: 512}));
app.use(express.static(__dirname + '/public'));
app.use(express.bodyParser());
app.use(express.methodOverride());
app.use(app.router);
app.use(express.directory(__dirname + '/public'));
app.use(function(req, res, next){
throw new Error(req.url + ' not found');
});
app.use(function(err, req, res, next) {
console.log(err);
res.send(err.message);
});
});
Now we’re ready to convert the widget controller so it uses templates, starting with the code to add a new widget.
The actual processing of the data in the widget controller for the new widget doesn’t change. We still pull the data from the request body, and add it to the in-memory widget store. However, now that we have access to a template system, we’re going to change how we respond to the successful addition of a new widget.
I created a new EJS template, named *added.ejs*, shown in Example 8-4. All it does is provide a listing of the widget’s properties, and a message consisting of the title sent with the widget object.
Example 8-4. “Widget added” confirmation view template
<%= title %>
<%= title %> | <%= widget.name %>
ID: <%= widget.id %>
Name: <%= widget.name %>
Price: <%= widget.price.toFixed(2) %>
Desc: <%= widget.desc %>
The code to process the update is little different from that shown in Chapter 7, other than the fact that we’re now rendering a view rather than sending a message back to the user (the part that changes is in bold text):
// add a widget
exports.create = function(req, res) {
// generate widget id
var indx = widgets.length + 1;
// add widget
widgets[widgets.length] =
{ id : indx,
name : req.body.widgetname,
price : parseFloat(req.body.widgetprice),
desc : req.body.widgetdesc };
//print out to console and confirm addition to user
console.log(widgets[indx-1]);
**res.render('widgets/added', {title: 'Widget Added', widget : widgets[indx-1]});**
};
The two options sent to the view are the page title and the widget object. Figure 8-1 shows the informative, though plain, result.
Warning
The code to process a new widget doesn’t do any validation of the data or check for authority or SQL injection hacks. Data validation, security, and authorization are covered in Chapter 15.
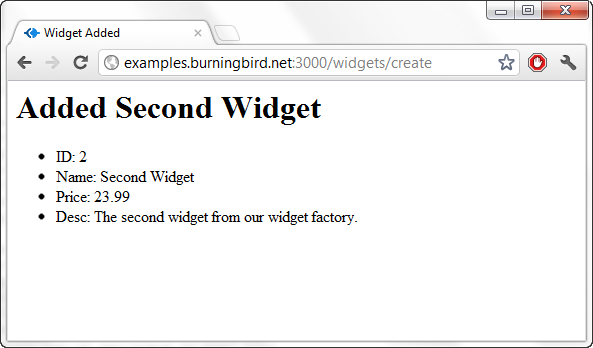
Figure 8-1. Confirmation of the added widget
The next two processes to convert to templates, update and deletion, require a way of specifying which widget to perform the action on. In addition, we also need to convert the index display of all widgets. For all three processes, we’re going to use a view to create both the widgets index page and a picklist, covered next.
## Working with the Widgets Index and Generating a Picklist
A *picklist* is nothing more than a list of choices from which one can choose. For the widget application, a picklist could be a selection or drop-down list incorporated into an update or delete page, using Ajax and client-side scripting, but we’re going to incorporate the functionality into the widget application’s index page.
Right now, the widget application index page just has a data dump of the widget data store. It’s informative, but ugly and not all that useful. To improve the result, we’re going to add a view to display all of the widgets in a table—one widget per row, with the widget properties in columns. We’re also going to add two more columns: one with a link to edit the widget, and one with a link to delete the widget. These provide the missing piece to the application: a way to edit or delete a widget without having to remember or know its identifier.
Example 8-5 has the contents of the template for this new view, named *index.ejs*. Since the file is located in the *widgets* subdirectory, we don’t have to worry that it’s the same name as the higher-level *index.ejs* file.
Example 8-5. Widgets index page with links to edit and delete the individual widgets
<%= title %>
<% if (widgets.length) { %>
<% } %>
The controller code to trigger this new view is extremely simple: a call to render the view, sending the entire array of widgets through as data:
// index listing of widgets at /widgets/
exports.index = function(req, res) {
res.render('widgets/index', {title : 'Widgets', widgets : widgets});
};
In Example 8-5, if the object has a length property (is an array), its element objects are traversed and their properties are printed out as table data, in addition to the links to edit and delete the object. Figure 8-2 shows the table after several widgets have been added to our in-memory data store.
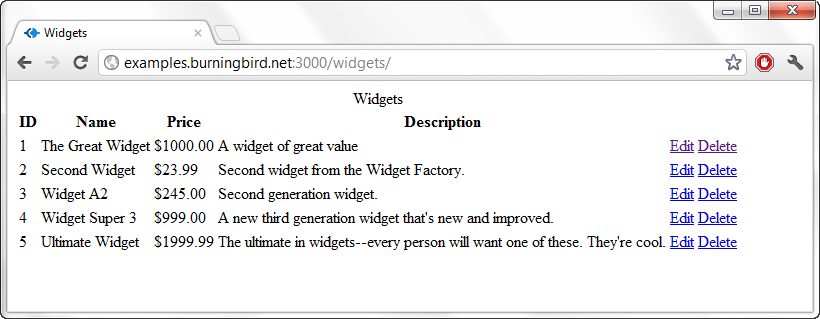
Figure 8-2. Widget display table after the addition of several widgets
The link (route) to delete the object is actually the same as the link (route) to show it: */widgets/:id*. We’ll add a mostly hidden form to the Show Widget page that includes a button to delete the widget if it’s no longer needed. This allows us to incorporate the necessary trigger for the deletion without having to add a new route. It also provides another level of protection to ensure that users know exactly which widget they’re deleting.
### Note
Rather than incorporate the delete request into the Show Widget page, it’s also perfectly acceptable to create another route, such as */widgets/:id/delete*, and generate an “Are you sure?” page from the index page link, which then triggers the deletion.
## Showing an Individual Object and Confirming an Object Deletion
To display an individual widget is as simple as providing a placeholder for all of its properties, embedded into whatever HTML you want to use. In the widget application, I’m using an unordered list (ul) for the widget properties.
Since we’re also encompassing into the page the trigger for deleting the object, at the bottom I’ve added a form that displays a button reading “Delete Widget.” In the form is the hidden _method field that is used to generate the HTTP DELETE verb that routes to the application’s destroy method. The entire template is shown in Example 8-6.
Example 8-6. View to display a widget’s properties and a form to delete the widget
<%= title %>
<%= widget.name %>
ID: <%= widget.id %>
Name: <%= widget.name %>
Price: $<%= widget.price.toFixed(2) %>
Description: <%= widget.desc %>
Very little modification is required in the controller code for either the show or the destroy methods. I’ve left the destroy method as is for now. All it does is delete the object from the in-memory store and send a message back to this effect:
exports.destroy = function(req, res) {
var indx = req.params.id - 1;
delete widgets[indx];
console.log('deleted ' + req.params.id);
res.send('deleted ' + req.params.id);
};
The show method required little change—simply replacing the send message with a call to render the new view:
// show a widget
exports.show = function(req, res) {
var indx = parseInt(req.params.id) - 1;
if (!widgets[indx])
res.send('There is no widget with id of ' + req.params.id);
else
res.render('widgets/show', {title : 'Show Widget', widget : widgets[indx]});
};
Figure 8-3 demonstrates what the Show Widget page looks like, complete with the Delete Widget button at the bottom.

Figure 8-3. The Show Widget page with delete button
By now, you’ve seen how simple it is to incorporate views into the application. The best thing of all about this system is that you can incorporate changes into the view templates without having to stop the application: it uses the changed template the next time the view is accessed.
One last view for the update widget, and we’re done converting the widget application to use the EJS template system.
## Providing an Update Form and Processing a PUT Request
The form to edit the widget is exactly the same as the form to add a widget, except for the addition of one field: _method. In addition, the form is prepopulated with the data for the widget being edited, so we need to incorporate the template tags and appropriate values.
Example 8-7 contains the contents for the *edit.ejs* template file. Note the use of the template tags with the value fields in the input elements. Also notice the addition of the _method field.
Example 8-7. The Edit view template file, with data prepopulated
<%= title %>
Edit <%= widget.name %>
Figure 8-4 shows the page with a widget loaded. All you need to do is edit the field values, and then click Submit to submit the changes.
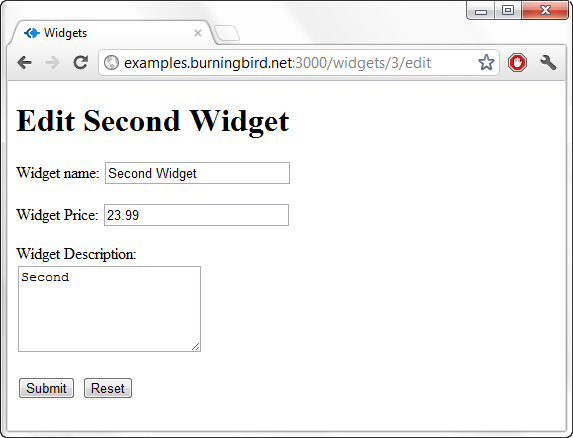
Figure 8-4. The Edit widget view
The modification to the controller code is as simple as the other modifications have been. The Edit view is accessed using res.render, and the widget object is passed as data:
// display edit form
exports.edit = function(req, res) {
var indx = parseInt(req.params.id) - 1;
res.render('widgets/edit', {title : 'Edit Widget', widget : widgets[indx]});
};
The code to process the update is very close to what we had in Chapter 7, except that instead of sending a message that the object is updated, we’re using a view. We’re not creating a new view, though. Instead, we’re using the *widgets/added.ejs* view we used earlier. Since both just display the object’s properties and can take a title passed in as data, we can easily repurpose the view just by changing the title:
// update a widget
exports.update = function(req, res) {
var indx = parseInt(req.params.id) - 1;
widgets[indx] =
{ id : indx + 1,
name : req.body.widgetname,
price : parseFloat(req.body.widgetprice),
desc : req.body.widgetdesc}
console.log(widgets[indx]);
res.render('widgets/added', {title: 'Widget Edited', widget : widgets[indx]})
};
Again, the view used doesn’t impact what route (URL) is shown, so it doesn’t matter if we reuse a view. Being able to reuse a view can save us a lot of work as the application increases in difficulty.
You’ve had a chance to see pieces of the controller code throughout these sections as we convert it to use templates. Example 8-8 is an entire copy of the changed file, which you can compare to Example 7-6 in Chapter 7 to see how easily views incorporate into the code, and how much work they can save us.
Example 8-8. The widget controller implemented with views
var widgets = [
{ id : 1,
name : "The Great Widget",
price : 1000.00,
desc: "A widget of great value"
}
]
// index listing of widgets at /widgets/
exports.index = function(req, res) {
res.render('widgets/index', {title : 'Widgets', widgets : widgets});
};
// display new widget form
exports.new = function(req, res) {
var filePath = require('path').normalize(__dirname + "/../public/widgets/new.html");
res.sendfile(filePath);
};
// add a widget
exports.create = function(req, res) {
// generate widget id
var indx = widgets.length + 1;
// add widget
widgets[widgets.length] =
{ id : indx,
name : req.body.widgetname,
price : parseFloat(req.body.widgetprice),
desc : req.body.widgetdesc };
//print out to console and confirm addition to user
console.log(widgets[indx-1]);
res.render('widgets/added', {title: 'Widget Added', widget : widgets[indx-1]});
};
// show a widget
exports.show = function(req, res) {
var indx = parseInt(req.params.id) - 1;
if (!widgets[indx])
res.send('There is no widget with id of ' + req.params.id);
else
res.render('widgets/show', {title : 'Show Widget', widget : widgets[indx]});
};
// delete a widget
exports.destroy = function(req, res) {
var indx = req.params.id - 1;
delete widgets[indx];
console.log('deleted ' + req.params.id);
res.send('deleted ' + req.params.id);
};
// display edit form
exports.edit = function(req, res) {
var indx = parseInt(req.params.id) - 1;
res.render('widgets/edit', {title : 'Edit Widget', widget : widgets[indx]});
};
// update a widget
exports.update = function(req, res) {
var indx = parseInt(req.params.id) - 1;
widgets[indx] =
{ id : indx + 1,
name : req.body.widgetname,
price : parseFloat(req.body.widgetprice),
desc : req.body.widgetdesc}
console.log(widgets[indx]);
res.render('widgets/added', {title: 'Widget Edited', widget : widgets[indx]})
};
This is the last time you’ll see the controller code for this chapter. Yet we’re about to make a profound change to the application: we’re going to replace the template system.
# The Jade Template System
Jade is the template system installed with Express by default. It is quite different from EJS: rather than embed the template tags directly into HTML, you use a simplified version of HTML.
### Note
The Jade website is at http://jade-lang.com/.
## Taking the Nickel Tour of the Jade Syntax
In the Jade template system, HTML elements are given by their name, but you don’t use any angle brackets. Nesting is indicated by indentation. So, rather than:
This is the title
Say hi World
You have:
html
head
title This is it
body
p Say Hi to the world
The contents of both the title and the paragraph elements are just included after the element name. There are no ending tags—they’re assumed—and again, indentation triggers nesting. Another example is the following, which also makes use of both class name and identifier, as well as additional nesting:
html
head
title This is it
body
div.content
div#title
p nested data
This generates:
This is it
nested data
If you have large bodies of content, such as text for a paragraph, you can use the vertical bar, or pipe (|), to concatenate the text:
p
| some text
| more text
| and even more
This becomes:
some text more text and even more
Another approach is to end the paragraph element with a period (.) indicating that the block contains only text and allowing us to omit the vertical bar:
p.
some text
more text
and even more
If we want to include HTML as the text, we can; it ends up being treated as HTML in the generated source:
body.
A header
A paragraph
Form elements generally have attributes, and they’re incorporated in Jade in parentheses, including setting their values (if any). The attributes need only be separated by whitespace, but I list them each on a separate line to make the template more readable.
The following Jade template:
html
head
title This is it
body
form(method="POST"
action="/widgets"
enctype="application/x-www-form-urlencoded")
input(type="text"
name="widgetname"
id="widgetname"
size="25")
input(type="text"
name="widgetprice"
id="widgetprice"
size="25")
input(type="submit"
name="submit"
id="submit"
value="Submit")
generates the following HTML:
This is it
## Using block and extends to Modularize the View Templates
Now we’re going to convert the widget application so it uses Jade rather than EJS. The only change that we need to make to the widget application code is in *app.js*, to change the template engine:
app.set('view engine', 'jade');
No other change is necessary to the application. None. Zip.
All of the templates share the same page layout. The layout is rather plain; there are no sidebars or footers, or any use of CSS. Because of the page’s plain nature, we haven’t minded duplicating the same layout markup in each view in the prior examples. However, if we start to add more to the overall page structure—such as sidebars, a header, and a footer—then having to maintain the same layout information in each file is going to get cumbersome.
The first thing we’re going to do in our conversion, then, is create a layout template that will be used by all the other templates.
### Note
Express 3.x completely changed its handling of views, including how it implements partial views and uses layouts. You can use the Jade templates in this section with Express 2.x if you add the following in the configure method call:
app.set('view options', {layout: false});
Example 8-9 contains the complete *layout.jade* file. It uses the HTML5 doctype, adds a head element with title and meta elements, adds the body element, and then references a block called content. That’s how you include blocks of content defined in other template files.
Example 8-9. Simple layout template in Jade
doctype 5
html(lang="en")
head
title #{title}
meta(charset="utf-8")
body
block content
Notice the use of the pound sign and curly braces (#{}) for the title. This is how we embed data passed to the template in Jade. The use of the identifier doesn’t change from EJS, just the syntax.
To use the new layout template, we start off each of the content templates with:
extends layout
The use of extends lets the template engine know where to find the layout template for the page view, while the use of block instructs the template engine about where to place the generated content.
You don’t have to use content for the block name, and you can use more than one block. In addition, you can also include other template files if you want to break up the layout template even further. I modified *layout.jade* to include a header rather than the markup directly in the layout file:
doctype 5
html(lang="en")
include header
body
block content
I then defined the header content in a file named *header.jade*, with the following:
head
title #{title}
meta(charset="utf-8")
There are two things to note in the new *layout.jade* and *header.jade* code.
First, the include directive is relative. If you split the views into the following subdirectory structure:
/views
/widgets
layout.jade
/standard
header.jade
you’d use the following to include the header template in the layout file:
include standard/header
The file doesn’t have to be Jade, either—it could be HTML, in which case you’ll need to use the file extension:
include standard/header.html
Second, do not use indentation in the *header.jade* file. The indentation comes in from the parent file and doesn’t need to be duplicated in the included template file. In fact, if you do so, your template will generate an error.
Now that we’ve defined the layout template, it’s time to convert the EJS views into Jade.
### Note
Now is also the time you might consider swapping the static Add Widget form file for a dynamic one so that it can also take advantage of the new layout template.
## Converting the Widget Views into Jade Templates
The first view to convert from EJS to Jade is the *added.ejs* template, which provides feedback for the successful addition of a new widget. The template file is named *added.jade* (the name must be the same, though the extension different, to work with the existing controller code), and it makes use of the newly defined *layout.jade* file, as shown in Example 8-10.
Example 8-10. The “Widget added” confirmation page converted to Jade
extends layout
block content
h1 #{title} | #{widget.name}
ul
li id: #{widget.id}
li Name: #{widget.name}
li Price: $#{widget.price.toFixed()}
li Desc: #{widget.desc}
Notice how we can still use the toFixed method to format the price output.
The block is named content, so it integrates with the expectations of the block name set in the *layout.jade* file. The simplified HTML for an h1 header and an unordered list is integrated with the data passed from the controller—in this case, the widget object.
Running the widget application and adding a new widget generates the same HTML as generated with the EJS: a header and a list of widget properties for the newly added widget—all without our changing any of the controller code.
Converting the main widgets display view
The next template to convert is the index template that lists all of the widgets in a table, with options to edit or delete the widget as table columns. We’re going to try something a little different with this template. We’re going to separate the table row generation for each widget from the overall table generation.
First, we’ll create the *row.jade* template. It assumes that the data is an object named widget, with the properties accessible off the object:
tr
td #{widget.id}
td #{widget.name}
td $#{widget.price.toFixed(2)}
td #{widget.desc}
td
a(href='/widgets/#{widget.id}/edit') Edit
td
a(href='/widgets/#{widget.id}') Delete
Each link *must* be included on a separate line; otherwise, we lose the nesting indication with the indentation.
The main *index.jade* file that references the newly created row template is shown in Example 8-11. This template introduces two new Jade constructs: a conditional test and an iteration. The conditional is used to test for the length property on the widgets object, assuring us we’re dealing with an array. The iteration construct uses an abbreviated form of the Array.forEach method, where the array is traversed and each instance is assigned to the new variable, widget.
Example 8-11. The index template for creating a table of widgets
extends layout
block content
table
caption Widgets
if widgets.length
tr
th ID
th Name
th Price
th Description
th
th
each widget in widgets
include row
This is a whole lot less work than having to manually enter all those angle brackets, especially with the table headers (th). The results of the Jade template are identical to those from the EJS template: an HTML table with widgets in each row, and the ability to edit or delete each widget.
Converting the edit and deletion forms
The next two conversions are working with forms.
First, we’ll convert the edit template into one using Jade. The only really tricky part of the conversion is handling all the various attributes. Though you can separate them by a space, I find it helps to list each on a separate line. This way, you can see that you’ve properly included all the attributes and can easily double-check their values. Example 8-12 contains the rather long template for the Edit Widget form.
Example 8-12. Jade template for the Edit Widget form
extends layout
block content
h1 Edit #{widget.name}
form(method="POST"
action="/widgets/#{widget.id}"
enctype="application/x-www-form-urlencoded")
p Widget Name:
input(type="text"
name="widgetname"
id="widgetname"
size="25"
value="#{widget.name}"
required)
p Widget Price:
input(type="text"
name="widgetprice"
id="widgetprice"
size="25"
value="#{widget.price}"
pattern="="^\$?([0-9]{1,3},([0-9]{3},)*[0-9]{3}|[0-9]+)(.[0-9][0-9])?$"
required)
p Widget Description:
br
textarea(name="widgetdesc"
id="widgetdesc"
cols="20"
rows="5") #{widget.desc}
p
input(type="hidden"
name="_method"
id="_method"
value="put")
input(type="submit"
name="submit"
id="submit"
value="Submit")
input(type="reset"
name="reset"
id="reset"
value="reset")
During the conversion of the Show Widget page, I noticed that the top of the page is basically a repeat of what is displayed in the *added.jade* template from Example 8-10: an unordered list with all of the widget’s properties. Another opportunity to simplify!
I created a new template, *widget.jade*, that just displays the widget information as an unordered list:
ul
li id: #{widget.id}
li Name: #{widget.name}
li Price: $#{widget.price.toFixed(2)}
li Desc: #{widget.desc}
I then modified the *added.jade* file from Example 8-10 to use this new template:
extends layout
block content
h1 #{title} | #{widget.name}
include widget
The new Show Widget template also makes use of the new *widget.jade* template, as demonstrated in Example 8-13.
Example 8-13. The new Show Widget template in Jade
extends layout
block content
h1 #{widget.name}
include widget
form(method="POST"
action="/widgets/#{widget.id}"
enctype="application/x-www-form-urlencoded")
input(type="hidden"
name="_method"
id="_method"
value="delete")
input(type="submit"
name="submit"
id="submit"
value="Delete Widget")
You can see how modularizing the templates makes each template that much cleaner, and thus easier to maintain.
With the newly modularized template, we can now show and delete a specific widget...and that leads to a quirk where the Jade template differs from the EJS template.
In the widget application, when widgets are deleted, they are deleted *in place*. This means the array element is basically set to null, so that the widget location in the array is maintained relative to its identifier. This in-place maintenance doesn’t cause a problem when we add and delete widgets and display them in the index page in EJS, but it *does* cause a problem with Jade: we get an error about missing properties, because it doesn’t filter out null array elements like the EJS template processing does.
This is trivially easy to fix. As shown in Example 8-11, just add another conditional test to the Jade markup in the *index.jade* file to make sure the widget object exists (i.e., is not null):
extends layout
block content
table
caption Widgets
if widgets.length
tr
th ID
th Name
th Price
th Description
th
th
each widget in widgets
if widget
include row
And now, all of the template views have been converted to Jade, and the application is complete. (Well, until we add in the data portion in Chapter 10.)
But while the application is complete, it’s not very attractive. Of course, it’s easy enough to add a stylesheet into the header to modify the presentation of all the elements, but we’ll also briefly take a look at another approach: using Stylus.
# Incorporating Stylus for Simplified CSS
It’s a simple matter to include a stylesheet into any of the template files. In the Jade template file, we can add one to the *header.jade* file:
head
title #{title}
meta(charset="utf-8")
link(type="text/css"
rel="stylesheet"
href="/stylesheets/main.css"
media="all")
The stylesheet is now immediately available to all of our application views because they all use the layout template, which uses this header.
### Note
Now you can definitely see the value of converting the static *new.html* file into a template view: making the change to the header doesn’t impact it, and it has to be manually edited.
If you’ve grown fond of the syntax for Jade, though, you can use a variation of this syntax for CSS by incorporating the use of Stylus into your application.
To use Stylus, first install it with npm:
npm install stylus
Stylus is not like the Jade template system. It doesn’t create dynamic CSS views. What it does is generate static stylesheets from a Stylus template the first time the template is accessed, or each time the template is modified.
### Note
Read more about Stylus at http://learnboost.github.com/stylus/docs/js.html.
To incorporate Stylus into the widget application, we have to include the module within the main application file’s (*app.js*) require section. Then we have to include the Stylus middleware along with the others in the configure method call, passing in an option with the source for the Stylus templates, and the destination where the compiled stylesheets are to be placed. Example 8-14 shows the newly modified *app.js* file with these changes in bold text.
Example 8-14. Adding Stylus CSS template support to the widget application
var express = require('express')
, routes = require('./routes')
, map = require('./maproutecontroller')
, http = require('http')
**, stylus = require('stylus')**
, app = express();
app.configure(function(){
app.set('views', __dirname + '/views');
app.set('view engine', 'jade');
app.use(express.favicon());
app.use(express.logger('dev'));
app.use(express.staticCache({maxObjects: 100, maxLength: 512}));**app.use(stylus.middleware({src: __dirname + '/views', dest: __dirname + '/public'}));**
app.use(express.static(__dirname + '/public'));
app.use(express.bodyParser());
app.use(express.methodOverride());
app.use(app.router);
app.use(express.directory(__dirname + '/public'));
app.use(function(req, res, next){
throw new Error(req.url + ' not found');
});
app.use(function(err, req, res, next) {
console.log(err);
res.send(err.message);
});
});
app.configure('development', function(){
app.use(express.errorHandler());
});
app.get('/', routes.index);
var prefixes = ['widgets'];
// map route to controller
prefixes.forEach(function(prefix) {
map.mapRoute(app, prefix);
});
http.createServer(app).listen(3000);
console.log("Express server listening on port 3000");
The first time you access the widget application after making this change, you may notice a very brief hesitation. The reason is that the Stylus module is generating the stylesheet—an event that happens when a new or modified stylesheet template is added and the application is restarted. After the stylesheet has been generated, though, it’s the generated copy that’s served up—it isn’t recompiled with every page access.
### Note
You will need to restart your Express application if you make changes to the stylesheet template.
The Stylus stylesheet templates all have the same extension: *.styl*. The source directory is set to *views*, but it expects the stylesheet templates to be in a *stylesheets* directory under *views*. When it generates the static stylesheets, it places them in a *stylesheets* directory under the destination directory (in this case, */public*).
After working with Jade, you should find the Stylus syntax very familiar. Again, each element that is being styled is listed, followed by the indented stylesheet setting. The syntax strips away the need for curly braces, colons, and semicolons.
For example, to change the background color for the web page to yellow, and the text color to red, use the following for the Stylus template:
body
background-color yellow
color red
If you want elements to share settings, list them on the same line with a comma between them, just like you would with CSS:
p, tr
background-color yellow
color red
Or you can list the elements on separate lines:
p
tr
background-color yellow
color red
If you want to use a pseudoclass, such as :hover or :visited, use the following syntax:
textarea
input
background-color #fff
&:hover
background-color cyan
The ampersand (&) represents the parent selector. All combined, the following Stylus template:
Combined, the following:
p, tr
background-color yellow
color red
textarea
input
background-color #fff
&:hover
background-color cyan
generates the following static CSS file:
p,
tr {
background-color: #ff0;
color: #f00;
}
textarea,
input {
background-color: #fff;
}
textarea:hover,
input:hover {
background-color: #0ff;
}
There’s more to working with Stylus, but I’ll leave that to you as an off-book exercise. The Stylus website provides a good set of documentation for the syntax. Before leaving this chapter, though, we’ll create a Stylus stylesheet that enhances the presentation of the widget application.
Specifically, we’ll add a border and spacing to the HTML table element in the index widget listing page. We’re also going to change the font for the headers and remove the bullet indicators for the unordered list. These are small changes, but they’ll be a start in refining the appearance of the widget application.
The new stylesheet template is shown in Example 8-15. It’s not terribly big and doesn’t use any involved CSS. It’s basic stuff, but it does improve—smooth out a bit—the overall appearance of the application.
Example 8-15. Stylus template for widget application
body
margin 50px
table
width 90%
border-collapse collapse
table, td, th, caption
border 1px solid black
td
padding 20px
caption
font-size larger
background-color yellow
padding 10px
h1
font 1.5em Georgia, serif
ul
list-style-type none
form
margin 20px
padding 20px
Figure 8-5 shows the index page after several widgets have been added. Again, it’s nothing fancy, but the data content is a lot easier to read with the new stylesheet.
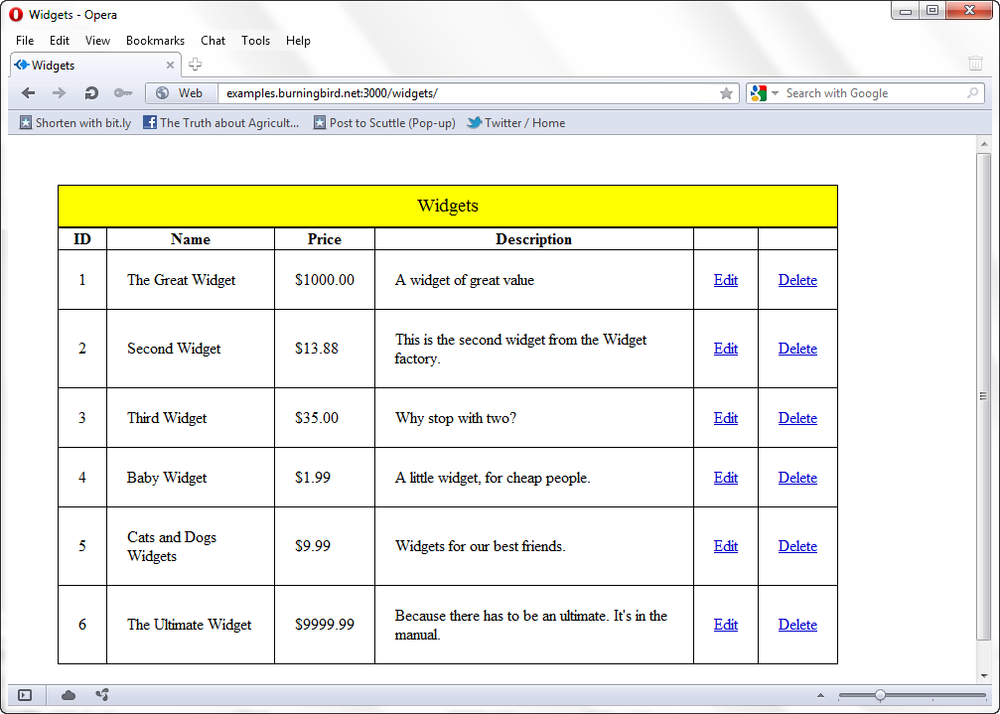
Figure 8-5. Widget application index page with Stylus styling