Learning Node Moving to the Server-Side (Powers Shelley.) (Z-Library)
CHAPTER 7: Networking, Sockets, and Security
finish packet (FIN), that is sent by a socket to signal that the transmission is done.
Think of two people talking by walkie-talkie. The walki-talkies are the end-points, the sockets of the communication. When two or more people want to speak to each other, they have to tune into the same radio frequency. Then when one person wants to communicate with the other, they push a button on the walki-talkie, and connect to the appropriate person using some form of identification. They also use the word “over” to signal that they’re no longer talking, but listening, instead. The other person pushes the talk button on their walkie-talkie, acknowledges the communication, and again using “over” to sig-nal they’re in listening mode.
The communication continues until one person signals “over and out”, that the communication is finished. Only one person can talk at a time. Walkie-talkie communication streams are known as half-duplex , because communication can only occur in one direction at a time. *Full-duplex communication streams al-*lows two-way communication.
We’ve already worked with half and full-duplex streams, in Chapter 6. The streams used to write to, and read from, files were examples of half-duplex streams: the streams supported either the readable interface, or the writable interface, but not both at the same time. The zlib compression stream is an ex-ample of a full-duplex stream, allowing simultaneous reading and writing. The same applies to networked streams (TCP), as well as encrypted (Crypto). We’ll look at Crypto later in the chapter, but first, we’ll dive into TCP.
TCP Sockets and Servers
TCP provides the communication platform for most Internet applications, such as web service and email. It provides a way of reliably transmitting data be-tween client and server sockets. TCP provides the infrastructure on which the application layer, such as HTTP, resides.
We can create a TCP server and client, just as we did the HTTP ones. Creat-ing the TCP server is a little diferent than creating an HTTP server. Rather than passing a requestListener to the server creation function, with its separate response and request objects, the TCP callback function’s sole argument is an instance of a socket that can both send, and receive.
To better demonstrate how TCP works, Example 7-1 contains the code to create a TCP server. Once the server socket is created, it listens for two events: when data is received and when the client closes the connection. It then prints out the data it received to the console, and repeats the data back to the client.
The TCP server also attaches an event handler for both the listening event and an error . In previous chapters, I just plopped a console.log() message afer the server is created, following pretty standard practice in Node.
Servers, Streams, and Sockets
However, since the listen() event is asynchronous, technically this practice is incorrect. Instead, you can incorporate a message in the callback function for the listen function, or you can do what I’m doing here, which is attach an event handler to the listening event, and correctly providing feedback.
In addition, I’m also providing more sophisticated error handling, modeled afer that in the Node documentation. The application is processing an error event, and if the error is because the port is currently in use, it waits a small amount of time, and tries again. For other errors—such as accessing a port like 80, which requires special privileges—the full error message is printed out to the console.
EXAMPLE 7-1. A simple TCP server, with a socket listening for client communication on port 8124
var net = require('net');
const PORT = 8124;
var server = net.createServer(function(conn) {
console.log('connected');
conn.on('data', function (data) {
console.log(data + ' from ' + conn.remoteAddress + ' ' + conn.remotePort);
conn.write('Repeating: ' + data);
});
conn.on('close', function() {
console.log('client closed connection');
});
}).listen(PORT);
server.on('listening', function() {
console.log('listening on ' + PORT);
});
server.on('error', function(err){
if (err.code == 'EADDRINUSE') {
console.warn('Address in use, retrying...');
setTimeout(() => {
server.close();
server.listen(PORT);
}, 1000);
}
else {
console.error(err);
}
});
CHAPTER 7: Networking, Sockets, and Security
To test the server you can use a TCP client application such as the netcat utility (nc) in Linux or the Mac OS, or an equivalent Windows application. Using netcat, the following connects to the server application at port 8124, writing data from a text file to the server:
nc burningbird.net 8124 < mydata.txt
In Windows, there are TCP tools, such as SocketTest , you can use. You can pass in an optional parameters object, consisting of two values:
pauseOnConnect and allowHalfOpen , when creating the socket. The default value for both is false :
{ allowHalfOpen: false,
pauseOnConnect: false }
Setting allowHalfOpen to true instructs the socket not to send a FIN when it receives a FIN packet from the client. Doing this keeps the socket open for writ-ing (not reading). To close the socket, you must use the end() function. Setting pauseOnConnect to true allows the connection to be passed, but no data is read. To begin reading data, call the resume() method on the socket.
Rather than using a tool to test the server, you can create your own TCP cli-ent application. The TCP client is just as simple to create as the server, as shown in Example 7-2 . The call to setEncoding() on the client changes the encoding for the received data. The data is transmitted as a bufer, but we can use setEncoding() to read it as a utf8 string. The socket’s write() method is used to transmit the data. It also attaches listener functions to two events: data , for received data, and close , in case the server closes the connection. EXAMPLE 7-2. The client socket sending data to the TCP server
var net = require('net');
var client = new net.Socket();
client.setEncoding('utf8');
// connect to server
client.connect ('8124','localhost', function () {
console.log('connected to server');
client.write('Who needs a browser to communicate?');
});
// when receive data, send to server
process.stdin.on('data', function (data) {
client.write(data);
});
Servers, Streams, and Sockets
// when receive data back, print to console
client.on('data',function(data) {
console.log(data);
});
// when server closed
client.on('close',function() {
console.log('connection is closed');
});
The data being transmitted between the two sockets is typed in at the termi-nal, and transmitted when you press Enter. The client application sends the text you type, and the TCP server writes out to the console when it receives it. The server repeats the message back to the client, which in turn writes the message out to the console. The server also prints out the IP address and port for the client using the socket’s remoteAddress and remotePort properties. Follow-ing is the console output for the server afer several strings were sent from the client:
Hey, hey, hey, hey-now.
from ::ffff:127.0.0.1 57251
Don't be mean, we don't have to be mean.
from ::ffff:127.0.0.1 57251
Cuz remember, no matter where you go,
from ::ffff:127.0.0.1 57251
there you are.
from ::ffff:127.0.0.1 57251
The connection between the client and server is maintained until you kill one or the other using Ctrl-C. Whichever socket is still open receives a close event that’s printed out to the console. The server can also serve more than one connection from more than one client, since all the relevant functions are asyn-chronous.
I P V 4 M A P P E D T O I P V 6 A D D R E S S E S
The sample output from running the client/server TCP applications in this section demonstrate an IPv4 address mapped to IPv6, with the addi-tion of : :ffff .
As I mentioned earlier, TCP is the underlying transport mechanism for much of the communication functionality we use on the Internet today, including HTTP. Which means that, instead of binding to a port with an HTTP server, we can bind directly to a socket.
CHAPTER 7: Networking, Sockets, and Security
To demonstrate, I modified the TCP server from the earlier examples, but in-stead of binding to a port, the new server binds to a Unix socket, as shown in Example 7-3 . I also had to modify the error handling to unlink the Unix socket if the application is restarted, and the socket is already in use. In a production en-vironment, you’d want to make sure no other clients are using the socket be-fore you would do something so abrupt.
EXAMPLE 7-3. TCP server bound to a Unix socket
var net = require('net');
var fs = require('fs');
const unixsocket = '/home/examples/public_html/nodesocket'; var server = net.createServer(function(conn) {
console.log('connected');
conn.on('data', function (data) {
conn.write('Repeating: ' + data);
});
conn.on('close', function() {
console.log('client closed connection');
});
}).listen(unixsocket);
server.on('listening', function() {
console.log('listening on ' + unixsocket);
});
// if exit and restart server, must unlink socket
server.on('error',function(err) {
if (err.code == 'EADDRINUSE') {
fs.unlink(unixsocket, function() {
server.listen(unixsocket);
});
} else {
console.log(err);
}
});
process.on('uncaughtException', function (err) {
console.log(err);
});
C H E C K I F A N O T H E R I N S T A N C E O F T H E S E R V E R I S R U N N I N G
Before unlinking the socket, you can check to see if another instance of the server is running. A solution at Stack Overflow provides an alterna-tive clean up technique accounting for this situation.
The client application is shown in Example 7-4 . It’s not that much diferent than the earlier client that communicated with the port. The only diference is adjusting for the connection point.
EXAMPLE 7-4. Connecting to the Unix socket and printing out received data var net = require('net');
var client = new net.Socket();
client.setEncoding('utf8');
// connect to server
client.connect ('/home/examples/public_html/nodesocket', function () { console.log('connected to server');
client.write('Who needs a browser to communicate?');
});
// when receive data, send to server
process.stdin.on('data', function (data) {
client.write(data);
});
// when receive data back, print to console
client.on('data',function(data) {
console.log(data);
});
// when server closed
client.on('close',function() {
console.log('connection is closed');
});
??? covers the SSL version of HTTP, HTTPS , along with Crypto and TLS/ SSL.
CHAPTER 7: Networking, Sockets, and Security
UDP/Datagram Socket
TCP requires a dedicated connection between the two endpoints of the com-munication. UDP is a connectionless protocol, which means there’s no guaran-tee of a connection between the two endpoints. For this reason, UDP is less reli-able and robust than TCP. On the other hand, UDP is generally faster than TCP, which makes it more popular for real-time uses, as well as technologies such as VoIP (Voice over Internet Protocol), where the TCP connection requirements could adversely impact the quality of the signal.
Node core supports both types of sockets. In the last section, I demonstrated the TCP functionality. Now, it’s UDP’s turn.
The UDP module identifier is dgram :
require ('dgram');
To create a UDP socket, use the createSocket method, passing in the type of socket—either udp4 or udp6 . You can also pass in a callback function to listen for events. Unlike messages sent with TCP, messages sent using UDP must be sent as bufers, not strings.
Example 7-5 contains the code for a demonstration UDP client. In it, data is accessed via process.stdin , and then sent, as is, via the UDP socket. Note that we don’t have to set the encoding for the string, since the UDP socket ac-cepts only a bufer and the process.stdin data is a bufer. We do, however, have to convert the bufer to a string, using the bufer’s toString method, in order to get a meaningful string for the console.log method call that echoes the input.
EXAMPLE 7-5. A datagram client that sends messages typed into the terminal var dgram = require('dgram');
var client = dgram.createSocket("udp4");
process.stdin.on('data', function (data) {
console.log(data.toString('utf8'));
client.send(data, 0, data.length, 8124, "examples.burningbird.net", function (err, bytes) {
if (err)
console.error('error: ' + err);
else
console.log('successful');
});
});
Guards at the Gate
The UDP server, shown in Example 7-6 , is even simpler than the client. All the server application does is create the socket, bind it to a specific port (8124), and listen for the message event. When a message arrives, the application prints it out using console.log , along with the IP address and port of the sender. No encoding is necessary to print out the message—it’s automatically converted from a bufer to a string.
We didn’t have to bind the socket to a port. However, without the binding, the socket would attempt to listen in on every port.
EXAMPLE 7-6. A UDP socket server, bound to port 8124, listening for messages var dgram = require('dgram');
var server = dgram.createSocket("udp4");
server.on ("message", function(msg, rinfo) {
console.log("Message: " + msg + " from " + rinfo.address + ":" + rinfo.port);
});
server.bind(8124);
I didn’t call the close method on either the client or the server afer send-ing/receiving the message. However, no connection is being maintained be-tween the client and server—just the sockets capable of sending a message and receiving communication.
Guards at the Gate
Security in web applications goes beyond ensuring that people don’t have ac-cess to the application server. Security can be complex, and even a little intimi-dating. Luckily, when it comes to Node applications, several of the components we need for security have already been created. We just need to plug them in, in the right place and at the right time.
Setting Up TLS/SSL
Secure, tamper-resistant communication between a client and a server occurs over SSL (Secure Sockets Layer), and its upgrade, TLS (Transport Layer Securi-ty). TLS/SSL provides the underlying encryption for HTTPS, which I cover in the next section. However, before we can develop for HTTPS, we have to do some environment setup.
CHAPTER 7: Networking, Sockets, and Security
A TLS/SSL connection requires a handshake between client and server. Dur-*ing the handshake, the client (typically a browser) lets the server know what kind of security functions it supports. The server picks a function and then sends through an *SSL certificate , which includes a public key. The client con-firms the certificate and generates a random number using the server’s key, sending it back to the server. The server then uses its private key to decrypt the number, which in turn is used to enable the secure communication.
For all this to work, you’ll need to generate both the public and private key, as well as the certificate. For a production system, the certificate would be sign-ed by a trusted authority , such as our domain registrars, but for development purposes you can make use of a self-signed certificate . Doing so generates a rather significant warning in the browser, but since the development site isn’t being accessed by users, there won’t be an issue.
P R E V E N T I N G S E L F - S I G N E D C E R T I F I C A T E W A R N I N G S
If you’re using a self-signed certificate, you can avoid browser warnings if you access the Node application via localhost (i.e. https://localhost:
8124). You can also avoid using self-signed certificates without the cost of a commercial signing authority by using Lets Encrypt , currently in open beta. The site provides documentation for setting up the certifi-cate.
The tool used to generate the necessary files is OpenSSL. If you’re using Li-nux, it should already be installed; there’s a binary installation for Windows, and Apple is pursuing its own Crypto library. In this section, I’m just covering setting up a Linux environment.
To start, type the following at the command line:
openssl genrsa -des3 -out site.key 1024
The command generates the private key, encrypted with Triple-DES and stored in PEM (privacy-enhanced mail) format, making it ASCII readable.
You’ll be prompted for a password, and you’ll need it for the next task, creat-ing a certificate-signing request (CSR).
When generating the CSR, you’ll be prompted for the password you just cre-ated. You’ll also be asked a lot of questions, including the country designation (such as US for United States), your state or province, city name, company name and organization, and email address. The question of most importance is the one asking for the Common Name. This is asking for the hostname of the site—for example, burningbird.net or yourcompany.com . Provide the hostname where the application is being served. In my example code, I created a certifi-cate for examples.burningbird.net .
Guards at the Gate
openssl req -new -key site.key -out site.csr
The private key wants a passphrase . The problem is, every time you start up the server you’ll have to provide this passphrase, which is an issue in a produc-tion system. In the next step, you’ll remove the passphrase from the key. First, rename the key:
mv site.key site.key.org
Then type:
openssl rsa -in site.key.org -out site.key
If you do remove the passphrase, make sure your server is secure by ensur-ing that the file is readable only by root.
The next task is to generate the self-signed certificate. The following com-mand creates one that’s good only for 365 days:
openssl x509 -req -days 365 -in site.csr -signkey site.key -out final.crt Now you have all the components you need in order to use TLS/SSL and
HTTPS.
Working with HTTPS
Web pages that ask for user login or credit card information had better be served as HTTPS, or we should give the site a pass. HTTPS is a variation of the HTTP protocol, except that it’s also combined with SSL to ensure that the web-site is who and what we think it is, that the data is encrypted during transit, and the data arrives intact and without any tampering.
Adding support for HTTPS is similar to adding support for HTTP, with the ad-dition of an options object that provides the public encryption key, and the signed certificate. The default port for an HTTPS server difers, too: HTTP is served via port 80 by default, while HTTPS is served via port 443.
A V O I D I N G T H E P O R T N U M B E R
One advantage to using SSL with your Node application is the default port for HTTPS is 443, which means you don’t have to specify the port number when accessing the application, and not conflict with your Apache or other web server. Unless you’re also utilizing HTTPS with your non-Node web server, of course.
CHAPTER 7: Networking, Sockets, and Security
Example 7-7 demonstrates a very basic HTTPS server. It does little beyond sending a variation of our traditional Hello, World message to the browser. EXAMPLE 7-7. Creating a very simple HTTPS server
var fs = require("fs"),
https = require("https");
var privateKey = fs.readFileSync('site.key').toString(); var certificate = fs.readFileSync('final.crt').toString(); var options = {
key: privateKey,
cert: certificate
};
https.createServer(options, function(req,res) {
res.writeHead(200);
res.end("Hello Secure World\n");
}).listen(443);
The public key and certificate are opened, and their contents are read syn-chronously. The data is attached to the options object, passed as the first pa-rameter in the https.createServer method. The callback function for the same method is the one we’re used to, with the server request and response object passed as parameters.
When you run the Node application, you’ll need to do so with root permis-sions. That’s because the server is running bound to the default of port 443. Binding to any port less than 1024 requires root privilege. You can run it using another port, such as 3000, and it works fine, except when you access the site, you’ll need to use the port:
https://examples.burningbird.net:3000
Accessing the page demonstrates what happens when we use a self-signed certificate, as shown in Figure 7-1 . It’s easy to see why a self-signed certificate should be used only during testing. Accessing the page using localhost also dis-ables the security warning.

FIGURE 7-1
What happens when
you use Edge to
access a website
using HTTPS with a
self-signed
certifcate
The browser address bar demonstrates another way that the browser sig-nals that the site’s certificate can’t be trusted, as shown in Figure 7-2 . Rather than displaying a lock indicating that the site is being accessed via HTTPS, it displays a lock with a red *x showing that the certificate can’t be trusted. Click-*ing the icon opens an information window with more details about the certifi-cate.

FIGURE 7-2
More information
about the certifcate
is displayed when
the lock icon is
clicked, as
demonstrated in
CHAPTER 7: Networking, Sockets, and Security
Encrypting communication isn’t the only time we use encryption in a web application. We also use it to store user passwords and other sensitive data. The Crypto Module
Node provides a module used for encryption, Crypto, which is an interface for OpenSSL functionality. This includes wrappers for OpenSSL’s hash, HMAC, ci-pher, decipher, sign, and verify functions. The Node component of the technol-ogy is actually rather simple to use but there is a strong underlying assumption that the Node developer knows and understands OpenSSL and what all the var-ious functions are.
B E C O M E F A M I L I A R W I T H O P E N S S L
I cannot recommend strongly enough that you spend time becoming fa-miliar with OpenSSL before working with Node’s Crypto module. You can explore OpenSSL’s documentation , and you can also access a free book on OpenSSL, OpenSSL Cookbook , by Ivan Risti ć .
I’m covering a relatively straight-forward use of the Crypto module to en-cyrpt a password that’s stored in a database, using OpenSSL’s hash functionali-ty. The same type of functionality can also be used to create a hash for use as a checksum , to ensure that data that’s stored or transmitted hasn’t been corrup-ted in the process.
M Y S Q L
The example in this section makes use of MySQL. For more information on the node-myself module used in this section, see the module’s Git-hub repository . If you don’t have access to MySQL, you can store the username, password, and salt in a local file, and modify the example ac-cordingly.
One of the most common tasks a web application has to support is also one of the most vulnerable: storing a user’s login information, including password. It probably only took five minutes afer the first username and password were stored in plain text in a web application database before someone came along, cracked the site, got the login information, and had his merry way with it.
You do not store passwords in plain text. Luckily, you don’t need to store passwords in plain text with Node’s Crypto module.
You can use the Crypto module’s createHash method to encrypt the pass-word. An example is the following, which creates the hash using the sha1 algo-
Guards at the Gate
rithm, uses the hash to encode a password, and then extracts the digest of the encrypted data to store in the database:
var hashpassword = crypto.createHash('sha1')
.update(password)
.digest('hex');
The digest encoding is set to hexadecimal. By default, encoding is binary, and base64 can also be used.
Many applications use a hash for this purpose. However, there’s a problem with storing plain hashed passwords in a database, a problem that goes by the innocuous name of rainbow table .
Put simply, a rainbow table is basically a table of precomputed hash values for every possible combination of characters. So, even if you have a password that you’re sure can’t be cracked—and let’s be honest, most of us rarely do— chances are, the sequence of characters has a place somewhere in a rainbow table, which makes it much simpler to determine what your password is.
The way around the rainbow table is with *salt (no, not the crystalline varie-*ty), a unique generated value that is concatenated to the password before en-cryption. It can be a single value that is used with all the passwords and stored securely on the server. A better option, though, is to generate a unique salt for each user password, and then store it with the password. True, the salt can also be stolen at the same time as the password, but it would still require the person attempting to crack the password to generate a rainbow table specifically for the one and only password—adding immensely to the complexity of cracking any individual password.
Example 7-8 is a simple application that takes a username and a password passed as command-line arguments, encrypts the password, and then stores both as a new user in a MySQL database table. I’m using MySQL rather than any other database because it is ubiquitous on most systems, and a system with which most people are familiar.
To follow along with the example, use the node-mysql module by installing it as follows:
npm install node-mysql
The table is created with the following SQL:
CREATE TABLE user (userid INT NOT NULL AUTO_INCREMENT, PRIMARY KEY(userid), username VARCHAR(400) NOT NULL, password VARCHAR(400) NOT NULL, salt DOUBLE NOT NULL );
CHAPTER 7: Networking, Sockets, and Security
The salt consists of a date value multiplied by a random number and roun-ded. It’s concatenated to the password before the resulting string is encrypted. All the user data is then inserted into the MySQL user table.
EXAMPLE 7-8. Using Crypto’s createHash method and a salt to encrypt a password var mysql = require('mysql'),
crypto = require('crypto');
var connection = mysql.createConnection({
host: 'localhost',
user: 'username',
password: 'userpass'
});
connection.connect();
connection.query('USE nodedatabase');
var username = process.argv[2];
var password = process.argv[3];
var salt = Math.round((new Date().valueOf() * Math.random())) + ''; var hashpassword = crypto.createHash('sha512')
.update(salt + password, 'utf8')
.digest('hex');
// create user record
connection.query('INSERT INTO user ' +
'SET username = ?, password = ?, salt = ?
[username, hashpassword, salt], function(err, result) { if (err) console.error(err);
connection.end();
});
Following the code from the top, first a connection is established with the database. Next, the database with the newly created table is selection. The username and password are pulled in from the command line, and then the crypto magic begins.
The salt is generated, and passed into the function to create the the hash, using the sha512 algorithm. Functions to update the password with the salt, and set the hash encoding are chained to the function to create the hash. The newly encrypted password is then inserted into the newly created table, along with the username.
The application to test a username and password, shown in Example 7-9 , queries the database for the password and salt based on the username. It uses the salt to, again, encrypt the password. Once the password has been encryp-
Guards at the Gate
ted, it’s compared to the password stored in the database. If the two don’t match, the user isn’t validated. If they match, then the user’s in.
EXAMPLE 7-9. Checking a username and a password that has been encrypted var mysql = require('mysql'),
crypto = require('crypto');
var connection = mysql.createConnection({
user: 'username',
password: 'userpass'
});
connection.query('USE nodedatabase');
var username = process.argv[2];
var password = process.argv[3];
connection.query('SELECT password, salt FROM user WHERE username = ?', [username], function(err, result, fields) {
if (err) return console.log(err);
var newhash = crypto.createHash('sha512')
.update(result[0].salt + password, 'utf8')
.digest('hex');
if (result[0].password === newhash) {
console.log("OK, you're cool");
} else {
console.log("Your password is wrong. Try again.");
}
connection.end();
});
Trying out the applications, we first pass in a username of Michael , with a password of apple*frk13* :
node password.js Michael apple*frk13*
We then check the same username and password:
node check.js Michael apple*frk13*
and get back the expected result:
OK, you're cool
Trying it again, but with a diferent password:
CHAPTER 7: Networking, Sockets, and Security
node check.js Michael badstuff
we get back the expected result again:
Your password is wrong. Try again
The crypto has can also be used in a stream. As an example, consider a checksum, which is an algorithmic way of determining if data has transmitted successfully. You can create a hash of the file, and pass this along with the file when transmitting it. The person who downloads the file can then use the hash to verify the accuracy of the transmission. The following code uses the pipe() function and the duplex nature of the Crypto functions to create such a hash.
var crypto = require('crypto');
var fs = require('fs');
var hash = crypto.createHash('sha256');
hash.setEncoding('hex');
var input = fs.createReadStream('main.txt');
var output = fs.createWriteStream('mainhash.txt');
input.pipe(hash).pipe(output);
You can also use md5 as the algorithm in order to generate a MD5 checksum, which has popular support in most environments.
var hash = crypto.createHash('md5');
Child Processes 8
Operating systems provide access to a great deal of functionality, but much of it is only accessible via the command line. It would be nice to be able to access this functionality from a Node application. That’s where child processes come in.
Node enables us to run a system command within a new child process, and listen in on its input/output. This includes being able to pass arguments to the command, and even pipe the results of one command to another. The next sev-eral sections explore this functionality in more detail.
All but the last example demonstrated in this chapter use Unix com-mands. They work on a Linux system, and should work in a Mac. They won’t, however, work in a Windows Command window.
child_process.spawn
There are four diferent techniques you can use to create a child process. The most common one is using the spawn method. This launches a command in a new process, passing in any arguments. In the following, we create a child pro-cess to call the Unix pwd command to print the current directory. The command takes no arguments:
var spawn = require('child_process').spawn,
pwd = spawn('pwd');
pwd.stdout.on('data', function (data) {
console.log('stdout: ' + data);
});
pwd.stderr.on('data', function (data) {
console.log('stderr: ' + data);
});
CHAPTER 8: Child Processes
pwd.on('close', function (code) {
console.log('child process exited with code ' + code); });
Notice the events that are captured on the child process’s stdout and stderr . If no error occurs, any output from the command is transmitted to the child process’s stdout , triggering a data event on the process. If an error oc-curs, such as in the following where we’re passing an invalid option to the com-mand:
var spawn = require('child_process').spawn,
pwd = spawn('pwd', ['-g']);
Then the error gets sent to stderr , which prints out the error to the console: stderr: pwd: invalid option -- 'g'
Try `pwd --help' for more information.
child process exited with code 1
The process exited with a code of 1 , which signifies that an error occurred. The exit code varies depending on the operating system and error. When no er-ror occurs, the child process exits with a code of 0 .
L I N E B U F F E R I N G
The Node documentation has issued a warning that some programs use line-buffered I/O internally. This could result in the data being sent to the program not being immediately consumed.
The earlier code demonstrated sending output to the child process’s stdout and stderr , but what about stdin ? The Node documentation for child pro-cesses includes an example of directing data to stdin . It’s used to emulate a Unix pipe (|) whereby the result of one command is immediately directed as in-put to another command. I adapted the example in order to demonstrate one of my favorite uses of the Unix pipe—being able to look through all subdirecto-ries, starting in the local directory, for a file with a specific word (in this case, test ) in its name:
find . -ls | grep test
Example 8-1 implements this functionality as child processes. Note that the first command, which performs the find , takes two arguments, while the sec-ond one takes just one: a term passed in via user input from stdin . Also note
child_process.spawn
that, unlike the example in the Node documentation, the grep child process’s stdout encoding is changed via setEncoding . Otherwise, when the data is printed out, it would be printed out as a bufer.
EXAMPLE 8-1. Using child processes to fnd fles in subdirectories with a given search term, “test”
var spawn = require('child_process').spawn,
find = spawn('find',['.','-ls']),
grep = spawn('grep',['test']);
grep.stdout.setEncoding('utf8');
// direct results of find to grep
find.stdout.on('data', function(data) {
grep.stdin.write(data);
});
// now run grep and output results
grep.stdout.on('data', function (data) {
console.log(data);
});
// error handling for both
find.stderr.on('data', function (data) {
console.log('grep stderr: ' + data);
});
grep.stderr.on('data', function (data) {
console.log('grep stderr: ' + data);
});
// and exit handling for both
find.on('close', function (code) {
if (code !== 0) {
console.log('find process exited with code ' + code); }
// go ahead and end grep process
grep.stdin.end();
});
grep.on('exit', function (code) {
if (code !== 0) {
console.log('grep process exited with code ' + code); }
});
When you run the application, you’ll get a listing of all files in the current di-rectory and any subdirectories that contain test in their filename.
CHAPTER 8: Child Processes
The child_process.spawnSync() is a synchronous version of the same function.
child_process.exec and child_process.execFile
In addition to spawning a child process, you can also use child_process.ex-ec() and child_process.execFile() to run a command. The child_pro-cess.exec() method is similar to child_process.spawn() , except that spawn() starts returning a stream as soon as the program executes, as noted in the previous section. The child_process.exec() function, like child_pro-cess.execFile() bufer the results. However, both spawn() and exec() spawn a shell to process the application. In this they difer from child_pro-cess.execFile() , which runs an application in a file, rather than running a command. This makes child_process.execFile() more eficient than ei-ther child_process.spawn() and child_process.exec() .
W I N D O W S F R I E N D L Y
The child_process.execFile() may be more efficient, but child_pro-cess.exec() is Windows friendly, as we’ll see later in the chapter.
The first parameter in the two bufered functions is either the command or the file and its location, depending on which function you choose; the second parameter is options for the command; and the third is a callback function. The callback function takes three arguments: error , stdout , and stderr . The data is bufered to stdout if no error occurs.
If the executable file contains:
!/usr/local/bin/node
console.log(global);
the following application prints out the bufered results:
var execfile = require('child_process').execFile,
child;
child = execfile('./app.js', function(error, stdout, stderr) { if (error == null) {
console.log('stdout: ' + stdout);
}
});
child_process.spawn
Which could also be accomplished using child_process.exec() : var exec = require('child_process').exec,
child;
child = exec('./app.js', function(error, stdout, stderr) { if (error) return console.error(error);
console.log('stdout: ' + stdout);
});
The child_process.exec() function takes three parameters: the command, an options object, and a callback. The options object takes several values, includ-ing encoding and the uid (user id) and gid (group identity) of the process. In Chapter 6, I created an application that copies a PNG file and adds a polaroid efect. It uses a child process (spawn) to access ImageMagick, a powerful command-line graphics tool. To run it using child_process.exec() , use the following, which incorporates a command-line argument:
var exec = require('child_process').exec,
child;
child = exec('./polaroid -s phoenix5a.png -f phoenixpolaroid.png', {cwd: 'snaps'}, function(error, stdout, stderr) {
if (error) return console.error(error);
console.log('stdout: ' + stdout);
});
The child_process.execFile() has an additional parameter, an array of command-line options to pass to the application. The equivalent application using this function is:
var execfile = require('child_process').execFile,
child;
child = execfile('./snapshot',
['-s', 'phoenix5a.png', '-f', 'phoenixpolaroid.png'],
{cwd: 'snaps'}, function(error, stdout, stderr) {
if (error) return console.error(error);
console.log('stdout: ' + stdout);
});
Note that the command-line arguments are separated into diferent array el-ements, with the value for each argument following the argument.
CHAPTER 8: Child Processes
There are synchronous versions— child_process.execSync() and child_process.execFileSync() —of both functions. The only diference is, of course, that these functions are synchronous rather than asynchronous. child_process.fork
The last child process method is child_process.fork() . This variation of spawn() is for spawning Node processes.
What sets the child_process.fork() process apart from the others is that there’s an actual communication channel established to the child process. Note, though, that each process requires a whole new instance of V8, which takes both time and memory.
One use of child_process.fork() is to spin of functionality to completely sep-arate Node instances. Let’s say you have a server on one Node instance, and you want to improve performance by integrating a second Node instance an-swering server requests. The Node documentation features just such an exam-ple using a TCP server. Could it also be used to create parallel HTTP servers? Yes, and using a similar approach.
With thanks to Jiale Hu for giving me the idea when I saw his demon-stration of parallel HTTP servers in separate instances. Jiale uses a TCP server to pass on the socket endpoints to two separate child HTTP
servers.
Similar to what is demonstrated in the Node documentation for a master/ child parallel TCP servers, in the master in my demonstration, I create the HTTP server, and then use the child_process.send() function to send the server to the child process.
var cp = require('child_process'),
cp1 = cp.fork('child2.js'),
http = require('http');
var server = http.createServer();
server.on('request', function (req, res) {
res.writeHead(200, {'Content-Type': 'text/plain'});
res.end('handled by parent\n');
});
server.on('listening', function () {
cp1.send('server', server);
});
Running a Child Process Application in Windows
server.listen(3000);
The child process receives the message with the HTTP server via the process object. It listens for the connection event, and when it receives it, triggers the connection event on the child HTTP server, passing to it the socket that forms the connection endpoint.
var http = require('http');
var server = http.createServer(function (req, res) {
res.writeHead(200, {'Content-Type': 'text/plain'});
res.end('handled by child\n');
});
process.on('message', function (msg, httpServer) {
if (msg === 'server') {
httpServer.on('connection', function (socket) {
server.emit('connection', socket);
});
}
});
If you test the application by accessing the domain with the 3000 port, you’ll see that sometimes the parent HTTP server handles the request, and some-times the child server does. If you check for running processes, you’ll see two: one for the parent, one for the child.
N O D E C L U S T E R
The Node Cluster module, which we’ll briefly look at in Chapter 11, is based on the Node child_process.fork() , in addition to other functional-ity.
Running a Child Process Application in Windows Earlier I warned you that child processes that invoke Unix system commands won’t work with Windows, and vice versa. I know this sounds obvious, but not everyone knows that, unlike with JavaScript in browsers, Node applications can behave diferently in diferent environments.
When working in Windows, you either need to use child_process.exec(), which spawns a shell in order to run the application, or you need to invoke whatever command you want to run via the Windows command interpret-er, cmd.exe .
CHAPTER 8: Child Processes
Example 8-2 demonstrates running a Windows command using the latter approach. In the application, Windows cmd.exe is used to create a directory listing, which is then printed out to the console via the data event handler. EXAMPLE 8-2. Running a child process application in Windows
var cmd = require('child_process').spawn('cmd', ['/c', 'dir\n']); cmd.stdout.on('data', function (data) {
console.log('stdout: ' + data);
});
cmd.stderr.on('data', function (data) {
console.log('stderr: ' + data);
});
cmd.on('exit', function (code) {
console.log('child process exited with code ' + code);
});
The /c flag passed as the first argument to cmd.exe instructs it to carry out the command and then terminate. The application doesn’t work without this flag. You especially don’t want to pass in the /K flag, which tells cmd.exe to execute the application and then remain, because then your application won’t terminate.
The equivalent using child_process.exec() is:
var cmd = require('child_process').exec('dir');
Node and ES6 9
Most of the examples in the book use JavaScript that has been widely available for many years. And it’s perfectly acceptable code, as well as very familiar to people who have been coding with the language in a browser environ-ment. One of the advantages to developing in a Node environment, though, is you can use more modern JavaScript, such as ECMAScript 2015 (or ES6, as most people call it), and even later versions, and not have to worry about compatibil-ity with browser or operating system. Many of the new language additions are an inherent part of the Node functionality.
In this chapter, we’re going to take a look at some of the newer JavaScript capabilities that are implemented, by default, with the versions of Node we’re covering in this book. We’ll look at how they can improve a Node application, and we’ll look at the gotchas we need to be aware of when we use the newer functionality.
L I S T I N G O F S U P P O R T E D E S 6 F U N C T I O N A L I T Y
I’m not covering all the ES6 functionality supported in Node, just the currently implemented bits that I’ve seen frequently used in Node appli-cations, modules, and examples. For a list of E6 shipped features, see the Node documentation .
Strict Mode
JavaScript strict mode has been around since ECMAScript 5, but its use directly impacts on the use of ES6 functionality, so I want to take a closer look at it be-fore diving into the ES6 features.
Strict mode is turned on when the following is added to the top of the Node application:
"use strict";
CHAPTER 9: Node and ES6
You can use single or double quotes.
There are other ways to force strict mode on all of the application’s depen-dent modules, such as the --strict_mode flag, or even using a module, but I recommend against this. Forcing strict mode on a module is likely to generate errors, or have unforeseen consequences. Just use it in your application or modules, where you control your code.
Strict mode has significant impacts on your code, including throwing errors if you don’t define a variable before using it, a function parameter can only be declared once, you can’t use a variable in an eval expression on the same lev-el as the eval call, and so on. But the one I want to specifically focus on is this section is you can’t use octal literals in strict mode.
In previous chapters, when setting the permissions for a file, you can’t use an octal literal for the permission:
"use strict";
var fs = require('fs');
fs.open('./new.txt','a+', 0666 , function(err, fd) {
if (err) return console.error(err);
fs.write(fd, 'First line', 'utf-8', function(err,written, str) { if (err) return console.error(err);
var buf = new Buffer(written);
fs.read(fd, buf, 0, written, 0, function (err, bytes, buffer) { if (err) return console.error(err);
console.log(buf.toString('utf8'));
});
});
});
In strict mode, this code generates a syntax error:
fs.open('./new.txt','a+',0666, function(err, fd) {
^^
SyntaxError: Octal literals are not allowed in strict mode. You can convert the octal literal to a safe format by replacing the leading
zero with ’0o'—a zero following by a lowercase ‘o’. The strict mode application works if the file permission is set using 0o666 , rather than 0666 :
fs.open('./new.txt','a+', 0o666 , function(err, fd) {
You can also convert the octal literal to a string, using quotes:
fs.open('./new.txt','a+','0666', function(err, fd) {
let and const
But this syntax is frowned on, so use the previously mentioned format. Strict mode is also necessary in order to use some ES6 extensions. If you
want to use ES6 classes, discussed later in the chapter, you must use strict mode. If you also want to use let , discussed next, you must use strict mode.
D I S C U S S I N G O C T A L L I T E R A L S
If you’re interested in exploring the roots for the octal literal conversion, I recommend reading an ES Discuss thread on the subject, Octal literals have their uses (you Unix haters skip this one) .
let and const
A limitation with JavaScript applications in the past is the inability to declare a variable at the block level. One of the most welcome additions to ES6 has to be the let statement. Using it, we can now declare a variable within a block, and its scope is restricted to that block. Using var , the value of 100 is printed out in the following:
if (true) {
var sum = 100;
}
console.log(sum); // prints out 100
When you use let :
"use strict";
if (true) {
let sum = 100;
}
console.log(sum);
You get a completely diferent result:
ReferenceError: sum is not defined
The application must be in strict mode to use let .
Aside from block-level scoping, let difers from var in that variables de-clared with var are *hoisted to the top of the execution scope before any state-*ments are executed. The following results in undefined printed out with the console, but no runtime error occurs:
CHAPTER 9: Node and ES6
console.log(test);
var test;
While the following code using let results in a runtime ReferenceError stating that test isn’t defined.
"use strict";
console.log(test);
let test;
Should you always use let ? Some programmers say yes, others no. You can also use both and limit the use of var for those variables that need application or function-level scope, and save let for block-level scope, only. Chances are, the coding practices established for your organization will define what you use. Moving on from let , the const statement declares a read-only value refer-ence. If the value is a primitive, it is immutable. If the value is an object, you
can’t assign a new object or primitive, but you can change object properties. In the following, if you try to assign a new value to a const , the assignment
silently fails:
const MY_VAL = 10;
MY_VAL = 100;
console.log(MY_VAL); // prints 10
It’s important to note that const is a value reference. If you assign an array or object to a const , you can change object/array members:
const test = ['one','two','three'];
const test2 = {apples : 1, peaches: 2};
test = test2; //fails
test[0] = test2.peaches;
test2.apples = test[2];
console.log(test); // [ 2, 'two', 'three' ]
console.log(test2); { apples: 'three', peaches: 2 }
Unfortunately, there’s been a significant amount of confusion about const because of the difering behaviors between primitive and object values. Howev-
Arrow Functions
er, if immutability is your ultimate aim, and you’re assigning an object to the const, you can use object.freeze() on the object to provide at least shallow immutability.
I have noticed that the Node documentation shows the use of const when importing modules. While assigning an object to a const can’t prevent it’s prop-erties from being re-used, it can imply a level of semantics that tells another coder, at a glance, that this item won’t be re-assigned a new value later.
M O R E O N C O N S T A N D L A C K O F I M M U T A B I L I T Y
Mathias, a web standards proponent, has a good in-depth discussion on const and immutability.
Like let , const has also block-level scope. Unlike let, it doesn’t require strict mode.
Use let and const in your applications for the same reason you’d use them in the browser, but I haven’t found any additional benefit specific to Node. Some folks report better performance with let and const , others have actual-ly noted a performance decrease. I haven’t found a change at all, but your expe-rience could vary. As I stated earlier, chances are your development team will have requirements as to which to use, and you should defer to these. Arrow Functions
If you look at the Node API documentation, the most frequently used ES6 en-hancement has to be arrow functions . Arrow functions do two things. First, they provide a simplified syntax. For instance, in previous chapters, I used the fol-lowing to create a new HTTP server:
http.createServer(function (req, res) {
res.writeHead(200);
res.write('Hello');
res.end();
}).listen(8124);
Using an arrow function, I can re-write this to:
http.createServer( (req, res) => {
res.writeHead(200);
res.write('Hello');
res.end();
CHAPTER 9: Node and ES6
}).listen(8124);
The reference to the function keyword is removed, and the fat arrow (=>) is used to represent the existence of the anonymous function, passing in the given parameters. The simplification can be extended further. For example, the fol-lowing very familiar function pattern:
var decArray = [23, 255, 122, 5, 16, 99];
var hexArray = decArray.map(function(element) {
return element.toString(16);
});
console.log(hexArray); // ["17", "ff", "7a", "5", "10", "63"] Is simplified to:
var decArray = [23, 255, 122, 5, 16, 99];
var hexArray = decArray.map((element) => element.toString(16)); console.log(hexArray); // ["17", "ff", "7a", "5", "10", "63"] The curly brackets, the return statement, and the function keyword are
all removed, and the functionality is stripped to its minimum.
Arrow functions aren’t only syntax simplifications, they also redefine how this is defined. In JavaScript, before arrow functions, every function defined its own value for this. So in the following example code, instead of my name printing out to the console, I get an undefined:
function NewObj(name) {
this.name = name;
}
NewObj.prototype.doLater = function() {
var self = this;
setTimeout(function() {
console.log(self.name);
}, 1000);
};
var obj = new NewObj('shelley');
obj.doLater();
The reason is this is defined to be the object in the object constructor, but the setTimeout function in the later instance. We get around the problem us-ing another variable, typically self , that could be closed ove r—attached to the
given environment. The following results in expected behavior, with my name printing out:
function NewObj(name) {
this.name = name;
}
NewObj.prototype.doLater = function() {
var self = this;
setTimeout(function() {
console.log(self.name);
}, 1000);
};
var obj = new NewObj('shelley');
obj.doLater();
In an arrow function, this is always set to the value it would normally have within the enclosing context, in this case, the new object:
function NewObj(name) {
this.name = name;
}
NewObj.prototype.doLater = function() {
setTimeout(()=> {
console.log(this.name);
}, 1000);
};
var obj = new NewObj('shelley');
obj.doLater();
W O R K I N G A R O U N D T H E A R R O W F U N C T I O N Q U I R K S
The arrow function does have quirks, such as how do you return an empty object, or where are the arguments. Strongloop has a nice writeup on the arrow functions that discusses the quirks, and the work-arounds.
Classes
JavaScript has now joined its older siblings in support for classes. No more in-teresting twists to emulate class behavior.
How do classes work in a Node context? For one, they only work in strict mode. For another, the results can difer based on whether you’re using Node LTS, or Stable. But more on that later.
CHAPTER 9: Node and ES6
Earlier, in Chapter 3, I created a “class”, InputChecker, using the older syntax: var util = require('util');
var eventEmitter = require('events').EventEmitter;
var fs = require('fs');
exports.InputChecker = InputChecker;
function InputChecker(name, file) {
this.name = name;
this.writeStream = fs.createWriteStream('./' + file + '.txt', {'flags' : 'a',
'encoding' : 'utf8',
'mode' : 0666});
};
util.inherits(InputChecker,eventEmitter);
InputChecker.prototype.check = function check(input) {
var command = input.toString().trim().substr(0,3);
if (command == 'wr:') {
this.emit('write',input.substr(3,input.length));
} else if (command == 'en:') {
this.emit('end');
} else {
this.emit('echo',input);
}
};
I modified it slightly to embed the check() function directly into the object definition. I then converted the result into an ES 6 class.
'use strict';
const util = require('util');
const eventEmitter = require('events').EventEmitter;
const fs = require('fs');
class InputChecker {
constructor(name, file) {
this.name = name;
this.writeStream = fs.createWriteStream('./' + file + '.txt', {'flags' : 'a',
'encoding' : 'utf8',
'mode' : 0o666});
}
check (input) {
var command = input.toString().trim().substr(0,3);
if (command == 'wr:') {
this.emit('write',input.substr(3,input.length));
} else if (command == 'en:') {
this.emit('end');
} else {
this.emit('echo',input);
}
}
};
util.inherits(InputChecker,eventEmitter);
exports.InputChecker = InputChecker;
The application that uses the new *classified (sorry, pun) module is un-*changed:
var InputChecker = require('./class').InputChecker;
// testing new object and event handling
var ic = new InputChecker('Shelley','output');
ic.on('write', function (data) {
this.writeStream.write(data, 'utf8');
});
ic.addListener('echo', function( data) {
console.log(this.name + ' wrote ' + data);
});
ic.on('end', function() {
process.exit();
});
process.stdin.setEncoding('utf8');
process.stdin.on('data', function(input) {
ic.check(input);
});
As the code demonstrates, I did not have to place the application into strict mode in order to use a module that’s defined in strict mode.
I ran the application and that’s when I discovered that the application worked with the Stable release of Node, but not the LTS version. The reason? The util.inherits() functionality assigns properties directly to the object
U S I N G E S 6 F E A T U R E S I N L T S
The issues I ran into with using ES6 features in Node LTS does demon-strate that if your interest is in using ES6 features, you’re probably going to want to stick with the Stable release.
Promises with Bluebird
During the early stages of Node development, the creators debated whether to go with callbacks, or using promises. Callbacks won, which pleased some folk, and disappointed other.
Promises are now part of ES6, and you can certainly use them in your Node applications. However, if you want to use ES6 promises with the Node core functionality, you’ll either need to implement the support from scratch, or you can use a module to provide this support. Though I’ve tried to avoid using third-party modules as much as possible in this book, in this case, I recommend us-ing the module. In this section, we’ll look at using a very popular promises module: Bluebird.
M O R E O N P R O M I S E S A N D I N S T A L L I N G B L U E B I R D
The Mozilla Developer Network has a good section on ES6 promises . In-stall Bluebird using npm: npm install bluebird . Another popular
promise module is Q, but I’m not covering it as it’s undergoing a re-design.
Rather than nested callbacks, ES6 promises feature branching, with success handled by one branch, failure by another. The best way to demonstrate it is by taking a typical Node file system application, and then *promisfying it—convert-*ing the callback structure to promises.
Using native callbacks, the following application opens a file and reads in the contents, makes a modification, and then writes it to another file.
var fs = require('fs');
fs.readFile('./apples.txt','utf8', function(err,data) {
if (err) {
console.error(err.stack);
} else {
Promises with Bluebird
var adjData = data.replace(/apple/g,'orange');
fs.writeFile('./oranges.txt', adjData, function(err) { if (err) console.error(err);
});
}
});
Even this simple example shows nesting two levels deep: reading the file in, and then writing the modified content.
Now, we’ll use Bluebird to promisfy the example. In the code, the Bluebird promisifyAll() function is used to promisfy all of the File System functions. Instead of readFile() , we’ll then use readFileAsync() , which is the version of the function that supports promises.
var promise = require('bluebird');
var fs = promise.promisifyAll(require('fs'));
fs.readFileAsync('./apples.txt','utf8')
.then(function(data) {
var adjData = data.replace(/apple/g, 'orange');
return fs.writeFileAsync('./oranges.txt', adjData);
})
.catch(function(error) {
console.error(error);
});
In the example, when the file contents are read, a successful data operation is handled with the then() function. If the operation weren’t successful, the catch() function would handle the error. If the read is successful, the data is modified, and the promisfy version of writeFile() , writeFileAsync( ) is called, writing the data to the file. From the previous nested callback example, we know that writeFile() just returns an error. This error would also be han-dled by the single catch() function.
Though the nested example isn’t large, you can see how much clearer the promise version of the code is. You can also start to see how the nested prob-lem is resolved—especially with only one error handling routine necessary for any number of calls.
What about a more complex example? I modified the previous code to add an additional step to create a new subdirectory to contain the oranges.txt file. In the code, you can see there are now two then() functions. The first pro-cesses the successful response to making the subdirectory, the second creates the new file with the modified data. The new directory is made using the prom-
CHAPTER 9: Node and ES6
isfyed mkdirAsync() function, which is returned at the end of the process. This is the key to making the promises work, because the next then() function is actually attached to the returned function. The modified data is still passed to the promise function where the data is being written. Any errors in either the read file or directory making process are handled by the single catch() .
var promise = require('bluebird');
var fs = promise.promisifyAll(require('fs'));
fs.readFileAsync('./apples.txt','utf8')
.then(function(data) {
var adjData = data.replace(/apple/g, 'orange');
return fs.mkdirAsync('./fruit/');
})
.then(function(adjData) {
return fs.writeFileAsync('./fruit/oranges.txt', adjData); })
.catch(function(error) {
console.error(error);
});
How about handling instances where an array of results is returned, such as when we’re using the File System function readdir() to get the contents of a directory?
That’s where the array handling functions such as map() come in handy. In the following code, the contents of a directory are returned as an array, and each file in that directory is opened, it’s contents modified and written to a comparably named file in another directory. The inner catch() function han-dles errors for reading and writing files, while the outer one handles the direc-tory access.
var promise = require('bluebird');
var fs = promise.promisifyAll(require('fs'));
fs.readdirAsync('./apples/').map(filename => {
fs.readFileAsync('./apples/'+filename,'utf8')
.then(function(data) {
var adjData = data.replace(/apple/g, 'orange');
return fs.writeFileAsync('./oranges/'+filename, adjData); })
.catch(function(error) {
console.error(error);
})
})
.catch(function(error) {
Promises with Bluebird
console.error(error);
})
I’ve only touched on the capability of Bluebird and the very real attraction of using promises in Node. Do take some time to explore the use of both, in addi-tion to the other ES6 features, in your Node applications.
Full-stack Node Development 10 Most of the book focuses on the core modules and functionality that make up Node. I’ve tried to avoid covering third-party modules, primarily because Node is still a very dynamic environment, and support for the third-party modules can change quickly, and drastically.
But I don’t think you can cover Node without at least briefly mentioning the wider context of Node applications, which means you need to be familiar with full stack Node development. This means being familiar with data systems, APIs, client-side development...a whole range of technologies with only one commonality: Node.
The most common form of full-stack development with Node is MEAN—Mon-goDB, Express, AngularJS, and Node. However, full-stack development can en-compass other tools, such as MySQL or Redis for database development, and other client-side frameworks in addition to AngularJS. The use of Express, though, has become ubiquitous. You have to become familiar with Express if you’re going to work with Node.
F U R T H E R E X P L O R A T I O N S O F M E A N
For additional explorations of MEAN, fullstack development, and Ex-press, I recommend Web Development with Node and Express: Leverag-ing the JavaScript Stack, by Ethan Brown; AngularJS: Up and Running, by Shyam Seshadri and Brad Green; the video “Architecture of the MEAN Stack”, by Scott Davis.
The Express Application Framework
In Chapter 5 I covered a small subset of the functionality you need to imple-ment to server a Node application through the web. The task to create a Node web app is daunting, at best. That’s why a application framework like Express has become so popular: it provides most of the functionality with minimal ef-fort.
CHAPTER 10: Full-stack Node Development
Express is almost ubiquitous in the Node world, so you’ll need to become fa-miliar with it. We’re going to look at the most bare bones Express application we can in this chapter, but you will need additional training once you’re finish-ed.
Express provides good documentation, including how to start an applica-tion. We’ll follow the steps the documentation outlines, and then expand on the basic application. To start, create a new subdirectory for the application, and name it whatever you want. Use npm to create a package.json file, using app.js as the entry point for the application. Lastly, install Express, saving it to your dependencies in the package.json file by using the following command:
npm install express --save
The Express documentation contains a minimal Hello World express applica-tion, typed into the app.js file:
var express = require('express');
var app = express();
app.get('/', function (req, res) {
res.send('Hello World!');
});
app.listen(3000, function () {
console.log('Example app listening on port 3000!');
});
The app.get() function handles all GET web requests, passing in the re-quest and response objects we’re familiar with from our work in earlier chap-ters. By convention, Express applications use the abbreviated forms of req and res . These objects have the same functionality as the default request and re-sponse objects, with the addition of new functionality provided by Express. For instance, you can use res.write() and res.end() to respond to the web re-quest, which we’ve used in past chapters, but you can also use res.send() , an Express enhancement, to do the same in one line.
Instead of manually creating the application, we can also use the Express application generator to generate the application skeleton. We’ll use that next, as it provides a more detailed and comprehensive Express application.
First, install the Express application generator globally:
sudo npm install express-generator -g
Next, run the application with the name you want to call your application. For demonstration purposes, I’ll use bookapp :
The Express Application Framework
express bookapp
The Express application generator creates the necessary subdirectories. Change into the bookapp subdirectory and install the dependencies:
npm install
That’s it, you’ve created your first skeleton Express application. You can run it using the following if you’re using a Mac OS or Linux environment:
DEBUG=bookapp:* npm start
And the following in a Windows Command window:
set DEBUG=bookapp:* & npm start
You could also start the application with just npm start , and forgo the de-bugging.
The application is started, and listens for requests on the default Express port of 3000. Accessing the application via the web returns a simple web page with the “Welcome to Express” greeting.
Several subdirectories and files are generated by the application: ├── app.js
├── bin
│ └── www
├── package.json
├── public
│ ├── images
│ ├── javascripts
│ └── stylesheets
│ └── style.css
├── routes
│ ├── index.js
│ └── users.js
└── views
├── error.jade
├── index.jade
└── layout.jade
We’ll get into more detail about many of the components, but the public fac-ing static files are located in the public subdirectory. As you’ll note, the graph-ics and CSS files are placed in this location. The dynamic content template files are located in the views . The routes subdirectory contains the web endpoint applications that listen for web requests, and render web pages.
CHAPTER 10: Full-stack Node Development
The www file in the bin subdirectory is a startup script for the application. It’s a Node file that’s converted into a command-line application. When you look in the generated package.json file, you’ll see it listed as the application’s start script.
{
"name": "bookapp",
"version": "0.0.0",
"private": true,
"scripts": {
"start": "node ./bin/www"
},
"dependencies": {
"body-parser": "~1.13.2",
"cookie-parser": "~1.3.5",
"debug": "~2.2.0",
"express": "~4.13.1",
"jade": "~1.11.0",
"morgan": "~1.6.1",
"serve-favicon": "~2.3.0"
}
}
You install other scripts to test, restart, or otherwise control your applica-tion, in the bin subdirectory.
To begin a more in-depth look at the application we’ll look at the applica-tion’s entry point, the app.js file.
When you open the app.js file, you’re going to see considerably more code than the simple application we looked at earlier. There are several more mod-ules imported, most of which provide the middleware support we’d expect for a web-facing application. The imported modules also include application-specific imports, given under the routes subdirectory:
var express = require('express');
var path = require('path');
var favicon = require('serve-favicon');
var logger = require('morgan');
var cookieParser = require('cookie-parser');
var bodyParser = require('body-parser');
var routes = require('./routes/index');
var users = require('./routes/users');
var app = express();
The modules and their purposes are:
The Express Application Framework
- express - the Express application
- path - Node core module for working with file paths
- serve-favicon - middleware to serve the favicon.ico file from a given path or bufer
- morgon - an HTTP request logger
- cookie-parser - parses cookie header and populates req.cookies • body-parser - provides four diferent types of request body parsers (but
does not handle multipart bodies
Each of the middlware modules works with a vanilla HTTP server, as well as Express.
W H A T I S M I D D L E W A R E ?
It’s the intermediary between the system/operating system/database and the application. The list of middleware that works with Express is quite comprehensive.
The next section of code in app.js mounts the middleware (makes it avail-able in the application) at a given path, via the app.use() function. It also in-cludes code that defines the view engine setup, which I’ll get to in a moment.
// view engine setup
app.set('views', path.join(__dirname, 'views'));
app.set('view engine', 'jade');
// uncomment after placing your favicon in /public
//app.use(favicon(path.join(__dirname, 'public', 'favicon.ico'))); app.use(logger('dev'));
app.use(bodyParser.json());
app.use(bodyParser.urlencoded({ extended: false }));
app.use(cookieParser());
app.use(express.static(path.join(__dirname, 'public'))); The last call to app.use() references one of the few built-in Express middle-
ware, express.static , used to handle all static files. If a web user requests an HTML or JPEG or other static file, express.static is what processes the re-quest. All static files are served relative to the path specified when the middle-ware is mounted, in this case, in the public subdirectory.
Returning to the app.set() function calls, and setting up the view engine, for dynamically generated content you’ll use a template engine that helps map the data to the delivery. One of the most popular, Jade, is integrated by default, but there are others such as Mustache and EJS that can be used just as
CHAPTER 10: Full-stack Node Development
easily. The engine setup defines the subdirectory where the template files (views) are located, and which view engine to use (Jade).
In the views subdirectory, you’ll find three files: error.jade , index.jade , and layout.jade . These will get you started, though you’ll need to provide much more when you start integrating data into the application. The content for the generated index.jade file is given below.
extends layout
block content
h1= title
p Welcome to #{title}
The line that reads extends layout incorporates the Jade syntax from the layout.jade file. You’ll recognize the HTML header (h1) and paragraph (p) ele-ments. The h1 header is assigned the value passed to the template as title, which is also used in the paragraph element. How these values get rendered in the template requires us to return to the app.js file , for the next bit of code:
app.use('/', routes);
app.use('/users', users);
These are the application specific end points, the functionality that re-sponds to client requests. The top-level request ('/') is satisfied by the index.js file in the routes subdirectory, the users, by the users.js file, naturally.
In the index.js file we’re introduced to the Express router, which provides the functionality tor respond to the request. As the Express documentation notes, the router functionality fits the following pattern:
app.METHOD(PATH, HANDLER)
The method is the HTTP method, and Express supports several, including the familiar get, post, put, and delete, as well as the possibly less familiar, merge, search, head, options, and so on. That path is the web path, and the handler is the function that processes the request. In the index.js , the meth-od is get , the path is the application root, and the handler is a callback func-tion passing request and response:
var express = require('express');
var router = express.Router();
/* GET home page. */
router.get('/', function(req, res, next) {
res.render('index', { title: 'Express' });
MongoDB and Redis Database Systems
});
module.exports = router;
Where the data and view meet is in the res.render() function call. The view used is the index.jade file we looked at earlier, and you can see that the value for the title attribute in the template is passed as data to the function. In your copy, try changing “Express” to whatever you’d like, and re-loading the page to see the modification.
The rest of the app.js file is error handling, and I’ll leave that for you to ex-plore on your own. This is a quick and very abbreviated introduction to Express, but hopefully even with this simple example, you’re getting a feel for the struc-ture of an Express application.
I N C O R P O R A T I N G D A T A
I’ll toot my horn and recommend my book, the JavaScript Cookbook, if you want to learn more about incorporating data into an Express applica-tion. Chapter 14 demonstrates extending an existing Express application to incorporate a MongoDB store, as well as incorporating the use of con-trollers, for a full Model-View-Controller (MVC) architecture.
MongoDB and Redis Database Systems
In Chapter 7, Example 7-8 featured an application that inserted data into a MySQL database. Though sketchy at first, support for relational databases in Node applications has grown stronger, with robust solutions such as the MySQL driver for Node , and newer modules, such as the Tedious package for SQL Server access in a Microsof Azure environment.
Node applications also have access to several other database systems. In this section I’m going to briefly look at two: MongoDB, which is very popular in Node development, and Redis, a personal favorite of mine.
MongoDB
The most popular database used in Node applications is MongoDB. MongoDB is a document based database. The documents are encoded as BSON, a binary form of JSON, which probably explains its popularity among JavaScript devel-opers. With MongoDB, instead of a table row, you have a BSON document; in-stead of a table, you have a collection.
MongoDB isn’t the only document-centric database. Other popular versions of this type of data store are CouchDB by Apache, SimpleDB by Amazon, Rav-
CHAPTER 10: Full-stack Node Development
enDB, and even the venerable Lotus Notes. There is some Node support of vary-ing degrees for most modern document data stores, but MongoDB and CouchDB have the most.
MongoDB is not a trivial database system, and you’ll need to spend time learning its functionality before incorporating it into your Node applications. When you’re ready, though, you’ll find excellent support for MongoDB in Node via the MongoDB Native NodeJS Driver , and additional, object-oriented sup-port with Mongoose .
Though I’m not going to get into detail in how to use MongoDB with Node, I am going to provide one example, just so you can get an idea of how it works. Though the underlying data structure difers form relational databases, the concepts are still the same: you create a database, you create collections of re-cords, and you add individual records. You can then update, query, or delete the records. In the MongoDB example, shown in working , I’m connecting to an example database, accessing a Widgets collection, removing any existing re-cords, inserting two, and then querying for the two, and printing them out. EXAMPLE 10-1. Working with a MongoDB database
var MongoClient = require('mongodb').MongoClient;
// Connect to the db
MongoClient.connect("mongodb://localhost:27017/exampleDb", function(err, db) {
if(err) { return console.error(err); }
// access or create widgets collection
db.collection('widgets', function(err, collection) {
if (err) return console.error(err);
// remove all widgets documents
collection.remove(null,{safe : true}, function(err, result) { if (err) return console.error(err);
console.log('result of remove ' + result.result);
// create two records
var widget1 = {title : 'First Great widget',
desc : 'greatest widget of all',
price : 14.99};
var widget2 = {title : 'Second Great widget',
desc : 'second greatest widget of all',
price : 29.99};
collection.insertOne(widget1, {w:1},
function (err, result) {
if (err) return console.error(err);
console.log(result.insertedId);
MongoDB and Redis Database Systems
collection.insertOne(widget2, {w:1},
function(err, result) {
if (err) return console.error(err);
console.log(result.insertedId);
collection.find({}).toArray(function(err,docs) {
console.log('found documents');
console.dir(docs);
//close database
db.close();
});
});
});
});
});
});
Yes, Node callback hell, but you can incorporate the use of promises. The MongoClient object is the object you’ll use the most for connecting to
the database. Note the port number given (27017). This is the default port for the MongoDB system. The database is exampleDB, given as part of the connec-tion URL, and the collection is widgets, in honor of the class Widget factory known far and wide among developers.
The MongoDB functions are asynchronous, as you’d expect. Before the re-cords are inserted, the application first deletes all existing records in the collec-tion, using the collection.remove() function, with no specific query. If we didn’t remove the records, we’d have duplicate records, as the MongoDB as-signs system-generated unique identifiers for each new record, and we’re not explicitly making the title or other field a unique identifier.
Each new record is added using collection.insertOne() , passing in the JSON defining the object. An option, {w:1} specifies that write concern , de-scribing the level of acknowledgement from MongoDB for the write operation.
Once the records are inserted, the application uses collection.find() , again without a specific query, to find all records. The function actually creates a cursor , and the toArray() function returns the cursor results as an array, which we can then print out to the console, using console.dir(). The result of the application looks similar to the following:
result of remove 1
56c5f535c51f1b8d712b6552
56c5f535c51f1b8d712b6553
found documents
[ { _id: ObjectID { _bsontype: 'ObjectID', id: 'VÅõ5Å\u001f\u001bq+eR' }, title: 'First Great widget',
desc: 'greatest widget of all',
CHAPTER 10: Full-stack Node Development
price: 14.99 },
{ _id: ObjectID { _bsontype: 'ObjectID', id: 'VÅõ5Å\u001f\u001bq+eS' }, title: 'Second Great widget',
desc: 'second greatest widget of all',
price: 29.99 } ]
The object identifier is actually a object, and the identifier is in BSON, which is why it doesn’t cleanly print. If you want to provide a cleaner output, you can access each individual field, and covert the BDON identifier into a hexadecimal string with toHexString() :
docs.forEach(function(doc) {
console.log('ID : ' + doc._id.toHexString());
console.log('desc : ' + doc.desc);
console.log('title : ' + doc.title);
console.log('price : ' + doc.price);
});
Now the result is:
result of remove 1
56c5fa40d36a4e7b72bfbef2
56c5fa40d36a4e7b72bfbef3
found documents
ID : 56c5fa40d36a4e7b72bfbef2
desc : greatest widget of all
title : First Great widget
price : 14.99
ID : 56c5fa40d36a4e7b72bfbef3
desc : second greatest widget of all
title : Second Great widget
price : 29.99
You can see the records in the MongoDB using the command-line tool. Use the following sequence of commands to start it, and look at the records:
-
Type mongo to start the command-line tool
-
Type use exampleDb to change to the exampleDb database

-
Type show collections to see all collections
-
Type db.widgets.find() to see the Widget records
If you’d prefer a more object-based approach to incorporating MongoDB into your application, you’ll want to use Mongoose . The Mongoose web site has ex-cellent documentation, so you can easily explore its capabilities on your own. It also may be a better fit for integrating into Express.
M O N G O D B I N N O D E D O C U M E N T A T I O N
The MongoDB driver for Node is documented online, and you can access the documentation from its Github repository site . But you can also ac-cess documentation for the driver at the MongoDB site . I prefer the MongoDB site’s documentation, especially for those just starting out.
Redis Key/Value Store
When it comes to data, there’s relational databases and Everything Else, other-wise known as NoSQL. In the NoSQL category, a type of structured data is based on key/value pairs, typically stored in memory for extremely fast access. The three most popular in-memory key/value stores are Memcached, Cassan-dra, and Redis. Happily for Node developers, there is Node support for all three stores.
Memcached is primarily used as a way of caching data queries for quick ac-cess in memory. It’s also quite good with distributed computing, but has limited support for more complex data. It’s useful for applications that do a lot of quer-ies, but less so for applications doing a lot of data writing and reading. Redis is the superior data store for the latter type of application. In addition, Redis can be persisted, and it provides more flexibility than Memcached—especially in its support for diferent types of data. However, unlike Memcached, Redis works only on a single machine.
The same factors also come into play when comparing Redis and Cassandra. Like Memcached, Cassandra has support for clusters. However, also like Memc-ached, it has limited data structure support. It’s good for ad hoc queries—a use that does not favor Redis. However, Redis is simple to use, uncomplicated, and typically faster thanCassandra. For these reasons, and others, Redis has gained a greater following among Node developers.
E A R N
I was delighted to read the acronym EARN, or Express, AngularJS, Redis, and Node. An example of EARN is covered in The EARN Stack .
My preferred Node Redis module is installed using npm:
npm install redis
CHAPTER 10: Full-stack Node Development
If you plan on using big operations on Redis, I also recommend installing the Node module support hiredes, as it’s non-blocking and can improve perfor-mance:
npm install hiredis redis
The Redis module is a relatively thin wrapper around Redis, itself. As such, you’ll need to spend time learning the Redis commands, and how the Redis da-ta store works.
To use redis in your Node applications, you first include the module: var redis = require('redis');
Then you’ll need to create a Redis client. The method used is create-Client :
var client = redis.createClient();
The createClient method can take three optional parame-ters: port , host , and options (outlined shortly). By default, the host is set to 127.0.0.1 , and the port is set to 6379 . The port is the one used by default for a Redis server, so these default settings should be fine if the Redis server is hosted on the same machine as the Node application.
The third parameter is an object that supports several options, outlined in detail in the modules documentation. Use the default settings until you’re more comfortable with Node and Redis.
Once you have a client connection to the Redis data store, you can send commands to the server until you call the client.quit() method call, which closes the connection to the Redis server. If you want to force a closure, you can use the client.end() method instead. However, the latter method doesn’t wait for all replies to be parsed. The client.end() method is a good one to call if your application is stuck or you want to start over.
Issuing Redis commands through the client connection is a fairly intuitive process. All commands are exposed as methods on the client object, and com-mand arguments are passed as parameters. Since this is Node, the last parame-ter is a callback function, which returns an error and whatever data or reply is given in response to the Redis command.
In the following code, the client.hset() method is used to set a hash property:
client.hset("hashid", "propname", "propvalue", function(err, reply) { // do something with error or reply
});
MongoDB and Redis Database Systems
The hset command sets a value, so there’s no return data, only the Redis acknowledgment. If you call a method that gets multiple values, such as cli-ent.hvals , the second parameter in the callback function will be an array—ei-ther an array of single strings, or an array of objects:
client.hvals(obj.member, function (err, replies) {
if (err) {
return console.error("error response - " + err);
}
console.log(replies.length + " replies:");
replies.forEach(function (reply, i) {
console.log(" " + i + ": " + reply);
});
});
Because the Node callback is so ubiquitous, and because so many of the Re-dis commands are operations that just reply with a confirmation of success, the redis module provides a redis.print method you can pass as the last param-eter:
client.set(" somekey ", " somevalue ", redis.print);
The redis.print method prints either the error or the reply to the console and returns.
To demonstrate Redis in Node, I’m creating a message queue . A message queue is an application that takes as input some form of communication, which is then stored into a queue. The messages are stored until they’re retrieved by the message receiver, when they are popped of the queue and sent to the re-ceiver (either one at a time, or in bulk). The communication is asynchronous, because the application that stores the messages doesn’t require that the re-ceiver be connected, and the receiver doesn’t require that the message-storing application be connected.
Redis is an ideal storage medium for this type of application. As the messag-es are received by the application that stores them, they’re pushed on to the end of the message queue. When the messages are retrieved by the application that receives them, they’re popped of the front of the message queue.
G E T T I N G I N A L I T T L E T C P , H T T P , A N D C H I L D P R O C E S S W O R K
The Redis example also incorporates a TCP server (hence working with Node’s Net module), an HTTP server, as well as a child process. Chapter 5 covers HTTP, Chapter 7 covers Net, and Chapter 8 covers child processes.
CHAPTER 10: Full-stack Node Development
For the message queue demonstration, I created a Node application to ac-cess the web logfiles for several diferent subdomains. The application uses a Node child process and the Unix tail -f command to access recent entries for the diferent logfiles. From these log entries, the application uses two regular expression objects: one to extract the resource accessed, and the second to test whether the resource is an image file. If the accessed resource is an image file, the application sends the resource URL in a TCP message to the message queue application.
All the message queue application does is listen for incoming messages on port 3000, and stores whatever is sent into a Redis data store.
The third part of the demonstration application is a web server that listens for requests on port 8124. With each request, it accesses the Redis database and pops of the front entry in the image data store, returning it via the re-sponse object. If the Redis database returns a null for the image resource, it prints out a message that the application has reached the end of the message queue.
The first part of the application, which processes the web log entries, is shown in #node_application_that_processes_web_log . The Unix tail com-mand is a way of displaying the last few lines of a text file (or piped data). When used with the -f flag, the utility displays a few lines of the file and then sits, listening for new file entries. When one occurs, it returns the new line. The tail -f command can be used on several diferent files at the same time, and man-ages the content by labeling where the data comes from each time it comes from a diferent source. The application isn’t concerned about which access log is generating the latest tail response—it just wants the log entry.
Once the application has the log entry, it performs a couple of regular ex-pression matches on the data to look for image resource access (files with a .jpg , .gif , .svg , or .png extension). If a pattern match is found, the application sends the resource URL to the message queue application (a TCP server). EXAMPLE 10-2. Node application that processes web log entries, and sends image resource requests to the message queue
var spawn = require('child_process').spawn;
var net = require('net');
var client = new net.Socket();
client.setEncoding('utf8');
// connect to TCP server
client.connect ('3000','examples.burningbird.net', function() { console.log('connected to server');
});
MongoDB and Redis Database Systems
// start child process
var logs = spawn('tail', ['-f',
'/home/main/logs/access.log',
'/home/tech/logs/access.log',
'/home/shelleypowers/logs/access.log',
'/home/green/logs/access.log',
'/home/puppies/logs/access.log']);
// process child process data
logs.stdout.setEncoding('utf8');
logs.stdout.on('data', function(data) {
// resource URL
var re = /GET\s(\S+)\sHTTP/g;
// graphics test
var re2 = /.gif|.png|.jpg|.svg/;
// extract URL, test for graphics
// store in Redis if found
var parts = re.exec(data);
console.log(parts[1]);
var tst = re2.test(parts[1]);
if (tst) {
client.write(parts[1]);
}
});
logs.stderr.on('data', function(data) {
console.log('stderr: ' + data);
});
logs.on('exit', function(code) {
console.log('child process exited with code ' + code); client.end();
});
Typical console log entries for this application are given in the following block of code, with the entries of interest (the image file accesses) in bold:
/robots.txt
/weblog
/writings/fiction?page=10
/images/kite.jpg
/node/145
/culture/book-reviews/silkworm
/feed/atom/
/images/visitmologo.jpg
/images/canvas.png
CHAPTER 10: Full-stack Node Development
/sites/default/files/paws.png
/feeds/atom.xml
#message_queue_that_takes_incoming_messag contains the code for the message queue. It’s a simple application that starts a TCP server and listens for incoming messages. When it receives a message, it extracts the data from the message and stores it in the Redis database. The application uses the Re-dis rpush command to push the data on the end of the images list (bolded in the code).
EXAMPLE 10-3. Message queue that takes incoming messages and pushes them onto a Redis list
var net = require('net');
var redis = require('redis');
var server = net.createServer(function(conn) {
console.log('connected');
// create Redis client
var client = redis.createClient();
client.on('error', function(err) {
console.log('Error ' + err);
});
// sixth database is image queue
client.select(6);
// listen for incoming data
conn.on('data', function(data) {
console.log(data + ' from ' + conn.remoteAddress + ' ' + conn.remotePort);
// store data
client.rpush('images',data);
});
}).listen(3000);
server.on('close', function(err) {
client.quit();
});
console.log('listening on port 3000');
The message queue application console log entries would typically look like the following:
MongoDB and Redis Database Systems
listening on port 3000
connected
/images/venus.png from 173.255.206.103 39519
/images/kite.jpg from 173.255.206.103 39519
/images/visitmologo.jpg from 173.255.206.103 39519
/images/canvas.png from 173.255.206.103 39519
/sites/default/files/paws.png from 173.255.206.103 39519 The last piece of the message queue demonstration application is the HTTP
server that listens on port 8124 for requests, shown in #http_serv-er_that_pops_off_messages_from . As the HTTP server receives each request, it accesses the Redis database, pops of the next entry in the images list, and prints out the entry in the response. If there are no more entries in the list (i.e., if Redis returns null as a reply), it prints out a message that the message queue is empty.
EXAMPLE 10-4. HTTP server that pops of messages from the Redis list and returns to the user
var redis = require("redis"),
http = require('http');
var messageServer = http.createServer();
// listen for incoming request
messageServer.on('request', function (req, res) {
// first filter out icon request
if (req.url === '/favicon.ico') {
res.writeHead(200, {'Content-Type': 'image/x-icon'} );
res.end();
return;
}
// create Redis client
var client = redis.createClient();
client.on('error', function (err) {
console.log('Error ' + err);
});
// set database to 6, the image queue
client.select(6);
client.lpop('images', function(err, reply) {
if(err) {
return console.error('error response ' + err);
CHAPTER 10: Full-stack Node Development
}
// if data
if (reply) {
res.write(reply + '\n');
} else {
res.write('End of queue\n');
}
res.end();
});
client.quit();
});
messageServer.listen(8124);
console.log('listening on 8124');
Accessing the HTTP server application with a web browser returns a URL for the image resource on each request (browser refresh) until the message queue is empty.
The data involved is very simple, and possibly prolific, which is why Redis is so ideally suited for this type of application. It’s a fast, uncomplicated data store that doesn’t take a great deal of efort in order to incorporate its use into a Node application.
AngularJS and Other Full-Stack Frameworks
AngularJS and Other Full-Stack Frameworks First of all, framework is a grossly over-used term. We see it used for front-end libraries, such as jQuery, graphics libraries such as D3, Express, as well as a host of more modern full-stack applications. In this chapter, when I use framework, I mean the full-stack frameworks, such as AngularJS, Ember, Backbone, and Re-act.
To become familiar with full-stack frameworks, you need to become familiar with a website, TodoMVC . This site defines the requirements for a basic type of application, a to-do list, and then invites any and all framework developers to submit implementations of this application. The site also provides a plain-vanilla implementation of the application without using any framework, as well as one implemented in jQuery. The site provides developers a way to contrast and compare how the same functionality is implemented in each framework. This includes all the popular frameworks, not just AngularJS: Backbone.js, Do-jo, Ember, React, and so on. It also features applications that incorporate multi-ple technologies, such as one that utilizes AngularJS, Express, and the Google Cloud Platform.
The To-Do requirements provide a recommended directory and file struc-ture:
index.html
package.json
node_modules/
css
└── app.css
js/
├── app.js
├── controllers/
CHAPTER 10: Full-stack Node Development
└── models/
readme.md
There’s nothing esoteric about the structure, and resembles what we found for the ExpressJS application. But how each framework meets the require-ments can be very diferent, which is why the ToDo application is a great way of learning how each framework, works.
To demonstrate lets look at some of the code for a couple of the frameworks: AngularJS and Backbone.js. I’m not going to replicate much of the code be-cause it’s a sure bet that the code will change by the time you read this. I’ll start with AngularJS, and focus on the optimized application—the site features sev-eral diferent implementations featuring AngularJS. Figure 10-1 shows the ap-plication afer three to-do items have been added.
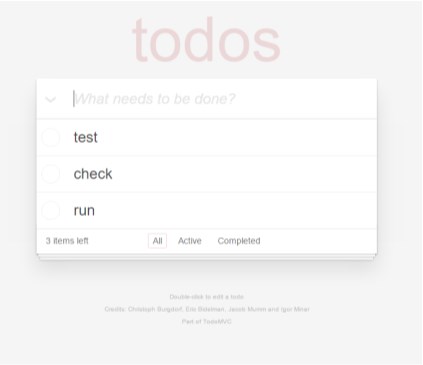
FIGURE 10-1
The ToDo
application after
three to-do items
have been added
To start, the application root, app.js , is very simple, as we’d expect with all the functionality being split to the various model-view-controller subgroups.
AngularJS and Other Full-Stack Frameworks
/* jshint undef: true, unused: true */
/*global angular */
(function () {
'use strict';
/**
- The main TodoMVC app module that pulls all dependency modules declared in same named files
- @type {angular.Module}
- /
angular.module('todomvc', ['todoCtrl', 'todoFocus', 'todoStorage']); })();
The name of the application is todomvc , and incorporates three services: todoCtrl , todoFocus , and todoStorage . The user interface is encompassed in the index.html file located at the root directory. It’s quite large, so I’ll just grab a piece. The main page body is enclosed in a section element, with the following definition:
AngularJS adds annotations to HTML called derivatives . You’ll recognize them easily, as the standard derivatives each start with “ng-”, as in ng-submit , ng-blur , and ng-model . In the code snippet, the ng-controller derivative defines the controller for the view, TodoCtrl, and the reference used for it that will appear elsewhere in the template: TC.
You can see several derivatives at work, and their purpose is intuitive for the most part. The ng-model derivative is where the view meets the model (data), in this case todo.title . The TC.doneEditing and TC.revertEditing are the controller functions. I pulled their code out of the controller file and replica-ted it below. The TC.doneEditing function resets the TC.editedTodo object, trims the edited to-do’s title, and if there is no title, removes the to-do. The
CHAPTER 10: Full-stack Node Development
TC.revertEditing function also resets the to-do object, and reassigns the original to-do to the index of the original to-do in the array of to-dos.
TC.doneEditing = function (todo, index) {
TC.editedTodo = {};
todo.title = todo.title.trim();
if (!todo.title) {
TC.removeTodo(index);
}
};
TC.revertEditing = function (index) {
TC.editedTodo = {};
todos[index] = TC.originalTodo;
};
There’s nothing overly complex about the code. Check out a copy of the code ( GitHub location ) , and try it yourself.
The Backbone.js application looks and behaves the same as the AngularJS one, but the source code is very different. Though the AngularJS app.js file wasn’t very large, the Backbone.js one is even smaller:
/*global $ */
/*jshint unused:false */
var app = app || {};
var ENTER_KEY = 13;
var ESC_KEY = 27;
$(function () {
'use strict';
// kick things off by creating the App
new app.AppView();
});
Basically, the app.AppView() starts the application. The app.js is simple, but the implementation of app.AppView() is not. Rather than annotating the HTML with derivatives, like AngularJS, Backbone.js makes heavy use of User-score templates. In the index.html file, you’ll see their use in in-page script ele-ments, such as the following, representing the template for each individual to-do. Interspersed in the HTML are the template tags, such as title , and wheth-er the checkbox is checked or not.
Rendering of the items occurs in the todo-view.js file, but the driving force behind the rendering occurs in the app-view.js file. I’ve included a portion of the file:
// Add a single todo item to the list by creating a view for it, and // appending its element to the <ul>.
addOne: function (todo) {
var view = new app.TodoView({ model: todo });
this.$list.append(view.render().el);
},
The rendering occurs in the todo-view.js file, a portion of which follows. You can see the reference to the list item’s identifier item-template, given previ-ously in the script embedded into the index.html file. The HTML in the script el-ement in the index.html provides the template for the items rendered by the view. In the template is a placeholder for the data provided by the model for the application. In the to-do application, the data is the title of the item, and whether it’s completed or not.
// The DOM element for a todo item...
app.TodoView = Backbone.View.extend({
//... is a list tag.
tagName: 'li',
// Cache the template function for a single item.
template: _.template($('#item-template').html()) ,
...
// Re-render the titles of the todo item.
render: function () {
// Backbone LocalStorage is adding id attribute instantly after // creating a model. This causes our TodoView to render twice. Once // after creating a model and once on id change. We want to // filter out the second redundant render, which is caused by this // id change. It's known Backbone LocalStorage bug, therefore // we've to create a workaround.
// https://github.com/tastejs/todomvc/issues/469
if (this.model.changed.id !== undefined) {
return;
}
CHAPTER 10: Full-stack Node Development
this.$el.html(this.template(this.model.toJSON()));
this.$el.toggleClass('completed', this.model.get('completed')); this.toggleVisible();
this.\(input = this.\)('.edit');
return this;
},
It’s a little harder to follow what’s happening with Backbone.js than with An-gularJS, but like the former, working through the ToDo application provides a great deal of clarity. I also suggest you check out this variation and give it a try.
View rendering is only one of the diferences between the frameworks. Angu-larJS rebuilds the DOM when changes occur, while Backbone.js makes changes in place. AngularJS provides two-way data binding, which means changes in the UI and model are automatically synchronized. Backbone.js’s architecture is MVP (model-view-presenter), while AngularJS’s is MVC (model-view-controller), meaning that Backbone.js doesn’t provide the same data binding, and you have to roll your own. On the other hand, Backbone.js is more lightweight and can be faster than AngularJS, though AngularJS is usually simpler for new framework developers to comprehend.
Both of these frameworks, and the other full-stack frameworks, are used to dynamically create web pages. And by that, I don’t mean the same kind of dy-namic page generation explored earlier in the chapter in the section on Express. These frameworks enable a specific type of application known as a Single Page Application, or SPA. Instead of generating HTML on the server and send to the browser, they package the data, send it to the browser, and then format the web page using JavaScript.
The advantage to this type of functionality is that the web page doesn’t al-ways have to be updated when you change the view of the data, or drill down into more detail in the page.
Consider the GMail application. It’s an example of a SPA. When you open the inbox for the application, and then access one of the emails, the entire page is not reloaded. Instead, any data necessary for the email is retrieved from the server and incorporated into the page display. The result is fast and is less dis-concerting to the user. But you never want to look at the page source. If you want remain sane, never use the page source feature on your browser to look at Google pages.
What does a good framework need to provide? One of features that frame-works should support is data-binding between display and data. This means if the data changes, the user-interface updates. It should also support a template engine, such as the Jade template engine used with Express earlier. It also
AngularJS and Other Full-Stack Frameworks
needs a way of reducing redundant code, so the framework needs to provide support for reusable components and/or modularization.
In the Express application, we saw a connection between URL routing, and functions. The URL becomes the unique way of accessing either groups of data, or single items. To find a unique student, you might have a URL like / students/A1234 , and the request routes to the page with details for the stu-dent identified by A1234 . Frameworks must provide support for this type of routing.
The framework also needs to support a MV* schema, which means, at a min-imum, business logic is separate from visualization logic. It could support a var-iation of MVC (model-view-controller), MVP (model-view-presenter), MVVM (model-view-view-model), and so on, but at a minimum, it needs to support a separation of the data and the UI.
And, of course, considering the context of this book, the framework must in-tegrate with Node.
Node in Development and 11 Production
The birth of Node coincided with, and even inspired, a host of new tools and techniques for code development, management, and maintenance. Debug-ging, testing, task management, production roll out, and support are key ele-ments of any Node project, and thankfully, most are automated.
This chapter introduces some of the tools and the concepts. It is not an ex-haustive list, but should provide a good start in your explorations. Debugging Node Applications
I confess to using console logging more than I should for debugging. It is an easy approach to checking variable values and results. However, the issue with using the console is we’re impacting on the dynamics and behavior of the appli-cation, and could actually be masking, or creating, a problem just by its use. It really is better to use debugging tools, especially when the application grows beyond simple blocks of code.
Node provides a built-in debugger we can use to set breakpoints in the code, and add watchers, in order to view intermediate code results. It’s not the most sophisticated tool in the world, but it is suficient for discovering bugs and po-tential gotchas. In the next section, we’ll look at a more sophisticated tool, the Node Inspector.
The Node Debugger
Given the choice, I’ll always prefer native implementations rather than using third-party functionality. Luckily for our debugging needs, Node does provide built-in debugger support. It’s not sophisticated, but can be useful.
You can insert breakpoints into your code by inserting the debugger com-mand directly in the code:
CHAPTER 11: Node in Development and Production
for (var i = 0; i <= test; i++) {
debugger;
second+=i;
}
To start debugging the application, you can specify the debug option when you run the application:
node debug application
node debug -p 3638
node debug http://localhost:3000
To demonstrate the debugger, I created an application that has two debug-ger breakpoints embedded:
var concat = require('./external.js').concatArray;
var test = 10;
var second = 'test';
for (var i = 0; i <= test; i++) {
debugger;
second+=i;
}
setTimeout(function() {
debugger;
test = 1000;
console.log(second);
}, 1000);
fs.readFile('./log.txt', 'utf8', function (err,data) {
if (err) {
return console.log(err);
}
var arry = ['apple','orange','strawberry'];
var arry2 = concat(data,arry);
});
The application is started with the following:
node debug debugtest
When it opens, the application breaks at line 1 and lists out the top part of the code:
Debugging Node Applications
< Debugger listening on port 5858
debug> . ok
break in debugtest.js:1
1 var fs = require('fs');
2 var concat = require('./external.js').concatArray;
3
You can use the list command to list out the source code lines in context. A command like list(10) , will list the previous 10 lines of code, and the next 10 lines of code. Typing list(25) with the debug test application displays all the lines in the application, numbered by line. You can add additional breakpoints at this point using either the setBreakpoint command, or its shortcut, sb . We’ll set a breakpoint for line 19 in the test application, which inserts a break-point in the fs.readFile() callback function. We’ll also set a breakpoint di-rectly in the custom module, at line 3:
debug> sb(19)
debug> sb('external.js',3)
You’ll get a warning about the script external.js not being loaded yet. It doesn’t impact on the functionality.
You can also set a watch on variables or expressions, using the watch('ex-pression') command directly in the debugger. We’ll watch the test and second variables, the data parameter, and the arry2 array:
debug> watch('test');
debug> watch('second');
debug> watch('data');
debug> watch('arry2');
Finally, we’re ready to start debugging. Typing cont or c will run the applica-tion up to the first breakpoint. In the output, we see we’re at the first break-point and we also see the value of the four watched items. Two— test and second —have an actual value, the other two have a value of
debug> c
break in debugtest.js:8
Watchers:
0: test = 10
1: second = "test"
2: data = "
3: arry2 = "
CHAPTER 11: Node in Development and Production
6
7 for (var i = 0; i <= test; i++) {
8 debugger;
9 second+=i;
10 }
There are some miscellaneous commands you can try out before we go onto the next breakpoint. The scripts command lists out which scripts are current-ly loaded:
debug> scripts
- 57: debugtest.js
58: external.js
debug>
The version command displays the V8 version. Type c again to go to the next breakpoint:
debug> c
break in debugtest.js:8
Watchers:
0: test = 10
1: second = "test0"
2: data = "
3: arry2 = "
6
7 for (var i = 0; i <= test; i++) {
8 debugger;
9 second+=i;
10 }
Notice the changed value for the second variable. That’s because it’s being modified in the for loop in which the debugger is contained. Typing in c several more times executes the loop and we can see the variable continuously being modified. Unfortunately, we can’t clear the breakpoint created using the de-bugger statement, but we can clear a breakpoint set using setBreakpoint or sb . To use clearBreakpoint or cb , specify the name of the script and the line number of the breakpoint:
cb('debugtest.js',19)
You can also turn of a watcher with unwatch :
debug> unwatch('second')
Debugging Node Applications
Returning to the topic of setting breakpoints, we can also set a breakpoint for the first line in a function by specifying the function name:
debug> sb('functionName()');
Using sb with no value sets breakpoint to the current line:
debug> sb();
In the application, the debugger runs the application until the next break-point, in the fs.readFile() callback. Now we’ll see that the data parameter has changed (breaks inserted for readability):
debug> c
break in debugtest.js:19
Watchers:
0: test = 10
1: second = "test012345678910"
2: data = "changed
data1.txt\nchanged data2.txt\nchanged data3.txt\nchanged data4.txt\nchanged ... (length: 735)"
3: arry2 = undefined
17
18 fs.readFile('./log.txt', 'utf8', function (err,data) { >19 if (err) {
20 return console.log(err);
21 }
The ellipses tells us that a portion of the data isn’t displayed, and the length of the entire block is 735. We can also see that arry2 value is no longer an error, but is, instead, undefined .
Instead of typing c to continue, we’ll now step through each line of the appli-cation using the next or n command. When we get to line 23, the debugger opens up the external module and breaks at line 3 because of the previously set breakpoint:
debug> n
break in external.js:3
Watchers:
0: test = "
1: second = "
2: data = "
3: arry2 = "
1
CHAPTER 11: Node in Development and Production
2 var concatArray = function(str, arry) {
3 return arry.map(function(element) {
4 return str + ' ' + element;
5 });
We could have also stepped through to line 23 in the application, and used the step or s command to step into the module function:
debug> s
break in external.js:3
Watchers:
0: test = "
1: second = "
2: arry2 = "
3: data = "
1
2 var concatArray = function(str, arry) {
3 return arry.map(function(element) {
4 return str + ' ' + element;
5 });
Notice how all the watched values now display an error. At this point, we’re completely out of the context of the parent application. We can add watchers when we’re in functions or external modules to prevent these kind of error, or to watch variables in the context in which they’re defined if the same variable is used in the application and in the module or other functions.
The backtrace or bt command provides a backtrace of the current execu-tion context. The value returned at this point in the debugging is displayed in the next code block:
debug> bt
0 concatArray external.js:3:3
1 debugtest.js:23:15
We see two entries, one for the line we’re currently at in the application, and one representing the current line in the imported module function.
We can step through the external function, or we can return to the applica-tion using the out or o command.
The Node debugger is based in REPL, and we can actually pull up the debug-ger’s REPL by typing the repl command. If we want to kill the script we can with the kill command, and if we want to restart the script, type restart . Be aware, though, that not only will the script restart, all the breakpoints and watchers will be cleared.
O U T O F D A T E N O D E . J S D O C U M E N T A T I O N A N D H E L P
At the time I wrote this book, the Node documentation for the debugger showed an exec command. However, this command doesn’t exist. The API documentation can be out of date, from time to time. To see what the debugger supports, type help .
Node Inspector
If you’re ready to step up your debugging game, then you’ll want to check out Node Inspector. Node Inspector incorporates debugging features you’re proba-bly familiar with by using the Blink DevTools debugger that works with either Chrome or Opera. The upside to the tool is the increased level of sophistication, as well as having a visual environment for debugging. The downside to the tool is system requirements. For instance, to run it in one of my Windows 10 ma-chines, the application told me I had to install either the .NET Framework 2.0 SDK, or Microsof Visual Studio 2005.
I N S T A L L I N G N O D E I N S P E C T O R
If you run into the Visual Studio error, you can try the following, to
change the version of the Visual Studio used by the application:
npm install -g node-inspector --msvs_version=2013
Or use whatever is the version you have installed.
If you have the environment that can support Node Inspector, install it with: npm install -g node-inspector
To use it, run your Node application using the following command. You’ll need to add the .js extension with the application when you run it with Node Inspector:
node-debug application.js
One of two things will happen. If Chrome or Opera is your default browser, the application will open up in the developer tools. If your default browser isn’t one of these two, you’ll need to manually open up one or the other browsers and provide the URL http://127.0.0.1:8080/?port=5858 .
N O D E I N S P E C T O R D O C U M E N T A T I O N
There is some documentation on Node Inspector at its GitHub reposito-ry . Strongloop, the company that supports the tool, also provides some documentation on using the Node Inspector. As the documentation notes, you can also get what you need from the Chrome Developer Tools documentation . Be aware, though, that Google frequently changes loca-tion of documentation, and it may not be working or complete at any point in time.
I opened my debugtest.js file created in the last section in Node Inspector. Figure 11-1 shows the debugger with the file first loaded, and afer clicking the run button, located in the upper right-hand corner of the tool. Node Inspector honors the debugger command, which becomes the first breakpoint for the application. The watch variables are shown just below the buttons to control program execution.
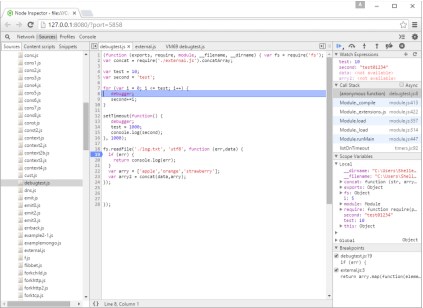
FIGURE 11-1
Running
debugtest.js in the
Node Inspector
debugger
To set new breakpoints is just a matter of clicking in the lef margin of the line where you want the breakpoint. To add a new watcher, click the plus sign (+) in the Watch Expressions header. The program commands above allow you to (in order), run the application to the next breakpoint, step over the next func-
Debugging Node Applications
tion call, step into the function, step out of the current function, clear all break-points, and pause the application.
What’s new with this wonderful visual interface is the listing of applications/ modules in the lef window, a Call Stack, a listing of Scope Variables (both local and global), and the set breakpoints, in windows on the right. If we want to add a breakpoint in the imported module, external.js, it’s just a simple matter of opening the file from the list in the lef, and inserting a breakpoint. Figure 11-2 shows the debugger with the module loaded and breakpoint reached.
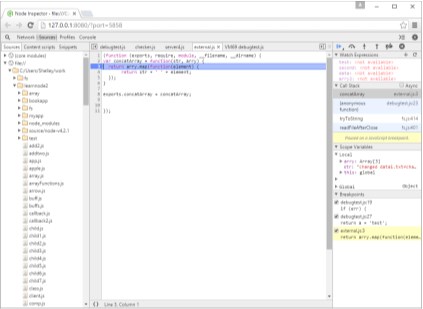
FIGURE 11-2
Node Inspector with
external.js module
loaded and
breakpoint reached
What’s interesting when you look at the application loaded into Node In-spector, you can see how the application is wrapped in an anonymous function, as I described in Chapter 3, in the section titled “How Node Finds and Loads a Module”.
When you’re finished with the Node Inspector, you can close the browser, and terminate the batch operation by typing CTRL-C.
M O R E S O P H I S T I C A T E D T O O L S
Both the built-in Debugger and Node Inspector provide solid functionali-ty to help you debug your Node applications. In addition, if you want to invest the time in setting up the environment and becoming familiar with more sophisticated integrated development environment (IDE), you can also use a tool like Nodeclipse , in the venerable Eclipse IDE.
Unit Testing
Unit testing is a way of isolating specific components of an application for test-ing. Many of the tests that are provided in the tests subdirectory of Node mod-ules are unit tests. The tests in the test subdirectory of the Node installation are all unit tests. Many of these unit tests are built using the Assert module, which we’ll go over next.
Unit Testing with Assert
Assertion tests evaluate expressions, the end result of which is a value of either true or false . If you’re testing the return from a function call, you might first test that the return is an array (first assertion). If the array contents should be a certain length, you perform a conditional test on the length (second assertion), and so on. There’s one Node built-in module that facilitates this form of asser-tion testing: Assert. It’s purpose is for internal use with Node, but we can use it. We just need to be aware that it’s not a true testing framework.
You include the Assert module in an application with the following: var assert = require('assert');
To see how to use Assert, let’s look at how existing modules use it. The Node application makes use of the Assert module in its module unit tests. For in-stance, there’s a test application called *test-util.js that tests the Utilities mod-*ule. The following code is the section that tests the isArray method:
// isArray
assert.equal(true, util.isArray([]));
assert.equal(true, util.isArray(Array()));
assert.equal(true, util.isArray(new Array()));
assert.equal(true, util.isArray(new Array(5)));
assert.equal(true, util.isArray(new Array('with', 'some', 'entries'))); assert.equal(true, util.isArray(context('Array')()));
assert.equal(false, util.isArray({}));
assert.equal(false, util.isArray({ push: function() {} })); Unit Testing
assert.equal(false, util.isArray(/regexp/));
assert.equal(false, util.isArray(new Error));
assert.equal(false, util.isArray(Object.create(Array.prototype))); Both the assert.equal() and the assert.strictEqual() methods have
two mandatory parameters: an expected response and an expression that eval-uates to a response. In the assert.equal isArray , if the expression evalu-ates to true , and the expected response is true , the assert.equal method succeeds and produces no output—the result is silent .
If, however, the expression evaluates to a response other than what’s expect-ed, the assert.equal method responds with an exception. If I take the first statement in the isArray test in the Node source and modify it to:
assert.equal(false, util.isArray([]));
then the result is:
assert.js:89
throw new assert.AssertionError({
^
AssertionError: false == true
at Object.
learnnode2/asserttest.js:4:8)
at Module._compile (module.js:409:26)
at Object.Module._extensions..js (module.js:416:10)
at Module.load (module.js:343:32)
at Function.Module._load (module.js:300:12)
at Function.Module.runMain (module.js:441:10)
at startup (node.js:134:18)
at node.js:962:3
The assert.equal() and assert.strictEqual() methods also have a third optional parameter, a message that’s displayed rather than the default in case of a failure:
assert.equal(false, util.isArray([]), 'Test 1Ab failed'); This can be a useful way of identifying exactly which test failed if you’re run-
ning several in a test script. You can see the use of a message (a label) in the node-redis test code:
assert.equal(str, results, label + " " + str +
" does not match " + results);
CHAPTER 11: Node in Development and Production
The message is what’s displayed when you catch the exception and print out the message.
The following Assert module methods all take the same three parameters, though how the test value and expression relate to each other varies, as the name of the test implies:
assert.equal
Fails if the expression results and given value are not equal
assert.strictEqual
Fails if the expression results and given value are not strictly equal assert.notEqual
Fails if the expression results and given value are equal
assert.notStrictEqual
Fails if the expression results and given value are strictly equal
assert.deepEqual
Fails if the expression results and given value are not equal
assert.notDeepEqual
Fails if the expression results and given value are equal
assert.deepStrictEqual
Similar to assert.deepEqual() except primitives are compared with strict equal ( === )
assert.notDeepStrictEqual
Tests for deep strict inequality
The deep methods work with complex objects, such as arrays or objects. The following succeeds with assert.deepEqual :
assert.deepEqual([1,2,3],[1,2,3]);
but would not succeed with assert.equal .
The remaining assert methods take difering parameters. Calling assert as a method, passing in a value and a message, is equivalent to calling as-sert.isEqual , passing in true as the first parameter, an expression, and a message. The following:
var val = 3;
assert(val == 3, 'Test 1 Not Equal');
Unit Testing
is equivalent to:
assert.equal(true, val == 3, 'Test 1 Not Equal');
Another variation of the exact same method is assert.ok :
assert.ok(val == 3, 'Test 1 Not Equal');
The assert.fail method throws an exception. It takes four parameters: a value, an expression, a message, and an operator, which is used to separate the value and expression in the message when an exception is thrown. In the fol-lowing code snippet:
try {
var val = 3;
assert.fail(3, 4, 'Fails Not Equal', '==');
} catch(e) {
console.log(e);
}
the console message is:
{ [AssertionError: Fails Not Equal]
name: 'AssertionError',
actual: 3,
expected: 4,
operator: '==',
message: 'Fails Not Equal',
generatedMessage: false }
The assert.ifError function takes a value and throws an exception only if the value resolves to anything but false . As the Node documentation states, it’s a good test for the error object as the first argument in a callback function:
assert.ifError(err); //throws only if true value
The last assert methods are assert.throws and assert.doesNotThrow . The first expects an exception to get thrown; the second doesn’t. Both methods take a code block as the first required parameter, and an optional error and message as the second and third parameters. The error object can be a con-structor, regular expression, or validation function. In the following code snip-pet, the error message is printed out because the error regular expression as the second parameter doesn’t match the error message:
CHAPTER 11: Node in Development and Production
assert.throws(
function() {
throw new Error("Wrong value");
},
/something/
);
You can create sturdy unit tests using the Assert module. The one major limi-tation with the module, though, is the fact that you have to do a lot of wrapping of the tests so that the entire testing script doesn’t fail if one test fails. That’s where using a higher-level unit testing framework, such as Nodeunit (discussed next), comes in handy.
Unit Testing with Nodeunit
Nodeunit provides a way to script several tests. Once scripted, each test is run serially, and the results are reported in a coordinated fashion. To use Nodeunit, you’re going to want to install it globally with npm:
[sudo] npm install nodeunit -g
Nodeunit provides a way to easily run a series of tests without having to wrap everything in try/catch blocks. It supports all of the Assert module tests, and provides a couple of methods of its own in order to control the tests. Tests are organized as test cases, each of which is exported as an object method in the test script. Each test case gets a control object, typically named test . The first method call in the test case is to the test element’s expect method, to tell Nodeunit how many tests to expect in the test case. The last method call in the test case is to the test element’s done method, to tell Nodeunit the test case is finished. Everything in between composes the actual test unit:
module.exports = {
'Test 1' : function(test) {
test.expect(3); // three tests
... // the tests
test.done();
},
'Test 2' : function (test) {
test.expect(1); // only one test
... // the test
test.done();
}
};
To run the tests, type nodeunit , followed by the name of the test script: Unit Testing
nodeunit thetest .js
Example 11-1 has a small but complete testing script with six assertions (tests). It consists of two test units, labeled Test 1 and Test 2 . The first test unit runs four separate tests, while the second test unit runs two. The expect method call reflects the number of tests being run in the unit.
EXAMPLE 11-1. Nodeunit test script, with two test units, running a total of six tests var util = require('util');
module.exports = {
'Test 1' : function(test) {
test.expect(4);
test.equal(true, util.isArray([]));
test.equal(true, util.isArray(new Array(3)));
test.equal(true, util.isArray([1,2,3]));
test.notEqual(true, (1 > 2));
test.done();
},
'Test 2' : function(test) {
test.expect(2);
test.deepEqual([1,2,3], [1,2,3]);
test.ok('str' === 'str', 'equal');
test.done();
}
};
The result of running the Example 11-1 test script with Nodeunit is: example1.js
✔ Test 1
✔ Test 2
OK: 6 assertions (3ms)
Symbols in front of the tests indicate success or failure: a check for success, and an x for failure. None of the tests in this script fails, so there’s no error script or stack trace output.
For CoffeeScript fans, Nodeunit supports CoffeeScript applications. CHAPTER 11: Node in Development and Production
Other Testing Frameworks
In addition to Nodeunit, covered in the preceding section, there are several oth-er testing frameworks available for Node developers. Some of the tools are sim-pler to use than others, and each has its own advantages and disadvantages. Next, I’ll briefly cover three frameworks: Mocha, Jasmine, and Vows. MOCHA
Install Mocha with npm:
npm install mocha -g
Mocha is considered the successor to another popular testing framework, Espresso.
Mocha works in both browsers and Node applications. It allows for asyn-chronous testing via the done function, though the function can be omitted for synchronous testing. Mocha can be used with any assertion library.
The following is an example of a Mocha test, which makes use of the should.js assertion library:
should = require('should')
describe('MyTest', function() {
describe('First', function() {
it('sample test', function() {
"Hello".should.equal("Hello");
});
});
});
You need to install the should.js library before running the test:
npm install should
Then run the test with the following command line:
mocha testcase.js
The test should succeed:
MyTest
First
✓ sample test
Unit Testing
1 passing (15ms)
VOWS
Vows is a BDD (behavior-driven development) testing framework, and has one advantage over others: more comprehensive documentation. Testing is com-posed of testing suites, themselves made up of batches of sequentially execut-ed tests. A batch consists of one or more contexts, executed in parallel, and each consisting of a topic, which is when we finally get to the executable code. The test within the code is known as a vow . Where Vows prides itself on being diferent from the other testing frameworks is by providing a clear separation between that which is being tested (topic) and the test (vow).
I know those are some strange uses of familiar words, so let’s look at a sim-ple example to get a better idea of how a Vows test works. First, though, we have to install Vows:
npm install vows
To try out Vows, I’m using a simple circle module:
var PI = Math.PI;
exports.area = function ® {
return (PI * r * r).toFixed(4);
};
exports.circumference = function ® {
return (2 * PI * r).toFixed(4);
};
In the Vows test application, the circle object is the topic, and the area and circumference methods are the vows. Both are encapsulated as a Vows context. The suite is the overall test application, and the batch is the test instance (circle and two methods). Example 11-2 shows the entire test.
EXAMPLE 11-2. Vows test application with one batch, one context, one topic, and two vows var vows = require('vows'),
assert = require('assert');
var circle = require('./circle');
var suite = vows.describe('Test Circle');
suite.addBatch({
CHAPTER 11: Node in Development and Production
'An instance of Circle': {
topic: circle,
'should be able to calculate circumference': function (topic) { assert.equal (topic.circumference(3.0), 18.8496);
},
'should be able to calculate area': function(topic) {
assert.equal (topic.area(3.0), 28.2743);
}
}
}).run();
Running the application with Node runs the test because of the addition of the run method at the end of the addBatch method:
node vowstest.js
The results should be two successful tests:
·· ✓ OK » 2 honored (0.012s)
The topic is always an asynchronous function or a value. Instead of using circle as the topic, I could have directly referenced the object methods as top-ics—with a little help from function closures:
var vows = require('vows'),
assert = require('assert');
var circle = require('./circle');
var suite = vows.describe('Test Circle');
suite.addBatch({
'Testing Circle Circumference': {
topic: function() { return circle.circumference;},
'should be able to calculate circumference': function (topic) { assert.equal (topic(3.0), 18.8496);
},
},
'Testing Circle Area': {
topic: function() { return circle.area;},
'should be able to calculate area': function(topic) {
assert.equal (topic(3.0), 28.2743);
}
}
}).run();
Keeping Node Up and Running
In this version of the example, each context is the object given a title: Test-ing Circle Circumference and Testing Circle Area . Within each con-text, there’s one topic and one vow.
You can incorporate multiple batches, each with multiple contexts, which can in turn have multiple topics and multiple vows.
Keeping Node Up and Running
You do the best you can with your application. You test it thoroughly, and you add error handling so that errors are managed gracefully. Still, there can be gotchas that come along—things you didn’t plan for that can take your applica-tion down. If this happens, you need to have a way to ensure that your applica-tion can start again, even if you’re not around to restart it.
Forever is just such a tool—it ensures that your application restarts if it crashes. It’s also a way of starting your application as a daemon that persists beyond the current terminal session. Forever can be used from the command line or incorporated as part of the application. If you use it from the command line, you’ll want to install it globally:
npm install forever -g
Rather than start an application with Node directly, start it with Forever: forever start -a -l forever.log -o out.log -e err.log finalserver.js Default values are accepted for two options: minUpTime (set to 1000ms),
and spinSleepTime (set to 1000ms).
The preceding command starts a script, finalserver.js , and specifies the names for the Forever log, the output log, and the error log. It also instructs the application to append the log entries if the logfiles already exist.
If something happens to the script to cause it to crash, Forever restarts it. Forever also ensures that a Node application continues running, even if you ter-minate the terminal window used to start the application.
Forever has both options and actions. The start value in the command line just shown is an example of an action. All available actions are:
start
Starts a script
stop
Stops a script
CHAPTER 11: Node in Development and Production
stopall
Stops all scripts
restart
Restarts the script
restartall
Restarts all running Forever scripts
cleanlogs
Deletes all log entries
logs
Lists all logfiles for all Forever processes
list
Lists all running scripts
config
Lists user configurations
set < key > < val > :: Sets configuration key value
clear < key > :: Clears configuration key value
logs < script |index > :: Tails the logs for < script |index >
columns add < col > :: Adds a column to the Forever list output
columns rm < col > :: Removes a column from the Forever list output columns set < cols > :: Sets all columns for the Forever list output An example of the list output is the following, afer httpserver.js is started
as a Forever daemon:
info: Forever processes running
data: uid command script forever pid id
logfile uptime
data: [0] _gEN /usr/bin/nodejs serverfinal.js 10216 10225 /home/name/.forever/forever.log STOPPED
List the log files out with the logs action:
info: Logs for running Forever processes
data: script logfile
data: [0] serverfinal.js /home/name/.forever/forever.log There are also a significant number of options, including the logfile settings
just demonstrated, as well as running the script ( -s or --silent ), turning on Keeping Node Up and Running
Forever’s verbosity ( -v or --verbose ), setting the script’s source directory ( --sourceDir ), and others, all of which you can find just by typing:
forever --help
You can incorporate the use of Forever directly in your code using the com-panion module, forever-monitor, as demonstrated in the documentation for the module:
var forever = require('forever-monitor');
var child = new (forever.Monitor)('serverfinal.js', {
max: 3,
silent: true,
args: []
});
child.on('exit', function () {
console.log('serverfinal.js has exited after 3 restarts'); });
child.start();
Additionally, you can use Forever with Nodemon , not only to restart the ap-plication if it unexpectedly fails, but also to ensure that the application is re-freshed if the source is updated.
Install Nodemon globally:
npm install -g nodemon
Nodemon wraps your application. Instead of using Node to start the applica-tion, use Nodemon:
nodemon app.js
Nodemon sits quietly monitoring the directory (and any contained directo-ries) where you ran the application, checking for file changes. If it finds a change, it restarts the application so that it picks up the recent changes.
You can pass parameters to the application:
nodemon app.js param1 param2
You can also use the module with CofeeScript:
nodemon someapp.coffee
CHAPTER 11: Node in Development and Production
If you want Nodemon to monitor some directory other than the current one, use the --watch flag:
nodemon --watch dir1 --watch libs app.js
There are other flags, documented with the module. The module can be found at https://github.com/remy/nodemon/ .
To use Nodemon with Forever, wrap Nodemon within Forever and specify the --exitcrash option to ensure that if the application crashes, Nodemon exits cleanly and passes control to Forever:
forever start nodemon --exitcrash serverfinal.js
If you get an error about Forever not finding nodedemon, use the full path: forever start /usr/bin/nodemon --exitcrash serverfinal.js If the application does crash, Forever starts Nodemon, which in turn starts
the Node script, ensuring that not only is the running script refreshed if the source is changed, but also that an unexpected failure doesn’t take your appli-cation permanently ofline.
Benchmark and Load Testing with Apache Bench A robust application that meets all the user’s needs is going to have a short life if its performance is atrocious. We need the ability to performance test our Node applications, especially when we make tweaks as part of the process to im-prove performance. We can’t just tweak the application, put it out for produc-tion use, and let our users drive out performance issues.
Performance testing consists of benchmark testing and load testing. Bench-mark testing , also known as comparison testing , is running multiple versions or variations of an application and then determining which is better. It’s an efec-tive tool to use when you’re tweaking an application to improve its eficiency and scalability. You create a standardized test, run it against the variations, and then analyze the results.
Load testing , on the other hand, is basically stress testing your application. You’re trying to see at what point your application begins to fail or bog down because of too many demands on resources, or too many concurrent users. You basically want to drive the application until it fails. Failure is a success with load testing.
There are existing tools that handle both kinds of performance testing, and a popular one is ApacheBench. It’s popular because it’s available by default on
Benchmark and Load Testing with Apache Bench
any server where Apache is installed—and few servers don’t have Apache in-stalled. It’s also an easy-to-use, powerful little testing tool. When I was trying to determine whether it’s better to create a static database connection for reuse or to create a connection and discard it with each use, I used ApacheBench to run tests.
ApacheBench is commonly called ab, and I’ll use that name from this point forward. ab is a command-line tool that allows us to specify the number of times an application is run, and by how many concurrent users. If we want to emulate 20 concurrent users accessing a web application a total of 100 times, we’d use a command like the following:
ab -n 100 -c 20 http://burningbird.net/
It’s important to provide the final slash, as ab expects a full URL, including path.
ab provides a rather rich output of information. An example is the following output (excluding the tool identification) from one test:
Benchmarking burningbird.net (be patient).....done
Server Software: Apache/2.4.7
Server Hostname: burningbird.net
Server Port: 80
Document Path: /
Document Length: 36683 bytes
Concurrency Level: 20
Time taken for tests: 5.489 seconds
Complete requests: 100
Failed requests: 0
Total transferred: 3695600 bytes
HTML transferred: 3668300 bytes
Requests per second: 18.22 [#/sec] (mean)
Time per request: 1097.787 [ms] (mean)
Time per request: 54.889 [ms] (mean, across all concurrent requests) Transfer rate: 657.50 [Kbytes/sec] received
Connection Times (ms)
min mean[±sd] median max
Connect: 0 1 2.3 0 7
Processing: 555 1049 196.9 1078 1455
Waiting: 53 421 170.8 404 870
Total: 559 1050 197.0 1080 1462
Percentage of the requests served within a certain time (ms) CHAPTER 11: Node in Development and Production
50% 1080
66% 1142
75% 1198
80% 1214
90% 1341
95% 1392
98% 1415
99% 1462
100% 1462 (longest request)
The lines we’re most interested in are those having to do with how long each test took, and the cumulative distribution at the end of the test (based on percentages). According to this output, the average time per request (the first value with this label) is 1097.787 milliseconds. This is how long the average user could expect to wait for a response. The second line has to do with throughput, and is probably not as useful as the first.
The cumulative distribution provides a good look into the percentage of re-quests handled within a certain time frame. Again, this indicates what we can expect for an average user: response times between 1080 and 1462 millisec-onds, with the vast majority of responses handled in 1392 milliseconds or less.
The last value we’re looking at is the requests per second—in this case,
18.22. This value can somewhat predict how well the application will scale, be-cause it gives us an idea of the maximum requests per second—that is, the up-per boundaries of application access. However, you’ll need to run the test at diferent times, and under diferent ancillary loads, especially if you’re running the test on a system that serves other uses.
T H E L O A D T E S T A P P L I C A T I O N
You can also use the Loadtest application to do load testing:
npm install -g loadtest
The advantage over Apache Bench is you can set requests as well as
users:
loadtest [-n requests] [-c concurrency] [-k] URL
Node in New Environments 12 Node has expanded to many diferent environments, beyond the basic server in Linux, Mac OS, and Windows.
Node has provided a way of using JavaScript with microcomputers and mi-crocontrollers such as Raspberry Pi and Adruino. Samsung is planning on inte-grating Node into its vision of the Internet of Things (IoT), even though the IoT technology it bought, SmartThings, is based on a variation of Java (Groovy). And Microsof has embraced Node, and is now working to extend it by providing a variation of Node with its own engine, Charka, running it.
The many faces of Node is what makes it both exciting and fun.
N O D E A N D M O B I L E E N V I R O N M E N T S
Node has also made its way into the mobile world, but attempting to squish a section on it into this book was beyond my ability to compress the subject down to a minimum. Instead, I’ll point the reader to a book on the topic, Learning Node.js for Mobile Application Development, by Stefan Buttigieg and Milorad Jevdjenic, from Packt Publishing.
Samsung IoT and GPIO
Samsung has created a variation of Node called IoT.js, as well as a JavaScript for IoT technologies called JerryScript. From the documentation about both I’ve read, the primary reason for new variations is to develop tools and technol-ogies that work in devices with lower memory than the traditional JavaScript/ Node environments.
In one graph accompanying a Samsung employee’s presentation , they show a full implementation of JerryScript with a binary size of 200KB and a memory footprint of 16KB to 64KB. This, compared to V8 requiring a binary size of 10MB, and a memory footprint of 8MB. When you’re working with IoT devi-ces, every scrap of space and memory matters.
CHAPTER 12: Node in New Environments
Focusing on IoT.js, in the documentation you’ll find that it supports a subset of the core Node modules, such as Bufer, HTTP, Net, and File System. Consider-ing its targeted use, no support for modules such as Crypto is understanda-ble. You know you’re in the world of IoT when you see that it also features a new core module: GPIO. It represents the application interface to the physical GPIO, which forms the bridge between application and device.
GPIO is an acronym for general-purpose input/output. It represents a pin on an integrated circuit that can be either an input or output, and whose behavior is controlled by applications we create. The GPIO pins provide an interface to the device. As inputs, they can received information from devices such as tem-perature or motion sensors; as outputs, they can control lights, touch screens, motors, rotary devices, and so on.
On a device such as a Raspberry Pi (covered later), there is a panel of pins along one side, most of which are GPIO pins, interspersed with ground and power pins. Figure 12-1 shows an actual photo of the pins, and underneath, a pinout diagram showing the GPIO, power, and ground pins for a Raspberry Pi 2 Model B.
FIGURE 12-1
Raspberry Pi 2 pins
and associated
pinout diagram
courtesy of the
Raspberry Pi
Foundation , used

via CC license CC-
BY-SA

As you might note, the pin number doesn’t reflect it’s actual physical loca-tion in the board. The number appearing in the pin label is the GPIO number . Some APIs, including Samsung’s IoT.js, expect the GPIO number when it asks for a pin number.
Windows with Charka Node
To use the Samsung IoT.js, you initialize the GPIO object, and then call one of the functions, such as gpio.setPen() , which takes a pin number as first pa-rameter, direction (i.e. ‘in’ for input, ‘out’ for output, and ‘none’ to release), an optional mode, and a callback. To send data to the pin, use the gpio.write-Pin() function, giving it the pin number, a boolean value, and a callback.
The Samsung IoT.js is definitely a work in progress. And it seems to conflict with other Samsung work known as SAMIO , which defines a data exchange platform that can, among other things, allow communication between an Ardu-ino and a Raspberry Pi when monitoring a flame sensor (see associated tutori-al ). And which does incorporate the use of Node, not IoT.js. But it is in active development, so I guess we’ll stay tuned.
R A S P B E R R Y P I A N D A R D U I N O
We’ll look at Raspberry Pi and Arduino in more detail at the end of the chapter.
Windows with Charka Node
On January 19, 2016, Microsof issued a Pull Request (PR) to enable Node to run with Microsof’s ChakraCore engine. The company created a v8 shim that implements most of the V8 essential APIs, allowing Node to run on ChakraCore, transparently.
The idea of Node running on something other than V8 is both interesting, and in my opinion, compelling. Though it seems that the V8 is driving the devel-opment of Node, at least Node Stable releases, technically there is no absolute requirement that Node be built on V8. Afer all, the Stable updates are related more towards enhancements of the Node API, and incorporating new ECMA-Script innovations with ES6, and eventually all subsequent releases of ECMA-Script.
Microsof has open sourced ChakraCore, which is a necessary first step. It provides the JavaScript engine support for the company’s new browser, Edge. And the company claims the engine is superior to V8.
While the debate and testing is ongoing about the PR, you can actually test Node on ChakraCore, as long as you have a Windows machine, Python (2.6 or
2.7), and Visual Studio (such as Visual Studio 2015 Community). You can also download a pre-built binary. Microsof makes available binaries for ARM (for Raspberry Pi), as well as the more traditional x86 and x64 architectures. When I installed it in my Windows machine, it created the same type of Command win-dow I used for the non-ChakraCore Node. Best of all, it can be installed on the same machine as a Node installation, and the two can be used side-by-side.
CHAPTER 12: Node in New Environments
I tried out several examples from the book and ran into no problems. I also tried out an example reflecting a recent change for Node Stable that allows the child_process.spawn() function to specify a shell option (covered in Chap-ter ). The example didn’t work with the 4.x LTS release, but it does work with the most recent Stable release (5.7 at the time this was written). And, it worked with the binary build of the Node based on ChakraCore. This, even though the new Stable release happened a few days prior. So Microsof is grabbing the most recent Stable release of the Node API in its Node/ChakraCore binary build.
Even of more interest, when I tried the following ES 6 reflect/proxy example: 'use strict'
// example, courtesy of Dr. Axel Rauschmayer
// http://www.2ality.com/2014/12/es6-proxies.html
let target = {};
let handler = {
get(target, propKey, receiver) {
console.log('get ' + propKey);
return 123;
}
};
let proxy = new Proxy(target, handler);
console.log(proxy.foo);
proxy.bar = 'abc';
console.log(target.bar);
It did work with the ChakraCore Node, it did not work with the V8 Node, not even the most recent Stable edition. Another advantage the ChakraCore devel-opers claim is a superior implementation of new ECMAScript enhancements.
Currently ChakraCore only works in Windows, and they’ve provided a Rasp-berry Pi binary. They also promise a Linux version, soon.
Node for Microcontrollers and Microcomputers Node has found a very comfortable home with microcontrollers, like Arduino, and microcomputers, like Raspberry Pi.
I use microcomputer when discussing Raspberry Pi, but in actuality, it’s a fully functioning, albeit small, computer. You can install an operating system on
Node for Microcontrollers and Microcomputers
it, such as Windows 10 or Linux, attach a keyboard, mouse, and monitor, and run many applications including a web browser, games, or ofice applications. The Arduino, on the other hand, is used for repetitive tasks. Rather than access the device directly to create an application, you connect it to your computer and use an associated application to build and upload a program to the device. It’s an embedded computer , as compared to a computer (like Raspberry Pi) that can stand on its own.
Arduino and Raspberry Pi are popular in their respective categories, but they’re only a subset of available devices, many of which are Arduino-compatible. There’s even a wearable device (LilyPad).
If you’re new to IoT and connected device development, I recommend start-ing with the Arduino Uno and then trying out the Raspberry Pi 2. There are kits available at online sites such as AdaFruit, SparkFun, Cana Kit, Amazon, Maker Shed, and others, as well as the board makers, themselves. The kits include all you need to start working with the boards, and are inexpensive, most under $100.00. They come with project books, and the components needed for sever-al projects.
In this section, I’m going to demonstrate how to create a “Hello, World” ap-plication for these types of devices. It consists of an application that accesses a LED light on a GPIO pen and flashes the light. I’m going to demonstrate the ap-plication on an Arduino Uno, and a Raspberry Pi 2.
First, through, you can’t get far in the connected device world without know-ing a little bit about electronics, and about that wonderful tool known as Fritz-ing.
Fritzing
Fritzing is open-source sofware that gives people the tools to prototype a de-sign, and then actually have the design physically created, through the Fritzing Fab. The sofware is available free of charge (though I recommend a donation if you end up using the tool over time). When you see graphical diagrams with Ar-duino and Raspberry Pi projects, they’re invariably made with the Fritzing app.
D O W N L O A D T H E A P P
The Fritzing application can be downloaded from the Fritzing web site . It is not a small application, which isn’t surprising considering the number of graphical components necessary for the application. You can down-load a Windows, Mac OS, or Linux version.
When the tool opens, and you create a new sketch, as the design diagram is called, a breadboard can be placed on the sketch. You can use the breadboard, or delete it. The components you use are dragged and dropped from the parts
CHAPTER 12: Node in New Environments
families in the tool to the right. In Figure 12-2, you can see the sketch I made for the Arduino blinking LED example, in the next section. It consists of an Arduino Uno dragged from the right, an LED from the same parts list, with the color of the LED changed from red to yellow. The parts description is what shows at the bottom right. You can manually edit most anything you want in this section.
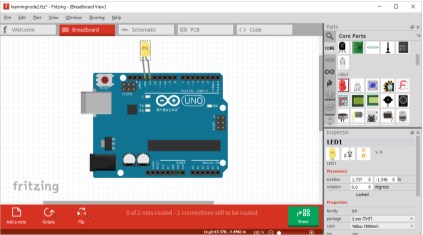
FIGURE 12-2
Fritzing sketch of
Arduino blinking
LED project
I dragged the bottom of the LEDs legs so they map to the proper pins in the Arduino. To attach a wire from the card to the board, just click where the wire should start, and drag to the component or board.
In the example, the LED has two legs, called leads , one longer than the other. In the diagram, the longer lead is shown bent. The longer lead is the positive (anode) lead, while the shorter lead is the negative (cathode) lead. The negative lead is plugged into the Arduino’s ground, while the positive lead is plugged in-to the 13 pin.
Instead of plugging the LED into the board, directly, I could use a bread-board. That’s the only option with the Raspberry Pi. The Fritzing sketch for the Raspberry Pi project is shown in Fire 12-3.
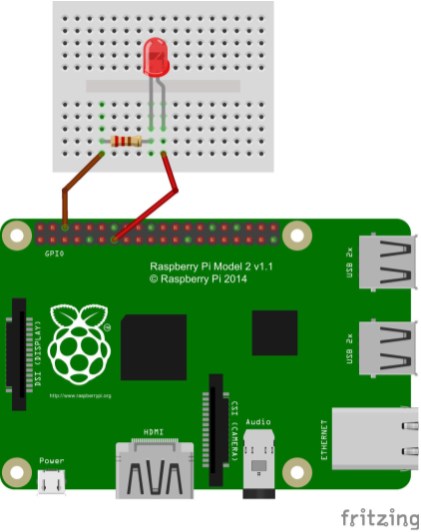
FIGURE 12-3
The Fritzing sketch
for the Raspberry Pi
LED project
A breadboard is an easy way of prototyping an electrical project. You don’t have to solder any of the components: all you have to do is plug one end of the wire to the board pin, and plug the other end into the breadboard. The LED also plugs into the breadboard. Underneath the plastic interior and the holes in the breadboard are strips of metal that are used to conduct electricity.
In the Raspberry Pi sketch, one wire is attached to a ground, then the board. But right afer that is a new component, a resistor. Resistors do what they sound like: resist electrons. If a resistor wasn’t added to the circuit (the com-
CHAPTER 12: Node in New Environments
plete sequence is a circuit), the LED would burn out. You’ll want to follow dia-grams such as the Fritzing sketch closely, because placement does matter. You can’t cross the center line for the entire circuit, or the electrical connection will be broken. In addition, you must place the diferent legs of each component in a diferent horizontal hole: don’t place the component in the board vertically. That’s equivalent to soldering the legs of the component together. The resistor is connected to the ground, but which end goes where doesn’t matter. The LED is polarized, though, therefore it’s important to place the ends in the correct lo-cation. If there’s a resistor present, the LED won’t be damaged if placed back-wards, but it won’t work. Best to just be careful in placement: the longer lead (the anode) is plugged into the GPIO pin, the shorter (the cathode) is plugged into the ground.
The resistance is measures in ohms ( Ω ), and the resistor in the sketch is 220 ohms. You can tell how many ohms a resistor is by reading the bands on the resistor. Diferent colors in diferent bands defines what type of resister is in-cluded in the circuit.
T H E E L E C T R I C A L B I T S
How do you know which resistor to use? It’s a thing called Ohm’s Law. Yes, all that stuff you learned in school can finally now be used. For more on Ohm’s Law and selecting resistors, see Calculating correct resistor value to protect Arduino pin . And do you really need resistors when controlling LEDs with Arduino ?
This is a super quick introduction to just some of the components of a cir-cuit, but it’s all you need to work with the examples in the next two sections. Node and Adruino
To program an Arduino Uno, you’ll need to install Arduino sofware on your computer. The version I used for the example was 1.6.7, on a Windows 10 ma-chine. There are versions for Mac OS X and Linux. The Arduino sites provides ex-cellent, and detailed, installation instructions . Once installed, connect the Ar-duino to the PC via a USB capable, and note the serial port to connect to the board (COM3 for me).
Next you’ll need to upload firmata to the Arduino in order to use Node. In the Arduino application, select File->Examples->Firmata->StandardFirmata. Figure 12-4 show the firmata loaded into the application. There’s a right-pointing ar-row at the top of the window. Click it to upload the firmata to the Arduino.
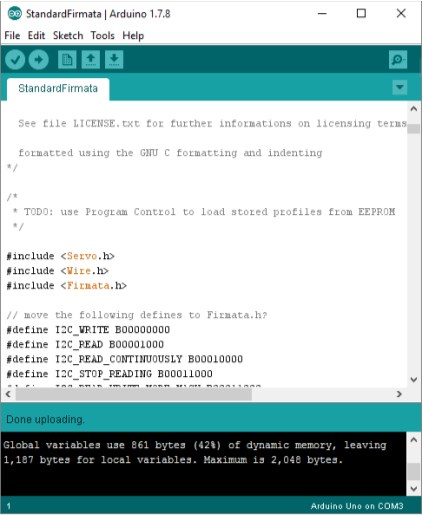
FIGURE 12-4
Firmata that must
be uploaded to the
Arduino for Node to
work
figure12-4new.png
Node and JavaScript is not the default or even the most common way to control either the Arduino or the Raspberry Pi. (Python is the popular choice.) However, there is a Node framework, Johnny-Five that provides a way of pro-gramming these devices. Install it in Node using the following:
npm install johnny-five
CHAPTER 12: Node in New Environments
The Johnny-Five web site provides not only a description of the extensive API you can use to control the board, it also provides several examples, includ-ing the “Hello, World” blink application.
First, unplug the board. Then grab an LED light that comes from your kit. Rather than use a breadboard for the example, we’ll plug the LED directly into the board pins. Turn the board so the “Arduino” label is right-side up. Along the top is a row of pins. Take the cathode (short lead) and plug it into the pin la-beled “GND” (for ground). Put the anode (long lead) into the pin next to it, la-beled 13. You don’t have to force the ends, just place it securely into the board.
Once you have the LED placed, plug the board back in. Next, create the fol-lowing Node app:
var five = require("johnny-five");
var board = new five.Board();
board.on("ready", function() {
var led = new five.Led(13);
led.blink(500);
});
The app loads the Johnny-Five module. It then creates a new board, repre-senting the Arduino. When the board is ready, the app creates a new Led, using the pin number of 13. Note, this is not the same as the GPIO number: Johnny-Five uses a physical numbering system reflecting pin locations marked on the card. Once the Led object is created, its blink() function is called, and the re-sult is shown in Figure 12-5.

FIGURE 12-5
Blinking an LED
using an Arduino
Uno and Node
Node for Microcontrollers and Microcomputers
The application opens a REPL. To terminate the application, type .exit . The LED will continue to blink until you terminate the application, and if the LED is lit when you do, it will stay lit until you power of the device.

The blinky LED is fun, but now that we have this shiny, new toy, let’s take it for a real spin. The LED object supports several interesting sounding functions like pulse() and faceIn() . However, these functions require a pwm (Pulse Width Modulation) pin. The 13 pin is not pwm. However, the 11 pin is, which you can determine by the tilde (~) character that proceeds it on the board (~11).
Turn of the board, and modify the LED so its anode lead (the longer lead) is now placed in the GPIO 11 pin slot. Plug the board back in.
The Example 12-1 application exposes several functions to the REPL Johnny-Five exposes, via the REPL.inject() function. This means you can
CHAPTER 12: Node in New Environments
control the board when you’re in the REPL environment. Some of the functions, such as pulse() , fadeIn() , and fadeOut() , require a pwm pin, in this case pin 11. The application also uses an animation for the pulse() function. To stop the animation, type in stop() at the REPL console. You’ll see the “Anima-tion stopped” message. You’ll still need to turn the LED of afer you stop it. And you need to stop animations (the strobe() and pulse() functions), before you turn of the LED or they won’t stop animating.
EXAMPLE 12-1. Interactive application using REPL to control LED
var five = require("johnny-five");
var board = new five.Board();
board.on("ready", function() {
console.log("Ready event. Repl instance auto-initialized!"); var led = new five.Led(11);
this.repl.inject({
// Allow limited on/off control access to the
// Led instance from the REPL.
on: function() {
led.on();
},
off: function() {
led.off();
},
strobe: function() {
led.strobe(1000);
},
pulse: function() {
led.pulse({
easing: "linear",
duration: 3000,
cuePoints: [0, 0.2, 0.4, 0.6, 0.8, 1],
keyFrames: [0, 10, 0, 50, 0, 255],
onstop: function() {
console.log("Animation stopped");
}
});
},
stop: function() {
led.stop();
},
fade: function() {
led.fadeIn();
},
Node for Microcontrollers and Microcomputers
fadeOut: function() {
led.fadeOut();
}
});
});
Run the application using Node:
node fancyblinking
Once you received the “Ready event...” message, you can now enter com-mands. An example is the following, which strobes the light:
strobe()
Typing stop() stops the strobe efect, and off() turns the light of, alto-gether. Try the fancier pulse() , fade() , and fadeOut() next.
Once you’ve mastered the blinking LED, check out some of the other Node/ Arduino applications you can try:
- Real-Time Temperature Logging with Arduino, Node, and Plotly • The Arduino Experimenter’s Guide to NodeJs has a whole host of
projects to try, and provides the finished code
- Controlling a MotorBoat using Arduino and Node
- As an alternative to Johnny-Five, try out the Cylon Arduino module • Arduino Node.js RC Car Driven with the HTML5 Gamepad API
You could stick with Arduino and be busy for months. However, Raspberry Pi adds a whole new dimension to IoT development, as you’ll see in the next sec-tion.
Node and Raspberry Pi 2
The Raspberry Pi 2 is a much more sophisticated card than the Arduino. You can connect a monitor, keyboard, and mouse to it, and use it as an actual com-puter. Microsof provides a Windows 10 installation for the device, but most people use Rasbpian, a Linux implementation based on Debian Jesse.
C O N N E C T T O T H E R A S P B E R R Y P I W I T H S S H
You can connect to your Raspberry Pi with SSH if you add a Wifi dongle. They’re very inexpensive and the ones I’ve used have worked, right out of the box. Once you have access to the internet on your Pi, SSH should be enabled by default. Just grab the IP address for the Pi, and use it in your SSH program. Wifi is built-in by default with the new Raspberry Pi 3.
The Raspberry Pi 2 runs of a MicroSD card. It should be at least 8GB in size, and be class 10. The Raspberry Pi site provides installation instructions , but I recommend formatting the card, coping over the NOOBs sofware, which al-lows you to pick which operating system to install, and then install Raspbian. However, you can also install a Rasbian image directly, downloaded from the site.
The newest Rasbian at the time this was written was released in February of
- It comes with Node installed, since it also features Node-RED: a Node-based application that allows you to literally drag and drop a circuit design and power a Raspberry Pi directly from the tool. However, the version of Node is older, v0.10.x. You’ll be using Johnny-Five to use Node to control the device, and it should work with this version, but you’ll probably want to upgrade Node. I recommend using the LTS version of Node (4.3.x at the time this was written), and following Node-REDs instructions for upgrading Node and Node-RED, manually .
Once Node is upgraded, go ahead an install Johnny-Five. First, though, you’ll need to also install another module, raspi-io, a plug-in that allows Johnny-Five to work with Raspberry Pi.
npm install johnny-five raspi-io
Do feel free to explore your new toy, including the desktop. Once you’re fin-ished, though, the next part is setting up the physical circuit. To start, power of the Raspberry Pi.
You’ll need to use a breadboard for the blinking light “Hello, world” applica-tion. In addition, you’ll need a resistor, preferably 220 ohms, which is the size of resistor frequently included in most Raspberry Pi kits. It should be a four-band resistor: red, red, brown, and gold.
R E A D I N G T H E R E S I S T O R B A N D S
Digi-Key Electronics provides a really handy calculator and color graph-ic for determining the ohms for your resistors. If you have trouble distin-guishing color, you’ll need help from a friend or family member. Or you can purchase the resistors and keep them separate and labeled in a case like a fishing tackle or electronic component box.
Node for Microcontrollers and Microcomputers
The Fritzing sketch is shown in Figure 12-3. Add the resistor and LED light to the breadboard, with the cathode lead (short lead) of the LED parallel with the last leg of the resistor. Carefully take two of the wires that came with your Rasp-berry Pi 2 kit and connect one to the GRND pin (third pin from the lef, top row), and one to pin 13 (seventh pin from the lef, second row) on the Raspberry Pi board. Attach the other ends to the breadboard: the GRND wire goes parallel to the first lead of the resistor, and the GPIO pin wire is inserted parallel to the anode lead (longer lead) of the LED.
Power up the Raspberry Pi again. Type in the Node application. It’s almost the same as the one for Arduino, but you’ll be using the raspi-io plug-in. In addi-tion, how you specify the pin number changes. In the Arduino, you used a num-ber for the pin. In Raspberry Pi, you’ll use a string. The diferences are highligh-ted in the code:
var five = require("johnny-five");
var Raspi = require("raspi-io");
var board = new five.Board({
io: new Raspi()
});
board.on("ready", function() {
var led = new five.Led( "P1-13" );
led.blink();
});
Run the program and the LED should be blinking, just as it did with the Ardu-ino, and as shown in Figure 12-6.

FIGURE 12-6
Blinking an LED
using Raspberry Pi
and Node
CHAPTER 12: Node in New Environments
You can also run the interactive application with the Raspberry Pi 2. In this board, a pmw pin is GPIO 18, which is pin 12 for the Johnny-Five application. This is the pin sixth from the lef, top row. Make sure you power down the Rasp-berry Pi before you move the wire from pin 13 to pin 12. I won’t repeat all the code, but the changed code for the application is included in the following code block:
var five = require("johnny-five");
var Raspi = require("raspi-io");
var board = new five.Board({
io: new Raspi()
});
board.on("ready", function() {
var led = new five.Led("P1-12");
// add in animations and commands
this.repl.inject({
...
});
});
Since the LED is larger, you can really see the animation better when you type in the pulse() function.
The pins are fragile on the Raspberry Pi, which is why most folks use a break-out . A breakout is a wide cable that plugs into the Raspberry Pi pins, and then attaches to the breadboard. The components then connect to the end of the breakout, rather than directly to the Raspberry Pi.
Other fun Raspberry Pi and Node projects:
- Easy Node.js and WebSockets LED Controller for Raspberry Pi • Home Monitoring with Raspberry Pi and Node
- Heimcontrol.js - Home Automation with Raspberry Pi and Node • Build your own Smart TV Using RaspberryPi, NodeJS and Socket.io • Building a garage door opener with Node and MQTT - Using an Intel Ed-
ison
There’s something immensely gratifying about seeing an actual physical re-action to our Node applications.